Knowing how to set up a sound card is what separates an upgrade you can hear from an expensive way to reproduce your old sound. Installation makes the card exist; setup — defaults, formats, channel layout, headphone gain, microphone tuning, and per-app routing — makes it yours. This guide assumes the card is physically installed and its drivers are in place; if it is not, How to Install a Sound Card comes first.
Work through the sections in order the first time, then save what you build as profiles. A well-set-up card disappears: games place sound where it belongs, voices arrive clean, music sounds like your headphones’ best self, and you stop thinking about audio settings entirely — which is the entire point of owning one.
Disclosure: As an Amazon Associate, ilcastellomenu.com earns from qualifying purchases. Product details and availability can change; check the retailer listing before you buy.
Step 1: set defaults everywhere they hide
Operating systems and apps each keep their own idea of your sound device, and setup begins by aligning them. Set the card as the default output and recording device in the system sound settings, then check the apps that override it: your games, voice chat, browser, and music player. A card can be perfectly configured and still bypassed by a single app clinging to the old onboard output — the commonest ‘my upgrade does nothing’ story in PC audio.
Decide the fate of onboard audio consciously. Keeping it enabled gives you a fallback and a second output (some users route chat to one device and game audio to another); disabling it in device settings or BIOS declutters every menu. Either is fine; drifting between them accidentally is what causes confusion. Note your choice somewhere if you maintain the machine for others.
Rename the card’s outputs in the control software if it allows it — ‘Headphones’ and ‘Speakers’ beat a list of identical device names when you are switching under pressure before a call or a match.
In this guide
Step 2: choose output format and channel configuration
Set the default format to a high-quality standard your content actually uses — for most users a 24-bit format at a common sample rate covers games, music, and video without resampling surprises. Chasing the highest number the card offers adds nothing audible and can introduce compatibility quirks in older games and apps; the reasoning mirrors the specification guidance in How to Choose a Sound Card.
Tell the card your true speaker layout. If you run stereo headphones, configure stereo or the card’s headphone mode — not 5.1 — unless you are deliberately engaging its virtual surround, in which case follow that feature’s own instructions, since virtualisation needs the multi-channel feed to work from. If you run real surround speakers, configure the exact layout and run the built-in test tones to confirm each channel lands on the right physical speaker; swapped surrounds are astonishingly common and quietly ruin positioning in games and films.
Set distances and levels if your software offers them, using a tape measure for distance and the test tones for balance. Ten minutes of this unglamorous calibration is worth more to a surround system than any processing preset stacked on top of a misconfigured layout.
Step 3: tune the headphone output and gain
If your card has switchable gain or a headphone amplifier mode, set it for your headphones: low gain for sensitive earbuds and most gaming headsets, higher gain for demanding high-impedance models. The symptom of wrong gain is audible both ways — too little leaves music thin and quiet at maximum volume; too much raises background hiss and makes the volume control touchy in its first degrees of travel.
Disable processing you do not need for music listening: surround virtualisation, bass boosts, and room effects are tools for specific content, not a permanent coat of paint. Build a clean stereo profile as your reference, then add game and movie profiles on top of it. Comparing any new setting against that clean reference — the method in How to Test a Sound Card — keeps your setup honest instead of gradually drifting into over-processed mush.
Check channel balance and mono compatibility while you are here: a track you know well, listened to critically for a minute, reveals swapped channels and imbalance faster than any meter. Headphone users who share the PC should save per-person profiles if volumes and EQ tastes differ; the card remembers what the household will not.
Step 4: set up the microphone properly
Select the card’s microphone input in the system and in each voice app, then set the input level so your loudest normal speech peaks healthily without clipping — the meters in your voice app or the card’s software show this directly. Too quiet is fixable by listeners; clipped and distorted is not, so leave headroom and let the level sit moderate rather than heroic.
Position before processing: microphone near your mouth, off-axis to breath, away from the keyboard’s click path. Then engage the card’s tools in order of value — gain staging first, noise suppression second, EQ last and lightly (a small presence lift and a cut to boominess covers most voices). Test in the app your friends or colleagues actually use, and ask them; their ears are the destination.
Streamers and regular callers should explore game/chat balance features if the card offers them — a hardware or software mix between game audio and voice is a daily quality-of-life feature, the kind highlighted in Best USB Sound Cards for Gaming — and bind it somewhere reachable, because its value is precisely in mid-game adjustment.
Step 5: EQ and processing — a light, honest touch
Equalisation is for correcting your headphones’ known tendencies and your room’s known problems, not for rebuilding sound from scratch. Small adjustments — a couple of decibels — at broad frequencies beat dramatic sculpted curves for most listeners. Change one thing, live with it for days across varied content, and keep a bypass comparison handy; ears adapt to almost anything, and only the bypass tells the truth.
For speakers, placement beats EQ every time: tweeters near ear height, reasonable distance from walls, symmetry around your seat. Run the card’s room or speaker tools after placement, not instead of it. For headphones, published EQ profiles for popular models can be a starting point, but treat them as drafts in your handwriting, not prescriptions.
Resist stacking every feature at once — surround plus EQ plus bass boost plus ‘clarity’ enhancers interact in ways nobody can predict or describe. One processing idea per profile, named for its purpose (‘Games — surround’, ‘Music — clean’), keeps the setup comprehensible when you return to it in six months.
Step 6: verify, save, and maintain
Run the verification routine: channel test tones, a familiar music track, a game with good positional audio, and a voice recording of yourself played back critically. The structured version lives in @@how-to-test-a-sound-card@@; the principle is that setup ends with evidence, not vibes. If something is wrong, you will find it now, while the settings are fresh in your mind.
Export or screenshot your finished settings and profiles. Driver reinstalls, Windows upgrades, and new PCs all reset audio configuration, and a saved reference turns a future rebuild from archaeology into ten minutes of re-entry. Note your gain setting and default format in the same place — the two numbers future-you will most want.
Maintain lightly: update drivers from the manufacturer when you have a reason (new features, fixes, a new OS), and re-run the channel test after moving speakers or changing headphones. Audio setups drift through life events, not malfunctions, and a five-minute seasonal check keeps yours true.
Common setup mistakes
The greatest hits: leaving an app on the onboard device; configuring 5.1 output for stereo headphones without engaging the intended virtualisation; maximum gain on sensitive earbuds; EQ curves copied from someone else’s ears and headphones; and never testing the microphone until the important call. Every one is a five-minute fix at setup time and a month of vague dissatisfaction if skipped.
If your card ever vanishes from the device list entirely, that is no longer setup — it is detection, and How to Fix Sound Card Not Detected takes it from there in safe order. Setup assumes a detected, driver-complete card; keep the two problems separate and both stay simple.
How to set up a sound card for two lives: work calls and play
Most sound cards serve a double life — voice calls and meetings by day, games and music by night — and good setup names that split explicitly. Build a work profile around the microphone: conservative gain, gentle noise suppression, no entertainment processing on your voice, and an output setting that keeps colleagues’ voices clear rather than cinematic. Build the play profile around immersion: your surround or clean-music preferences, game/chat balance in reach, and the microphone still respectable for team chat.
The switching between profiles should be one action — a software preset, a device button — because a setup that needs five minutes of panel-diving will, in practice, be left on whichever profile yesterday ended with. If your card’s software makes profile switching clumsy, approximate it: keep the shared settings constant and identify the single control (usually mic processing or surround) that actually needs to change between lives.
Test both profiles in their real arenas before trusting them: a real call with a colleague who will tell you the truth, and a real game session with your usual squad. Lab-perfect settings that have never survived contact with an actual Tuesday are hypotheses, and your callers and teammates are the peer reviewers.
Advanced routing: different audio to different places
Once defaults are solid, a sound card’s routing can split your audio life usefully: game sound to headphones while a film plays to speakers for someone else, voice chat on a separate device from game audio for recording, or a stream mix that sends your audience a different balance from the one in your ears. Operating-system and app settings cooperate with the card here — each app’s output choice is a routing decision — so map your three main apps deliberately rather than inheriting their guesses.
Streamers formalise this into buses: game, voice, music, and alerts, each levelled independently, with the card’s hardware mix as the final safety. You do not need a broadcast rig to borrow the principle — even a simple ‘chat on the headset, everything else on speakers’ split during a shared-room evening is routing, and it is free once you know the menus allow it.
Document your routing in the same settings export as your profiles. Routing is the least memorable part of any setup and the first thing a driver reinstall erases; a written map turns a rebuild from an evening of rediscovery into a checklist.
Keeping the setup true across updates
Operating-system updates, driver updates, and new peripherals all audition changes to your audio configuration without asking. After any of them, spend ninety seconds on the commissioning trio: confirm the default device, run the channel test, and record ten seconds of voice. That tiny ritual catches update-induced drift while the cause is still obvious and the fix is still a setting rather than an investigation.
When a new version of the card’s software offers features, add them one at a time to a profile you can roll back. Audio setups fail by accumulation — five small changes, one culprit, no record — and the discipline that prevented it is the same one this whole guide teaches: change, test, note, keep.
A setup maintained this way becomes effectively permanent: it survives hardware around it changing, because its owner carries the map. That is the real end-state of setting up a sound card — not a afternoon’s configuration, but a documented system you can rebuild on any machine in minutes.
Setting up for the whole household
Shared PCs need setups that survive other people. Prefer defaults that are safe at any headphone: moderate gain, no extreme EQ, volume limits where the software offers them for younger listeners. Put the two profiles anyone might need — speakers and headphones — somewhere switchable in one action, and write the household’s three audio facts (which jack, which knob, which profile) on a note by the machine. Shared technology runs on documentation, not memory.
Resist per-person complexity unless the software makes it effortless. A setup only its author can operate is a single point of failure with a volume knob; the household standard should be that anyone can get sound, correctly, in under ten seconds, and that the enthusiast’s refinements live in a named profile the basics never touch.
Setup as you upgrade: headphones, speakers, rooms
Every change around the card reopens setup: new headphones want gain and possibly EQ revisited; new speakers want placement, then channel levels, then distances; a new room wants the speaker pass done from the beginning. Treat these not as chores but as the setup’s natural lifecycle — the configuration is a snapshot of a system, and the system keeps moving.
Keep the old settings exported before each change so every experiment has a retreat path. The confidence to try a new EQ curve or layout comes precisely from knowing the previous state is one import away, and setups improve by experiments their owners were not afraid to run.
Volume staging across the whole chain: the setup beneath the setup
Most setup advice treats volume as a knob; treat it instead as a chain of gains, each of which can add noise or distortion if it is set thoughtlessly. The chain runs: the application’s volume, the operating system’s volume for the device, the card’s own output level or headphone gain, and any amplifier or powered speaker volume downstream. The principle that governs the chain is simple — keep each stage in the healthy middle of its range, and make your everyday adjustments at one designated stage, ideally the card’s own control or the last stage before your ears. A chain with the application whispering and the final amplifier straining is a chain amplifying its own noise floor; a chain with everything at maximum except a strangled final stage is a chain flirting with distortion at every loud passage.
Set it once, deliberately. Play a loud, known recording. Set the downstream speaker or amplifier volume to a sane fixed position if it has one. Bring the system and card levels up until the loud passage is as loud as you will ever want, then note those positions as your chain’s reference. From then on, daily listening lives below that ceiling, adjusted at your one designated control. This five-minute exercise is the difference between a setup and a pile of settings, and it explains a large share of ‘my new card sounds worse than my old one’ reports, which are usually staging accidents wearing a product’s name.
Headphones simplify the chain — application, system, card gain — and add one decision: the gain range, if the card offers it, should be the lowest range that reaches your listening level with room to spare. High gain on an easy headphone buys nothing but noise and a twitchy volume control. Low gain on a demanding headphone buys strain. The setup guide’s headphone section covers matching; the staging principle here is what makes the matching audible.
Sample rates and bit depth, settled without superstition
Format settings attract more anxiety than any other part of setup, so here is the calm version. The sample rate and bit depth you choose for the card’s shared output should match the dominant content you play — for most libraries and streams, the standard rates of recorded music and video — because conversions between rates, done well, are harmless, and done by careless software, are a needless variable. Set the shared format to a sane, standard choice, leave exclusive-mode applications to request their own formats if you use them, and then stop visiting this setting. It is the setup equivalent of a thermostat: its job is to be set once, correctly, and forgotten.
What actually matters in this neighbourhood is consistency. A chain where the card, the system, and the application disagree about format can produce resampling, dropouts, or the subtle speed and pitch errors of a clock mismatch — faults that present as ‘something sounds off’ rather than as errors. If you ever hear that off-ness, this is the first neighbourhood to inspect: one format, stated everywhere, matching the content. Bit depth’s practical role is headroom for volume control and processing done in software; a generous setting costs nothing and forgives much. Choose it once, generously, and move on to settings your ears can actually grade.
Resist the enthusiast spiral here with a clear conscience: beyond competent settings, this corner of setup has been measured exhaustively by people with better instruments than ears, and its audible returns are the smallest in this entire guide. Spend your remaining setup attention on gain staging, microphone placement, and speaker or headphone position — the physical variables — where the returns are large, obvious, and yours.
Microphone setup in depth: placement beats processing
The setup guide’s microphone step covers levels and defaults; this section covers the truth underneath them, which is that microphone quality is decided by position before it is touched by settings. A microphone hears its room and its distance with complete honesty. Halving the distance to your mouth does more for clarity than any processing in the card’s suite, because it raises your voice against everything else the microphone hears — the room’s reflections, the keyboard, the computer’s fans. Set the position first: close, slightly off-axis so breath does not strike it directly, and stable, because a microphone that drifts between sessions makes every later comparison meaningless.
Then set the gain against that position, using the loudest thing you will actually say — a laugh, a call-out in a game, the emphatic sentence in a presentation — not a polite test phrase. Peaks should approach the top of the healthy range without touching it. Gain set on polite speech guarantees distortion on real speech, and your listeners will hear it as harshness they cannot name. Record a local test, in the application your listeners actually hear you through, and judge that recording rather than the reassuring sound of your own voice in monitoring, which flatters every setup.
Processing comes last and lightest: a noise gate set just below your speech level, suppression used at the strength your room actually requires, and nothing else until a named problem asks for it. Each processor is a trade, not a gift — suppression trades artifacts for quiet, gates trade clipped word-beginnings for silence — and the trades are only worth making from a position and gain that were right to begin with. A well-placed, well-gained microphone with no processing beats a processed one compensating for a bad position, on every call, every stream, every time. Readers setting up specifically to be heard well may also find the gaming-focused discussion in whether gamers need a sound card useful, since the microphone case is half of its argument.
Per-application routing and the discipline of defaults
Modern systems let every application choose its own device, which is power that decays into confusion without a policy. Adopt one: the system default is your main card, always, and applications inherit it unless you have a named reason to override them. Named reasons are few and specific — a communications app pinned to a headset device, a recording program pinned to an interface, a media player in exclusive mode. Every override you grant should be written in your setup notes with its reason, because the day an application plays into the wrong device, the notes are the difference between a ten-second fix and a tour of every settings panel you own.
The most common routing fault deserves its own warning: the application that was open during a device change keeps the old device, or the system quietly reassigns defaults when a device disconnects and reconnects — a headset unplugged, a card waking from sleep — and the user experiences it as the card ‘losing’ its settings. Nothing was lost; the defaults moved. The recovery is a habit, not a repair: when sound goes somewhere unexpected, check the default device first, the application’s own selection second, and only then suspect the card. That order, memorised, will save you more time than any other sentence in this guide.
Households and shared machines multiply the value of the policy. A machine where every user improvises routing is a machine where sound is always going somewhere surprising for someone. One default, documented overrides, and a note by the machine: that is the whole constitution, and it works for families exactly as it works for studios.
EQ with intent: a method for the only creative setting
Equalisation is the one setup control that is genuinely creative, which is why it is the one most often abused into making things worse. Work it by a method. First, earn the right: live with the flat, correct setup — staging right, position right — for a week, so that what you are equalising is the transducer and the room rather than your own unsettled first impressions. Second, change by subtraction before addition: taming a peak you dislike usually beats boosting its neighbours, keeps headroom intact, and sounds more natural. Third, make small moves — the unit of honest EQ adjustment is small enough that you wonder if it did anything, followed by a day of listening that confirms it did.
Compare honestly or not at all. Level-match your EQ against the flat setting before judging, because louder always sounds better to an unaided ear and an EQ that mostly adds level is a volume control with extra steps. Save presets under names that state their purpose and the transducer they belong to — an EQ built for one headphone is a liability applied to another — and keep one preset that is simply flat, labelled as your reference, so you can always find your way home.
Know the boundary of EQ’s competence. It adjusts balance; it cannot repair a noisy source, a mis-placed microphone, a room that rings, or headphones you fundamentally dislike. When a problem survives honest EQ, the problem is elsewhere in this guide — in staging, position, or the transducer itself — and more EQ is decoration on a fault. The discipline is the same as everywhere in setup: name the problem, apply the smallest tool that addresses it, and verify with your ears on material you know.
Setup for speakers: the room joins the chain
Headphone setup ends at the ears; speaker setup continues into the room, and the room is an uncooperative component that must be negotiated with. Begin with geometry, which costs nothing: speakers at ear height when seated, angled toward the listening position, at distances from walls that the maker’s guidance suggests, and the listening position itself not hard against a rear wall if the room allows any choice. Symmetry is the principle underneath all of it — the two speakers should see mirror-image surroundings, because asymmetry is what smears stereo imaging into a vague suggestion.
Then let the card’s setup serve the geometry: channel configuration set to what you physically own — stereo means stereo, and telling the card about speakers that do not exist sends real audio into imaginary places — balance checked with a mono recording centred exactly, and any room-correction or enhancement features introduced one at a time, judged on recordings you know, and kept only if they survive a week. Subwoofer integration, where it exists, is its own afternoon of crossover and level patience, and it rewards the same method: small moves, known material, written notes.
The room’s soft furnishings are the final component, as they were in the loud-keyboard problem’s mirror image: a bare room flatters no speaker, and curtains, rugs, and upholstered furniture are acoustic treatment that happens to be furniture. You will not rebuild the room for the card, nor should you — but when a setup refuses to sound right despite correct settings everywhere, the room is the remaining suspect, and small furnishings changes have rescued more speaker setups than any setting in any control panel. The speaker-focused shortlists, such as cards chosen for music listening, assume this negotiation has happened; their differences only become audible once it has.
Maintaining the setup: updates, drift, and the quarterly check
A setup is a state, and states drift. Drivers update and reset a setting silently. Operating systems add features that insert themselves into the chain. Applications update their own audio behaviour. Your own preferences migrate as your ears learn. The countermeasure is a quarterly check with a fixed script: the reference recording playlist, the channel and balance check, the microphone test recording, and a walk through your setup notes confirming that every setting in the chain still matches the paper. Fifteen minutes, four times a year, and the setup you built is the setup you still have — rather than a slow improvisation you never chose.
Keep the notes themselves versioned like the installation record: when you change a setting deliberately, date the change and its reason. The notes are what separate drift from decision. When something sounds wrong, they answer the first diagnostic question — what changed? — with evidence instead of archaeology. And when you eventually replace the card, the notes are the new card’s setup, pre-written: every hard-won preference, ready to transfer in one sitting. Setup, done this way, is an asset that outlives the hardware it describes, which is the surest sign it was done properly.
Setup differences that matter by use: calls, music, games, creation
One setup cannot be optimal for four different lives, and the honest solution is named profiles rather than a compromise that serves each life at three-quarter strength. The calls profile is a microphone profile: gain and gate set for speech, monitoring off or low, enhancements chosen for intelligibility. The music profile is a listening profile: flat or your considered EQ, format matched to the library, every creative processor off. The games profile adds the spatial processing you have tested and liked, and communication routing for the headset. The creation profile is the strict one: monitoring direct, formats matched to the project, nothing in the chain that the recording has not accounted for.
Profiles are only worth their switching cost if switching is genuinely easy — a preset in the card’s panel, a documented sequence — and if each profile is labelled by its life rather than by its settings. Test each profile in its own life before trusting it: the calls profile on a call, the creation profile on a real recording. And keep the count honest; two profiles used weekly beat five profiles maintained quarterly and used never. The setup you have is the one you actually run, and this guide’s last word on the subject is the same as its first: defaults chosen deliberately, documented plainly, and then left alone to do their work.
Accessibility and hearing differences: setup as a personal instrument
Setup guides quietly assume standard hearing, and a good setup should not. If your hearing differs between ears, the balance control is not a diagnostic toy but a daily instrument: set it with a mono recording and your most-used transducer, and record the setting in your notes so it can be restored after any driver event. If high frequencies are where your hearing thins, a gentle, deliberate EQ shelf — set by the method in this guide, small moves judged over days — can restore the intelligibility of speech and the detail of music more honestly than raw volume, which raises the frequencies you hear well along with the ones you do not.
Mono has its own honourable uses: a single-earbud listener, a shared speaker across a room, a hearing situation where stereo’s separation is a loss rather than a pleasure should use the system’s or the card’s mono mixdown deliberately rather than losing half the recording by accident. And system-level hearing features — loudness equalisation for late-night listening at low levels, channel mixing options — belong in the setup conversation openly, configured once, documented like everything else. The principle is the guide’s own, extended: a setup is correct when it is correct for the ears that own it, and those ears are the final specification every other setting serves.
Two machines, one card: keeping settings sane across computers
An external card that migrates between machines — a work laptop and a home desktop is the common pattern — carries a setup problem internal cards never meet: each host has its own defaults, formats, and application routing, and the card’s own stored settings meet a different system every time it moves. The sane approach is to standardise what you can: the same format choices on both machines, the same profile names in the card’s panel, and a setup note for each host recording what differs and why. Then test the migration itself once, deliberately — move the card, run the quarterly check’s short form, confirm the defaults land where the notes say — because the day the card travels for real is the day a presentation is attached to it.
Where the card stores profiles internally, the migration can be nearly invisible, and it is worth learning whether yours does before assuming the work must be duplicated. Where it does not, accept the duplication as the price of the external design’s freedom, and keep the notes good enough that the second machine’s setup takes minutes. The card that travels well is a genuine professional tool; the card that travels badly is a home device with a portable shape, and the difference is entirely in this preparation.
Setup for streaming and recording sessions: a pre-flight ritual
Session work rewards a ritual, because sessions fail at their beginnings and the failures are always the same few. Build a pre-flight from this guide’s materials and run it every time, in order, before the audience or the take depends on it. Defaults confirmed — the card, not a webcam microphone that a helpful application selected. Microphone gain confirmed against the loud sentence, not the polite one. Monitoring in its intended state. The recording or streaming application’s own device selections checked against the system defaults, because applications keep their own counsel. A ten-second local recording, played back, judged. Then, and only then, the session.
The ritual takes three minutes and converts the most common session disasters into pre-flight findings, where they cost nothing. Write it on a card — physical or digital — and keep it with the setup notes; rituals held in memory decay exactly when fatigue or excitement arrives, which is when sessions tend to start. Professionals in every audio field run lists like this without embarrassment. The amateur’s version of professionalism is not talent; it is the list, run every time.
When setup fights back: recognising the three stubborn patterns
- Settings that reset themselves usually trace to a driver or suite reasserting its defaults at startup, a second control application fighting the first, or an operating system feature managing the device on your behalf. The cure is to find the other manager and give the chain a single master, then document the arrangement.
- Settings that apply to the wrong device trace to defaults that moved when something connected or woke. The cure is the routing policy from this guide: one default, named overrides, and the habit of checking the default first whenever sound surprises you.
- Settings that sound right in the panel and wrong in life trace to a second processor downstream — an application’s own enhancement, a television’s or speaker’s processing, a communication platform’s suppression — doubling or fighting yours. The cure is to audit the whole chain for processors and leave exactly one in charge of each job.
All three patterns share a moral: most setup misery is not a broken setting but two correct settings in conflict, and the diagnostic skill is finding the second author. Your setup notes, listing every processor and default deliberately chosen, are how the second author gets found in minutes instead of evenings.
The setup, handed over: documenting for the next owner of the desk
End setup the way installation ended: by making it transferable. Your notes should let another competent person — a family member, a colleague, your own future self after a year away — reconstruct the entire configuration without interviewing you. That means the defaults and their reasons, the staging reference levels, the microphone position described in words a stranger could reproduce, the profiles and their purposes, and the location of the driver installer and this guide’s checklists. A setup documented to that standard has crossed the line from a state your machine happens to be in to a piece of work you own.
It also changes how the setup ages. Undocumented setups decay into folklore — settings nobody dares touch because nobody remembers why they are set — and folklore is how good chains quietly become bad ones, one cautious non-decision at a time. Documented setups get maintained, improved, and occasionally challenged on evidence. The difference costs fifteen minutes at the end of the setup process, which this guide judges the best-spent quarter hour in the entire subject.
Gear mentioned in this guide
The products below are examples referenced in this guide. They were verified through the Amazon Creators API product pool for this site; use them as concrete reference points for the features discussed, not as a ranked list.
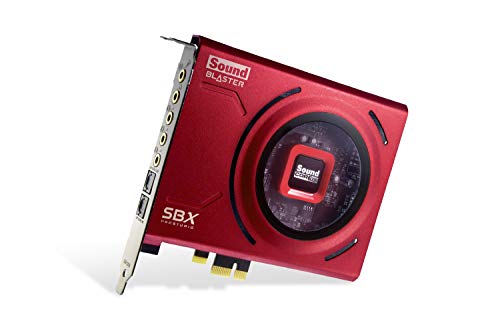
- Creative Sound Blaster Z SE Internal PCI-e Gaming Sound Card and DAC, 24-bit / 192 kHz, 116 dB SNR, ASIO, 600Ω Headphones Amp, Mic EQ, Discrete 5.1 / Virtual 7.1, Supports Dolby Digital Live, DTS … — Check on Amazon
- Sound BlasterX G6 Hi-Res 130dB 32bit/384kHz Gaming DAC, External USB Sound Card with Xamp Headphone Amp, Dolby Digital, 7.1 Virtual Surround Sound, Sidetone/Speaker Control for PS4, Xbox One — Check on Amazon
- Creative Labs 70SB185000000 Sound Blaster GC7 Game Streaming DAC Amp Programmable Buttons – Battle Mode – Scout Mode – Game Voice Mix for PC – PS4 & PS5 – Nintendo Switch — Check on Amazon


Frequently asked questions
What default format should I choose?
A 24-bit format at a widely supported sample rate is the sensible default for mixed use. Higher settings add compatibility risk without audible benefit for listening; production work may dictate specific rates per project, which you can set per session.
Why does my surround sound wrong in games?
Usually the layout: the card is configured for a speaker arrangement you do not have, or channels are mapped to the wrong physical speakers. Run the test tones, correct the layout to match reality, and confirm the game itself is set to the same layout.
How do I stop microphone hiss?
Lower the input gain and move the microphone closer — gain amplifies the room along with your voice. Then add the card’s noise suppression lightly. Hiss that survives correct gain and position may be an electrical-noise issue to chase with different ports or routing.
Should I use virtual surround for music?
Generally no — music is mixed for stereo, and virtualisation smears its imaging. Keep a clean stereo profile for music and reserve virtual surround for games and films, where the multi-channel source gives it something real to work with.
Do I need to set up each app separately?
Only the ones that override the system default — games, voice chat, and some media apps keep their own device choices. Set the system default first, then audit your main apps once; new apps will follow the system default.
How often should I redo my setup?
After driver or OS changes, new headphones or speakers, or moving your desk. Otherwise, a quick channel and microphone check a few times a year keeps everything true without turning maintenance into a hobby.
Related Guides
Keep exploring with these guides and roundups from the same desk and audio cluster: