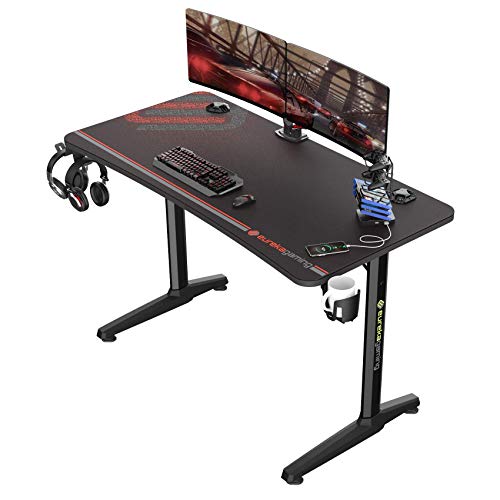
Learning how to assemble a gaming desk carefully is what separates a rigid, silent workstation from one that wobbles from day one. The build is not hard — legs, frame, desktop, then accessories — but desks punish two habits: tightening bolts fully before everything is aligned, and flipping the desk upright before the frame is square. This guide gives the correct order, the levelling checks, and the finishing touches that make a desk feel professionally built.
Disclosure: As an Amazon Associate, ilcastellomenu.com earns from qualifying purchases. Product links on this page may earn us a commission at no extra cost to you. Prices and availability change on Amazon, so check the product page for the current details before you buy.
Before You Start: Parts, Space and the Two-Person Rule
Assemble the desk in the room where it will live, close to its final position — a finished 55-inch desk is an awkward thing to carry through doorways. Clear floor space a little larger than the desktop and protect the floor with the packaging cardboard or a rug, since most of the build happens with the desktop face-down. Unpack and inventory: desktop (sometimes in two pieces on wide models), legs or side frames, crossbar, feet, bolts in two or three sizes, Allen key, and the accessory box — cup holder, headphone hook, cable tray, grommets and any monitor shelf.
Two people make the flip from upside-down to upright safe and easy; solo builders should plan the flip by sliding the desk to a bed or sofa edge, or by using the wall for support. Never drag a half-tightened desk across the floor to reposition it — lift it, or finish tightening first. Desks, like chairs, reward patience at exactly the steps where rushing feels harmless; the same philosophy governs How to Assemble a Gaming Chair.
In this guide
Step-by-Step: How to Assemble a Gaming Desk in the Right Order
- Lay the desktop face-down on your protected floor, with the pre-drilled holes accessible.
- Attach any under-desk frame rails or the cable tray first, while access is effortless — finger-tight only.
- Fit the legs or side frames to the desktop, starting every bolt by hand before any are tightened.
- Fit the crossbar between the legs if the design has one; this is the part that makes the frame a single rigid structure.
- Square the frame: measure the diagonals between opposite legs — equal diagonals mean a square frame — then tighten all bolts progressively in rotation.
- Screw in the adjustable feet, set roughly level, then flip the desk upright with a partner, lifting by the frame, not the desktop edges.
- Fit accessories last: cable grommets, cup holder, headphone hook, monitor shelf and any power strip mounting.
The finger-tight-until-square rule is the whole craft of flat-pack furniture. A frame tightened leg by leg locks in whatever twist it started with; a frame aligned first and tightened in rotation pulls itself true. If your desk has a two-piece desktop, join the halves loosely, align their front edges on a straight surface, then clamp them by tightening the joining plates evenly.
Levelling and the Wobble Test
With the desk upright in its final position, set it down and press each corner in turn. A rocking corner means the floor or the feet need adjustment: screw the adjustable foot on the rocking corner down (or the opposite corner up) in small turns until all four feet share the load. On hard floors, also confirm the feet’s pads are all present — a missing pad is a wobble and a scratch in waiting.
Then do the working test: sit at the desk, hands on the surface, and push and pull as you would in an animated gaming moment. A well-built desk moves as one piece with no creaks or independent leg flex. Any wobble now is a build issue — revisit bolt tightness and foot adjustment before loading equipment onto it, because diagnosing later means unloading everything, exactly the sequence How to Fix a Wobbly Gaming Desk exists to spare you.
Fitting Accessories and Routing the First Cables
Accessories go where your habits say, not where the product photo shows them. Right-handed mouse users usually want the cup holder on the left, out of the mouse’s travel zone but within reach; the headphone hook belongs on the side you naturally turn toward when standing up. Monitor shelves centre on your seated position, which is not always the desk’s geometric centre if the desk also holds a tower.
Before the PC goes on, mount the power strip under the desk or in the cable tray and route the desk’s own cables (monitor shelf lights, USB hubs) while access is still easy. This is the moment How to Organize Cables on a Gaming Desk becomes effortless rather than a retrofit. Leave service loops — a little slack at each device — so you can pull a monitor forward or swap a keyboard without re-routing the whole desk.
Common Assembly Mistakes to Avoid
- Tightening each leg fully as you go, locking a twisted frame that no foot adjustment can cure.
- Using a power drill on cam locks and desktop screws; hand tools only — drilled threads in particleboard strip instantly and cannot be re-tightened.
- Forgetting the crossbar because the desk ‘feels fine without it’ during the build; the crossbar is what stops side-to-side racking under load.
- Flipping the desk by its desktop edges, which can tear out the very screws you just fitted.
- Discarding the spare bolts and feet; they are your year-three repair kit.
Keep the instructions and spares in the cable tray or a labelled bag taped under the desk. Future you — adding a monitor arm or moving house — will be grateful.
The Finishing Pass: From Built to Set Up
A built desk is not a finished setup. Position monitors so the top third of the screen sits at eye level (the shelf or a monitor arm does this), centre the keyboard on your body rather than the desk, and bring the chair in to check armrest clearance and knee room. The complete arrangement routine is in How to Set Up a Gaming Desk, and the posture targets are in Gaming Desk Ergonomics Explained.
Finally, re-check every bolt after the first week. Desks settle just as chairs do: materials compress, joints seat, and a quarter-turn appears where none was needed on day one. That ten-minute pass, plus level feet, is the difference between a desk that feels solid for a decade and one that develops the wobble owners blame on the product instead of the build.
Assembling Standing and L-Shaped Desks: The Variations
Electric standing desks add two steps and one warning. The lifting columns and motor must be fitted and the control box mounted while the frame is upside down, and the handset cable routed so it cannot be pinched when the desk first rises. The warning: after assembly, run the desk through its full height range empty, twice, before loading equipment — a column that binds or a cable that snags should be discovered with nothing breakable aboard. Never open the motor housings or columns if something is wrong; they are sealed units and a warranty matter.
L-shaped desks hinge on the corner joint. Join the two tops loosely, align their front edges against a straight edge, and tighten the joining plates progressively while checking with your palm for a step between the surfaces — your hand detects a lip your eye misses. The frame’s diagonal check matters doubly here because a twisted corner frame telegraphs into both wings.
Desks with glass or stone-effect tops invert one habit: never rest them face-down on anything but a fully padded surface, and never use the top as a lever during the flip. Two people stop being a recommendation and become the method.
The One-Week and One-Move Rules
Like chairs, desks settle. Put a bolt check in your calendar for one week after assembly: materials compress, cam locks seat, and the quarter-turns you find then are the wobble you prevent next year. Do the same check after any house move, however carefully the desk was carried — transport is a full-body shake administered to every joint at once.
When moving a desk, disassemble more than feels necessary. Legs and crossbars travel safely; assembled frames rack in vans and doorways, loosening joints invisibly. Photograph the cable routing before teardown and the rebuild becomes a copy exercise instead of a redesign. Label the bolt bags by part — ‘left leg’, ‘crossbar’ — and the reassembly order writes itself.
Keep the manual and spares with the desk’s paperwork permanently. A desk that serves a decade will need its Allen key at least once a year, and its spare feet exactly once, on the day you would otherwise be searching a hardware store with a photograph of a thread.
Solo Assembly Tactics for Large Desks
Big desks are usually labelled two-person, but solo builders assemble them safely every day with preparation substituting for the second pair of hands. The principles: keep the desk low and supported at every stage, never let a large top balance on a frame corner, and plan the flip as a controlled roll onto a padded edge rather than a lift. A sofa or bed placed beside the build area becomes your assistant — the desk tips onto it, rotates, and lowers to the floor in stages.
Wall support is the other solo tool: building with the frame’s long side a few inches from a wall lets you lean the assembly safely while fitting the far legs, and the wall catches what your reach cannot. Work in socks or soft shoes around a face-down desktop — one gritty shoe sole dragged across the surface during the build engraves a scratch the desk will wear for life.
Know the genuine limits: glass tops, stone tops and anything over about 63 inches with a motorised frame deserve a real second person, for the flip and for your back. Borrowing a neighbour for ten minutes is not a failure of independence; it is the correct tool for that step, and it is cheaper than a chiropractor or a replacement top.
Pace is the solo builder’s last discipline. Fatigue makes the mistakes — the forced bolt, the skipped diagonal check — so build in daylight, in one session with breaks, rather than at midnight before a gaming weekend. The desk will stand for a decade; it can wait an hour for you to eat.
What to Do When the Instructions Are Bad
Flat-pack instructions range from excellent to interpretive dance, and gaming desks from smaller brands trend toward the latter. When a step is unclear, fall back on the structural logic of this guide: frames assemble loosely, square by diagonals, tighten in rotation, accessories last. That logic is brand-independent because physics is; a confusing diagram cannot repeal it.
Photograph each stage with your phone as you complete it. If a later step contradicts your work, the photos show whether you misread or the manual did — and if the manual is wrong, your photos are the evidence that gets a support answer instead of a shrug. Online, most popular desk models have owner assembly videos; watching one at double speed before opening the box is worth more than re-reading the manual three times.
Missing or wrong hardware is the other classic: count against the parts list before starting, as this guide insists, and if the count fails, contact the seller before improvising substitutes. A bolt of the wrong length in a desktop fixing is a future stripped hole; the correct bolt in three days is a desk built once. Patience is an assembly tool, and it is the one most often missing from the box.
Cable Tray and Power: Installing the Invisible Infrastructure
The cable tray deserves its own assembly attention because it is the desk’s permanent infrastructure. Mount it centred toward the rear, low enough to clear your knees at every sitting position, high enough that cables drop into it without kinking. If the tray is sold separately from the desk, fit it during this build while the desk is upside down — retrofitting it later, on your back, under a loaded desk, is a chore this guide exists to prevent.
Mount the power strip inside or directly above the tray with its switch oriented toward your usual side. Coil nothing yet; the equipment is not placed. But do run the strip’s own cable down the leg nearest the wall socket and clip it along the leg’s rear face, because that single run defines the desk’s relationship with the room’s power for its whole life.
Test the strip’s switch from your chair position before the desk is loaded: you should reach it without standing, because a switch you cannot reach is a switch that stays on forever, defeating its purpose as the station’s single point of control.
Calibrating a Standing Desk After Assembly
Electric desks need a first-run calibration that the manual mentions and owners skip. After the flip and before loading, run the desk slowly through its full range twice: listen for binding, watch the columns rise evenly, and let the controller learn its limits if the model requires an initialisation hold. Note the desk’s minimum and maximum heights in your setup note — your seated and standing presets will live inside them.
Set the presets only after the equipment is loaded and your chair is adjusted, because the correct heights are relationships — desktop to elbow, screen to eye — not numbers on the controller. Save a seated preset, a standing preset, and, if the controller allows, a third for a partner or a perched stool height.
Re-check the frame bolts after the first week of powered movement; a desk that travels up and down daily works its joints differently from a static one, and its settling period is measured in cycles as much as days. The one-week rule from this guide applies with interest to anything that moves.
The Assembly Audit: Signing Off Your Own Work
Finish every build with a formal audit, the way a professional installer would. Bolts: every one present, every one snug, none stripped or spinning. Frame: diagonals equal, no racking under a firm side push. Feet: level on the final floor, pads present. Accessories: tray, grommets, holders fitted and positioned for your habits, not the photograph’s. Power: strip mounted, switch reachable, first cables routed with slack.
Then load the desk in the order the setup guide prescribes — screens, input, tower, the rest — and audit again at the end of the first week, bolts and level included. Two audits, ten minutes each, bracket the desk’s entire settling story.
Sign off in your setup note with the date. It sounds ceremonial; it is actually the moment the desk stops being a project and becomes furniture, and the note is where its maintenance history begins. Future repairs, moves and warranty claims all start from that line.
Disassembly: The Skill Nobody Plans to Need
Every assembled desk is eventually disassembled — for a move, a room change, a sale — and the builders who fare best are the ones who kept the manual and reverse the process with the same discipline. Photograph the desk’s cable routing and accessory positions first. Remove equipment, then accessories, then the desktop, then the frame, bagging each stage’s bolts separately and labelling the bags as you go.
Protect the desktop’s face for storage and transport as carefully as on day one: a blanket, face inward against another flat surface, edges guarded. More desktops are ruined in vans than in decades of service, almost always by the same unprotected corner meeting the same unprotected wall.
Store the parts kit with the desk’s paperwork wherever the desk goes, and the reassembly — months or years later, possibly in another city — becomes the calm exercise this guide describes rather than an archaeology of mystery bolts. Assembly and disassembly are one skill with two directions, and the organised builder only ever learns it once.
Drawers, Shelves and Doors: The Fiddly Furniture Bits
Desks with storage add a second craft to the build: moving parts that must run true. Drawer runners are the usual test. Fit them to the carcass first, exactly level and parallel — a runner pair a few millimetres out of parallel produces a drawer that binds at the same point of every travel, forever, and no amount of later adjustment fully forgives a runner screwed in crooked. Insert screws in the runner’s slotted holes first, test the drawer’s travel, adjust, and only then add the fixed-hole screws that lock the alignment in. That two-stage habit is the whole secret of drawers that glide.
Drawer fronts and cupboard doors are alignment exercises of the same family: fit them loose, close them, judge the gaps with your eyes from standing height — gaps should be even on all sides — then tighten while holding the alignment, because the act of tightening moves panels by exactly the millimetre your eyes were judging. Work one hinge or bracket at a time and re-check after each; alignment is a conversation, not a single act.
Shelving towers and hutches that bolt to the desktop add a sequencing rule: they go on last, after the desk is upright, level and loaded-tested, because a tower fitted to an unsquared frame inherits the frame’s twist and advertises it at ceiling height. Leave their top fixings finger-tight until the tower is plumbed against a level or a door frame, then commit. Storage furniture punishes haste more visibly than any other part of the build — a crooked drawer announces itself every single day — and rewards the same patience this guide prescribes for frames, applied at smaller scale.
When the Motor Says No: Control Boxes, Error States and Resets
Electric desks occasionally refuse to move after assembly, and the refusal is almost never a dead motor. Work the sequence the manufacturers’ own support lines use. First, connections: every cable between control box, legs and handset seated fully — these connectors click, and a cable that looks plugged but never clicked is the single commonest cause of a desk that does nothing at all. Second, the reset: most systems have an initialisation procedure, typically holding the down button until the desk dips and rebounds, which teaches the control box where its legs are. A desk that has never been initialised may move only downward, move in inches, or refuse entirely, and it is not broken — it is uncalibrated, exactly as the calibration section of this guide describes.
Third, asymmetry: if one leg moves and the other does not, swap the legs’ cables at the control box where the design allows it. If the fault follows the cable port, the box is implicated; if it follows the leg, the leg or its cable is. That one swap halves the suspect list and gives any support call its answer in advance. Fourth, load and obstruction: desks protect themselves — a collision sensor that met a chair arm during a test run, or a desk asked to lift far beyond its rating, will stop and sulk until reset.
What you must not do is open the control box or the leg housings. They contain no user-serviceable parts, their capacitors and boards are not a home workshop’s business, and a desk under warranty that has been opened is a desk whose warranty has been renegotiated by its owner, unilaterally, downward. Everything diagnosable from outside — connections, initialisation, swaps, loads — is diagnosable safely; the rest belongs to the manufacturer, with your notes from the four steps above making their job short.
Rescuing a Stripped Hole Mid-Build
It happens in the best-regulated builds: a screw that suddenly turns free, its hole in the particleboard stripped by an over-enthusiastic turn or a factory drilling that was never sound. Stop and assess before touching anything else, because the rescue depends on how much material remains. A hole that is merely loose — the screw grips but will not snug — accepts the classic repair: pack the hole with wooden matchsticks or a sliver of dowel coated in wood glue, let it cure fully, trim flush, and re-drive the screw into the reinforced hole. The repair is genuinely strong, often stronger than the original board.
A hole that has blown out — a crater rather than a tunnel — needs the fuller version: clean out the loose fibres, fill with a two-part wood filler or a glued dowel plug, cure completely, then drill a fresh pilot hole at the correct diameter before re-driving. Rushing the cure is the failure mode of every version of this repair; a screw driven into half-cured filler re-strips the hole at a larger diameter and spends your second chance.
Know the repair’s limits. A stripped hole in a low-load location — a cable tray fixing, a modesty panel — is a routine save. A stripped hole at a leg joint or a crossbar mount, carrying the desk’s structural loads, deserves the stronger medicine of a threaded insert or a through-bolt if the design permits, or a call to the manufacturer if the desk is new: a structural hole that arrived stripped is a defect, and repairing it yourself converts their problem into your modification. Judge the hole’s job before choosing its rescue.
Levelling on Real Floors: Carpet Pile, Slopes and Old Boards
The levelling section of this guide assumes a floor that is merely imperfect. Real floors specialise: deep carpet pile that swallows the feet’s adjustment, old boards that slope a visible degree across the desk’s width, and the classic rental combination of both. On pile, level the desk after it has been loaded and lived on for a day — the feet sink through the pile to the floor beneath on their own schedule, and a desk levelled in the first hour re-levels itself wrong by the weekend. Press each corner down firmly during the first levelling to pre-compress the pile and shorten the settling.
On sloped floors, accept the desk’s terms: you are levelling the desk to true, not to the room, which means the foot on the low side extends until the bubble or the app agrees — and the desk may then look faintly wrong against the room’s own tilted lines. Trust the instrument over the eye; your body sits at the desk, not at the room, and it is the body’s level that governs the chair, the monitors and the drink that stays put. If the slope exceeds the feet’s range, shim under the low feet with a firm, full-footprint pad rather than folded card, which compresses unevenly and reintroduces the rock on a delay.
Old boards add movement: a floor that flexes underfoot will flex under a loaded desk corner when you lean. Diagnose it by pressing the floor beside each foot with your weight; a foot standing on a springy board needs its load spread — a small rigid pad under the foot, or the desk shifted a few inches so the foot lands nearer a joist. Levelling is the last step of assembly and the first step of every wobble investigation later, which is why the wobble guide in this batch begins exactly here.
Building for the Next Disassembly: Choices the First Build Makes
Every desk in this guide will be dismantled one day, and the first build quietly decides whether that day is an hour’s calm work or an afternoon of swearing at seized screws. The choices are small and free. Drive screws to snug and no further — the over-tightened fixing that holds heroically for five years is the one that tears its hole apart on removal. Keep one bolt of each size in the spares bag rather than using every last one, because the bolt lost down a stairwell in year six will be, by the law of these things, the size you have no spare for.
Label as you go if the desk is complex: a strip of painter’s tape on each frame member naming it — left leg, rear rail — takes seconds during the first build and saves the entire orientation puzzle during the second, when the manual may be lost and the parts will all look alike in a hallway. Photograph each joint before it is covered by the next stage; the reassembly you or a buyer performs in five years will be reverse-engineered from those photographs more than from any document.
Finally, decide the desk’s paperwork home now: manual, spares, Allen key and your assembly audit note, in one labelled place that moves when the desk moves. Desks outlive the drawers they were filed in and the phones their manuals were photographed on. The builders who fare best at disassembly are not the strongest or the cleverest; they are the ones whose first build was conducted by someone — themselves, five years earlier — who left the site tidy for the next crew.
Tops That Are Not Boards: Glass, Stone-Effect and Solid Wood
Most gaming desks wear engineered tops, but the exceptions each rewrite a handling rule. Glass tops are the strictest: they must never be rested on their edges or corners, never slid across a floor, and never have their fixings over-tightened, because glass fails by stress concentration — suddenly, and at the point of insult, not gradually like board. Handle a glass top with two people holding it flat from beneath, set it onto a frame whose pads are all present, and tighten its clamps or screws to firm finger pressure plus a fraction, in rotation, exactly as the manual’s modesty on torque intends.
Stone-effect and compact laminate tops are heavy beyond their size and brittle at their corners in a different way: a corner knocked against a door frame chips rather than dents, and the chip is permanent. Their build rule is padding — corners protected until the top is seated — and a flip performed with the top’s weight planned for, because a top that surprises its builders with its weight gets set down hard exactly once, on a corner.
Solid wood asks for time instead of care: a real timber top should acclimatise in the room it will live in for a day or two before assembly, because wood moves with humidity and a top fixed rigidly while swollen or shrunken can cup or split its fixings as it settles. Leave its underside fixings firm but not forced, and expect the seasonal micro-movement that engineered boards never show. Wood repays the patience by being the only top in this guide that can be sanded back to new after a decade of honest damage — a different ownership proposition entirely, and one worth choosing knowingly rather than discovering.
Desks That Hide Cables in Their Legs: Fitting the Invisible Route
Some desks route their power lead down through a hollow leg, and the feature is fitted during assembly or effectively never. The leg channel must be assembled in the right order — inner covers and guides seated before the leg is bolted to the frame, because access to the channel’s interior disappears the moment the leg meets the desktop. Thread the desk’s own power lead through while the leg is still in your hands on the floor, leaving the correct slack at both ends: enough at the top to reach the tray or strip with the desk at any height, enough at the bottom to reach the wall socket without the lead becoming the desk’s anchor.
Test the route before the flip: pull the lead gently through its full travel and confirm it slides without catching on a cover’s edge, because a cable chafing inside a leg is invisible in service and announces itself only as a failure. Where the design gives the leg a removable cover, note how it releases and keep that knowledge in the desk’s paperwork — the first upgrade that needs the channel will otherwise begin with twenty minutes of archaeology and a prised cover.
The payoff for the fiddly ten minutes is the cleanest drop a desk can have: one lead, hidden, arriving at the floor exactly at the leg. It is also the least forgiving route to retrofit, which is the general law this section illustrates — infrastructure fitted during assembly is nearly free, and the same infrastructure fitted afterwards costs an afternoon. When a desk offers channels, trays or grommets, the build is the moment to commit to them.
The Partner Audit: Borrowing a Second Pair of Eyes
The assembly audit in this guide is written for a solo builder, but a second person — even one who never touched a bolt — improves it in a specific way: they have no memory of intending things to be right. Have your auditor work from the manual’s parts list and the finished desk, checking what is rather than what was meant: every bolt present, every cover seated, the crossbar fitted, the feet’s pads intact. Builders skip steps they remember completing; auditors find the step that exists only in the builder’s memory.
Give the audit a physical script. The auditor presses each corner, rocks the desk in both axes, runs a hand along the desktop’s joints and edges for steps and lips, opens every drawer twice, and sits at the desk to work the height through its range if it adjusts. The builder’s job during all this is silence and note-taking — the moment a builder starts explaining why a finding is fine, the audit has ended and the defence has begun, and findings defended are findings kept.
It takes ten minutes and it is the closest a home build comes to professional quality control, for the same reason professionals use it: the person who made a thing is the worst person to inspect it, not from dishonesty but from familiarity. Desks assembled by two and audited by the other tend to be the desks that never develop the mysterious wobble of month three — because month three’s causes were all present, and visible, on day one.
When the Desktop Arrives Damaged: Deciding at the Door
Desktops are the part of the desk most often damaged in transit — a corner crushed through its packaging, a forklift’s opinion expressed along one edge — and the decision must be made before assembly, because an assembled desk is a kept desk in most sellers’ eyes. Unpack the top first, whatever the instructions’ order, and inspect it on a soft surface under a good light: all four corners, both long edges, and the face that will be up, including under any protective film, which hides scratches with professional skill.
Sort what you find by the only taxonomy that matters. Cosmetic damage on the underside or the rear edge — invisible in service, structurally irrelevant — is a negotiation: photograph it, tell the seller, and accept a partial remedy if the desk is otherwise right. Damage on the working face, a crushed corner, a crack running from a fixing hole, or any warp you can see sighting along the surface is an exchange, because each of those worsens or declares itself under load and no assembly technique compensates for a top that arrived wrong.
The discipline is in the timing: photographs taken of the unassembled top, in its packaging, within the delivery window, make the exchange a logistics event rather than an argument. The same photographs taken after a weekend of assembly make it a negotiation you will probably lose. Inspect first, build second — the ten minutes at the door are the cheapest insurance in the entire purchase, and they cost nothing but the patience to delay the satisfying part.
Gear for This Guide
You do not need to buy anything to follow most of this guide, but the items below are the ones that genuinely come up again and again in this topic. Each one is a current, widely sold model rather than a placeholder pick.

Mr IRONSTONE L Shaped Gaming Desk
Mr Ironstone’s L-shaped desk is a representative corner build: two desktop sections joined over a steel frame with a monitor stand — exactly the align-then-tighten sequence this guide describes, with the diagonal check earning its keep on the corner joint. Check on Amazon

CubiCubi Computer Desk 40 Inch
CubiCubi’s compact desk shows the simple end of the spectrum — a small frame and single top that one person can build and flip safely in half an hour, a good first flat-pack project. Check on Amazon
Frequently Asked Questions
How long does it take to assemble a gaming desk?
Most straight desks take 30 to 60 minutes; L-shaped and standing desks with more frame parts can take 60 to 90. Working finger-tight until the frame is square adds minutes and saves hours of wobble-chasing.
Can I assemble a gaming desk alone?
Yes for most straight desks up to about 55 inches, if you plan the flip carefully. Large L-shaped and glass or stone-top desks genuinely need a second person for the flip and positioning.
Why is my new desk wobbling already?
Almost always uneven feet or a frame tightened before it was squared. Level the feet first, then loosen, square by the diagonal test and re-tighten in rotation — the full diagnostic is in How to Fix a Wobbly Gaming Desk.
Should I use a drill to speed up assembly?
No. Hand-tighten with the included Allen key. Power drivers strip threads in engineered wood instantly, and a stripped desktop fixing cannot be tightened again.
Do I fit the cable tray before or after flipping the desk?
Before, while the desk is upside down and access is free. Routing the first cables before the equipment lands is the other half of the trick.
The instructions show a part my desk does not seem to have. Should I worry?
First, check the parts list rather than the diagrams: many manuals illustrate a whole range, and a diagram may show a crossbar, shelf or accessory fitted only to a sibling model. If the parts list for your model includes it and your box does not, photograph the empty packaging and contact the seller before building around its absence — some parts are structural, and a desk assembled without its crossbar feels fine until the first month of use explains what it was for.
Can I assemble the desk in one room and move it to another?
For small desks through wide doorways, carefully, yes — carried level by two people, never dragged. For most desks the safer answer is the one in this guide: assemble it where it will live. A finished desk is at its most fragile while being threaded through doorways at angles its frame was never loaded for, and legs and crossbars loosen under exactly that treatment. If it must move rooms, partially disassemble — legs and crossbar off — rather than gambling the whole frame on a hallway turn.
Should I assemble the desk fully before moving it into a small room?
Almost never. A finished desk is at its largest and most fragile in doorways, and frames loosen under the twisting loads of being threaded through them. Assemble in the room where the desk will live, close to its final position. If the room is too small to build in, assemble in stages — frame built and squared in the larger space, top fitted in the room — rather than gambling the completed desk on a corridor turn.
The Short Version
Build upside-down, start every bolt by hand, square the frame by its diagonals, tighten in rotation, level the feet, and only then flip, accessorise and cable. Re-check the bolts after a week. Those habits — not strength or tools — are what make a flat-pack desk feel like a fitted one.