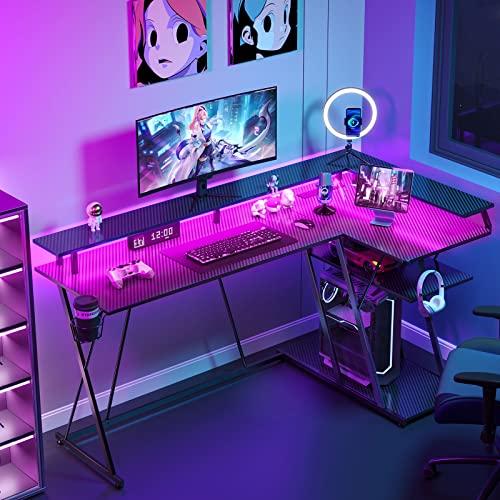
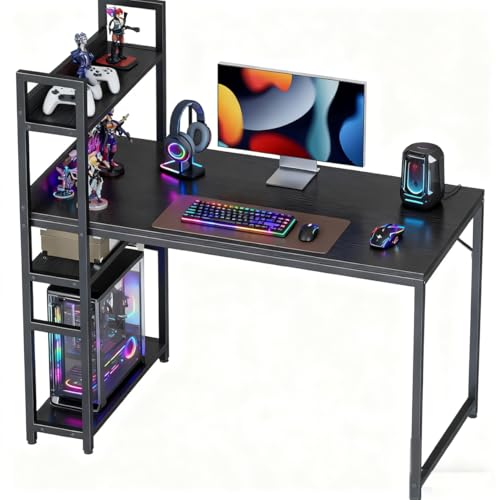
Knowing how to set up a gaming desk is what turns a pile of good equipment into a station that feels effortless: monitor at the right height and distance, keyboard centred on your body, tower placed for airflow, cables invisible, and light that helps your eyes instead of fighting them. This guide arranges a desk in the order professionals do — screens first, then input, then the PC, then power and cables, then comfort extras — with the reasoning behind each position.
Disclosure: As an Amazon Associate, ilcastellomenu.com earns from qualifying purchases. Product links on this page may earn us a commission at no extra cost to you. Prices and availability change on Amazon, so check the product page for the current details before you buy.
Start With the Screens: Position Decides Everything Else
Sit in your chair, adjusted as in How to Adjust a Gaming Chair, and place the monitor so its centre is roughly an arm’s length away and the top third of the screen is at eye level. Too close and you turn your head constantly; too low and your neck flexes all session. A monitor shelf helps on shallow desks, but a monitor arm is the real unlock: it frees the surface under the screen, lets you float the panel at exactly your distance, and makes dual-screen angles symmetrical instead of approximate.
Dual-monitor players should decide their primary screen honestly: the display you aim and read on goes directly in front, the secondary at a gentle angle — not two screens split down your nose line, which guarantees a twisted neck. Ultrawide users centre the panel and accept that its edges live in peripheral vision, which is what they are for. The size and distance maths behind these positions is expanded in What is the Best Size for a Gaming Desk.
In this guide
Keyboard, Mouse and the Space They Actually Need
Centre the keyboard on your body — specifically on the B key’s position relative to your sternum for touch-typists, or simply on your seated centre for most players — not on the desk or the monitor. Your mouse needs a clear run of at least a dinner-plate’s width for low-sensitivity play, more for arm aimers; measure your mousepad zone before placing anything else on the surface, because speakers and desk ornaments expand to fill whatever space you leave them.
Keep the essentials in the ‘golden triangle’ of reach: keyboard, mouse, and your drink (in the holder, not loose on the desk). Controllers, stream decks and secondary peripherals live one tier back. If your desk feels cramped at this stage, the problem is usually surface discipline, not desk size — though the upgrade path through Best Desks for Gaming Setups shows what a genuinely larger station looks like.
Tower Placement: Airflow, Dust and Noise
The tower has three possible homes, each with trade-offs. On the desk: best airflow, least dust, easiest access to ports and power buttons — at the cost of surface area and with fan noise closest to your ears. On the floor beside the desk: frees the surface, but carpet chokes bottom intakes and dust accumulation doubles; use a stand or board to lift it. In a desk’s CPU cabinet or shelf: tidy, but only if the compartment is open-backed and generously ventilated — a sealed cabinet is an oven with a door.
Whichever home you choose, leave clearance behind and above the case for exhaust air, route its cables with slack for when you pull it out for cleaning, and never push it flush against a wall. Players planning a new case alongside the desk can match dimensions against Best PC Cases for Cable Management, since case size decides whether the on-desk option is even available.
Power and Cables: The Invisible Half of the Setup
Mount a power strip under the desk or in its tray so every cable runs up, not down to a floor socket: shorter runs, nothing trailing, and one switch to kill the whole station. Then route in bundles by destination — display cables together, USB together, power together — using the method in How to Organize Cables on a Gaming Desk. Leave a labelled spare HDMI and USB lead coiled in the tray; future upgrades and console visits will thank you.
Cable discipline is also safety and sanity: nothing should cross your leg space, nothing should be pinched by the desk edge or a monitor arm’s travel, and a height-adjustable desk needs a proper slack loop that rises with it — test the full range before declaring the job done, as Standing Gaming Desk vs Seated warns.
Light, Sound and the Comfort Layer
Light the desk for your eyes, not for photos. A bias light behind the monitor or a desk lamp angled at the wall softens the contrast between a bright screen and a dark room, which is where eye strain breeds. Keep direct light off the screen itself to avoid reflections, and if you stream, your key light belongs in front of you, high and soft — the desk setup serves the camera only after it serves your posture.
Speakers belong at ear height, angled toward your head, roughly as far apart as they are from you; on small desks that usually means stands or raising them on books to tweeter-at-ear level. Headphone users should give the hook a fixed home on the side they stand up from. Finish with the comfort layer: chair mat down, footrest if your desk height demands one, and the chair rolled in for the final clearance check against Gaming Desk Ergonomics Explained.
A Setup Order Checklist You Can Reuse
- Chair adjusted and rolled into position; use it as the reference for every measurement.
- Monitor(s) placed for distance and eye level, on shelf or arm.
- Keyboard centred on your body; mouse zone measured and cleared.
- Tower placed for airflow with exhaust clearance; power strip mounted under the desk.
- All cables routed in bundles with service loops; full sit-stand range tested if applicable.
- Speakers or headphone hook positioned; lighting set for eyes first.
- Final sit: play something for fifteen minutes and adjust the one thing that nags you — there is always exactly one.
Setups are never finished, only settled — every new peripheral reopens the arrangement. Re-run this checklist whenever you add hardware and the desk will stay coherent instead of evolving into archaeology. If the desk itself is the limitation, How To Choose A Gaming Desk is the place to restart from measurements.
Small Desks and Apartments: Setup Under Constraint
A small desk does not excuse a bad setup; it just demands stricter priorities. The monitor arm becomes near-mandatory, because the stand’s footprint is surface you cannot spare, and floating the screen lets a 24-inch-deep desk deliver a 28-inch viewing geometry. The tower goes on the floor on a stand, without debate. Speakers yield to a headset on a hook, or shrink to a soundbar that lives under the monitor’s float zone.
Vertical thinking rescues small desks: a shelf above the monitor for the console and decor, wall-mounted storage for controllers, and every cable in the tray because floor cables in a small room are trip hazards, not aesthetics. The compact setups in this batch’s small-space roundups succeed on exactly this discipline — nothing on the surface that is not used daily, everything else with an address elsewhere.
Measure success by the golden triangle: if keyboard, mouse and drink are perfectly placed and your posture passes the audit, the setup is right, whatever its footprint. Constraint is a filter, not a failure.
Testing and Iterating: The Setup Is a Draft
Treat your first arrangement as a draft with a review date. Play your main games for a week and keep a note of every friction: the cable you keep catching, the controller that lives on the floor, the light that reflects at night but not at noon. One friction per day is normal in week one; each has a small fix, and the fixes compound into a station that feels designed rather than accumulated.
Photograph the setup when it feels right. The photo is your restore point after upgrades, moves and cable projects — setups drift, and a reference image beats memory. Note the monitor arm’s height setting and your chair’s adjustments in the same phone note, and a full teardown stops being a threat to your comfort.
Finally, resist the perpetual-upgrade itch that setup content encourages. A setup that serves your posture, your games and your eyes is finished, even if it would not win a photograph contest. Spend the next budget where the audit says it hurts — which, after this guide, is rarely the desk’s appearance.
Peripherals Placement: Stream Decks, Wheels and the Second Tier
The second tier of peripherals — stream decks, control pads, drawing tablets, wheels that clamp on for race night — needs planned homes, not daily improvisation. A stream deck belongs in zone two on your non-mouse side, angled toward you, where a glance and a reach land together. Drawing tablets and work tools that alternate with the keyboard should swap into the same centred footprint rather than pushing the keyboard into exile; the centre of the desk belongs to whichever primary tool is active.
Wheels and flight sticks transform the desk temporarily, and the transformation should be rehearsed: clamps need edge thickness and clearance from drawers, pedals need floor space the chair’s casters must vacate, and the monitor may need to come closer. Players who race weekly often dedicate the desk’s end to the rig’s parked position, so setup is a slide and a clamp rather than a rebuild.
Charging and storage complete the tier: controllers dock in one place, headsets hang in one place, and the spare cables for occasional devices live coiled in the tray, labelled. A setup is finished when every object you own for it has an address and the addresses survive a week of real use without negotiation.
Revisit the tier whenever a new device arrives, before it colonises the mouse zone by default. New gear always lands in the most convenient wrong place; the setup routine’s job is to give it the right one on day one.
Acoustics and Camera: The Setup’s Public Face
If you stream or record, the desk setup has an audience, and two more disciplines join the list. Acoustically, hard desks reflect: a large mousepad or desk mat damps keyboard and mouse noise at the source, microphone placement close to your mouth and away from the keyboard does more than any software gate, and speakers at ear level angled in will always beat louder speakers pointed at a wall.
On camera, the desk’s visible slice is what reads as production value: the monitor’s back or a clean backdrop, cable discipline behind the desk (the audience sees the rear view you never do), and light placed for your face rather than your screen. None of this requires new furniture — it requires looking at your own setup through the camera once, which most players have never done.
Even non-streamers benefit from the exercise on video calls: the colleague’s-eye view of your station is a free ergonomic and tidiness audit. Run it once a season. The camera is the most honest mirror a desk ever gets, and it costs one minute to consult.
The Setup for Specific Genres
Genre bends the general rules in predictable directions. Competitive FPS wants the monitor a touch closer and lower than the comfort default, the keyboard angled or tenkeyless to free mouse territory, and nothing — nothing — in the mouse’s sweep arc. Strategy and simulation players trade that intensity for breadth: screens wider, chair further back, reference materials and a second display welcomed into zone two.
Racing and flight setups reconfigure the desk’s front entirely: clamps demand edge access, so the golden triangle yields to the rig for race sessions, and the wise player designs the transformation — a section of desk that clears in one motion, cables with enough slack to let the monitor come forward, pedals stored where they deploy in seconds.
Creative and streaming hybrids add a third geometry: the camera’s. If you record, set up for the lens as a second audience — background, light and the desk’s visible slice — but never at the expense of the first audience, which is your own spine. Posture outranks production value in every session that lasts longer than the stream.
Maintaining the Setup Across Upgrades
Every upgrade is a small threat to a good setup: the new monitor is larger, the new GPU needs the tower moved, the new keyboard is wider. The defence is the setup note — your recorded positions, arm settings and chair adjustments — plus the discipline of re-running the checklist in this guide after any change, however small it seems. Setups decay by unexamined inches.
Photograph cable routes before disturbing them and new hardware inherits a working system instead of a fresh puzzle. Keep the spare leads labelled in the tray, because the upgrade that needs ‘that one cable’ always happens at midnight before a session that matters.
Once a year, consider the full reset: strip the desk to its surface and rebuild the setup from this guide’s order, discarding the accumulated compromises. It takes an afternoon and returns the station to intention — the setup equivalent of the chair’s deep clean, and best scheduled on the same weekend.
Knowing When the Setup Has Outgrown the Desk
Sometimes the audit’s honest conclusion is that the desk, not the arrangement, is the limit: the second monitor genuinely does not fit, the depth genuinely cannot serve the new ultrawide, the frame genuinely flexes under the grown rig. Recognise the signs without resentment — a desk that served one era of your gaming completely has done its whole job.
When that day comes, your setup note becomes the shopping brief: the dimensions the new desk must beat are all recorded, measured against reality rather than guessed from a listing. The choosing guide in this batch then does its work in an hour, because the setup you need has been documented by the setup you had.
Until that day, resist blaming the desk for arrangement problems. Most ‘I need a bigger desk’ conclusions dissolve under one honest pass of this guide’s checklist — which is why the checklist comes before the catalogue, every time.
The Setup’s Small Print: Comfort Details That Compound
A few details too small for their own sections repay attention disproportionately. A desk mat large enough to define the whole input zone damps sound, protects the surface and gives the mouse and keyboard one consistent plane. The drink lives in the holder, always, because the one time it does not is the time it meets the keyboard. A small clock or timer in view quietly governs session length better than willpower does.
Keep one drawer or box as the setup’s junk valve: the cables, adapters and tools that would otherwise colonise the surface live there, contained. Every tidy desk has such a valve; the untidy ones are simply missing it, and their surfaces pay the price instead.
And plant something — literally or figuratively — in your sightline that is not a screen. A plant, a photograph, a window view: the eyes’ distance breaks from this batch’s ergonomics guide need a target, and the room feels less like a cockpit and more like a place. Setups serve people; the small print is where that service becomes visible.
Portrait Screens and Vertical Space: The Third Orientation
Most setup advice assumes every screen is landscape, but a portrait monitor — for code, documents, chat columns and vertical video — changes the desk’s geometry in ways worth planning rather than improvising. A portrait 27-inch screen is narrower than its landscape twin and much taller, which moves its ergonomic problem from width to height: its top edge can sit well above eye level on a standard stand, and the correct response is a monitor arm that lets the screen’s centre sit where your gaze actually works, with the top’s height accepted rather than chased. Judge the portrait screen by its middle, not its crown.
Placement follows the content’s importance. A portrait screen used constantly — the developer’s code, the streamer’s chat — belongs in the primary arc, angled a few degrees toward you like a book on a stand, close enough that its narrower width keeps all its text within easy focus. A portrait screen used occasionally belongs at the arc’s edge, where its height makes it a glanceable board rather than a presence. What it should not do is stand between you and a landscape primary, splitting your forward view into two half-views that serve neither.
Desk depth and the portrait screen negotiate quietly: a tall screen can sit slightly further back than a landscape one because its working area is vertical, which makes portrait orientation a genuine space strategy for shallow desks — one of the few upgrades that gives surface back. Its cables, though, need the service loop discipline from the cable guide applied generously, because arms carrying tall screens travel through a wider arc when you adjust them, and a taut cable at full extension is a portrait screen’s favourite way to end an adjustment session.
Balance and Tip-Over: The Weight Distribution Nobody Checks
Setups fail physically in a way setup guides rarely mention: they become unbalanced. A desk’s stability assumes its load spread across its top and its frame; real setups concentrate load eccentrically — a heavy tower at one rear corner, a triple-monitor arm clamping a single point at the back, a player leaning their full forearm weight on the front edge. Each is survivable alone. Together, on a light desk with a high centre of gravity, they describe the tip and rack incidents that owners report as freak accidents and engineers read as arithmetic.
Run the balance audit when the setup is complete. Total the load and place the heaviest single objects low and over the frame’s supports where you can — a tower on a floor stand beside the desk removes the worst eccentric load entirely, which is one under-sung reason floor placement wins despite the dust. Check the desk’s behaviour with a firm downward press on each front corner in turn: a corner that lifts the opposite rear foot, even slightly, is telling you the load map needs redrawing before an animated gaming moment does the test at speed.
Monitor arms deserve their own sentence, because an arm is a lever that converts screen weight into torque at the clamp, multiplied by its extension. Two arms extended fully toward you move the setup’s centre of mass forward of the desk’s feet on some designs. The cure is geometric: keep heavy screens’ arms folded closer to their posts in daily use, extend them for the sessions that need it, and confirm the clamp’s grip after any rearrangement. Balance is not a property a desk has; it is a property a setup maintains, one rearrangement at a time.
The Quiet Setup: Dorms, Shared Rooms and Thin Walls
A setup in a shared room has a second user: everyone who is not playing. Setting up quietly is a design discipline of its own, and it starts with the mechanical noises — keyboard switches chosen or damped for the room’s hours, a chair whose casters roll on a mat rather than across boards at midnight, a desk placed so its back is not against the wall that carries sound to the next bed. None of these choices costs performance; they cost only the forethought that shared living always eventually demands.
Light is the second front. A monitor’s glow in a dark room is a searchlight to a sleeping roommate, and the quiet setup manages it with geometry before gadgets: the desk oriented so the screen faces a wall or a corner rather than the room, brightness matched to the room’s darkness rather than to the afternoon, a bias light that lets you run the screen dimmer without eye strain. Headphones complete the discipline — open-backed models leak your game to the room, closed ones keep it yours, and the choice between them in a dorm is a social decision disguised as an audio one.
Time is the third front, and it is managed by the setup’s flexibility: a station that can drop into a low, quiet mode — dimmer light, controller instead of keyboard, voice off or push-to-talk — survives shared living where a fixed, full-volume station generates the complaints that end setups. Build the quiet mode deliberately while you arrange everything else; retrofitting consideration is much harder than designing it in.
Two Heights, One Setup: Making Sit-Stand Work Daily
A height-adjustable desk only earns its cost if the setup survives the journey between heights intact and inviting, and that is a setup problem, not a desk problem. Begin with the cable truth from the cable guide: every device on the desk must reach its power and data at both heights with slack to spare, tested at full extension before the first real session, because the cable that goes taut at standing height will eventually be met by a player who raises the desk anyway — and something, somewhere, will be pulled off its place or out of its socket.
Peripherals behave differently at the two heights and should be placed for both. The monitor on its arm needs a standing position and a seated position that may differ in tilt as much as in height; mark or memorise both. The keyboard and mouse simply travel with the desk, but their relationship to your body must be re-derived at standing height — elbows level, shoulders down — which usually means the standing surface sits a fraction lower relative to you than instinct suggests, because standing players stand taller than seated ones in a way chairs concealed. Set the desk’s memory presets only after both postures have been audited, or you will have automated a compromise.
The chair completes the system: parked clear of the desk’s descent path, at a consistent spot, ready to return to. Players who stand for part of the day often find their seated gaming preset wants to sit a touch lower and more reclined than their work preset, because evening bodies are tired bodies — record both, and let the switch between them be the small ritual that separates the day’s halves. A sit-stand setup succeeds when changing height is a ten-second event with no consequences, and fails when it is a project; the difference is entirely in this setup work, done once.
The Occasional Hardware: Printers, Scanners and Guests of the Desk
Every setup accumulates occasional hardware — a printer, a scanner, a label maker, a work laptop that visits — and occasional hardware ruins setups by having no address, colonising the mouse zone or the second monitor’s arc whenever it appears. The setup discipline is to house it by its frequency: weekly hardware earns a permanent home at the desk’s edge or on a shelf within cable reach; monthly hardware earns a home off the desk entirely, with one pre-routed spare cable at the desk making its visits a plug rather than a project.
Printers carry a specific warning: they vibrate, and a printer sharing a desk with monitors on arms will set the screens trembling through every page — a wobble source no desk tightening can cure, because it arrives through the surface. Give the printer its own stand or a shelf decoupled from the desk, and its paper a home that is not the keyboard’s left flank. Scanners and their lids need vertical clearance that shelves above the desk often deny; measure the open lid’s height before assigning the home, not during the first scan.
The guest devices follow the same law as guest chairs in this batch: a console that visits for weekends, a friend’s laptop for a co-op night — each deserves one prepared connection and a cleared landing zone, arranged in advance. Setups feel effortless not because they contain little, but because everything that arrives has somewhere it is expected. Occasional hardware is where that expectation is won or lost.
Setting Up for Two: The Shared Desk’s Second Position
Some desks serve two players — partners sharing a station, siblings on a schedule, a parent and a teenager — and the second user is usually set up as an afterthought, inheriting whatever geometry the first user arranged. Do it deliberately instead. The second position needs its own audit: its own chair settings recorded, its own monitor relationship checked, its own reach zone cleared. Where the desk is wide enough for side-by-side play, divide it into two honest territories with a shared middle, and route two cable paths from the start, because the second player’s cables added later will cross the first player’s everywhere they can.
Where the desk serves two players in shifts, the setup’s job is changeover speed: presets on the desk if it adjusts, marked chair settings, peripherals that both players accept or that swap in seconds. The friction budget is real — a changeover that takes ten minutes will be skipped, and the second player will play all evening in the first player’s geometry, which is how shared desks acquire a primary owner and a tenant. Design the changeover like a pit stop and both drivers stay fast.
Storage completes the two-player setup: a drawer, box or shelf per player for the personal layer — their controller, their headset, their notebook — so the surface itself resets to neutral between shifts. A shared desk that holds two people’s clutter holds neither person’s setup. The goal is a station that presents itself, to whoever sits down, as theirs; that illusion is a design achievement, and it is built from presets, territories and two small boxes.
Documenting the Setup: The Photograph Protocol That Pays
The main guide tells you to photograph a setup that feels right. Done properly, the documentation is a small system rather than a snapshot, and it repays its ten minutes at every upgrade, move and troubleshooting session for years. Photograph from four fixed stations: your seated eye position, showing the screens’ relationship to your view; directly above the desk, showing the surface layout and its zones; behind the desk at floor level, showing the cable routes and the strip; and the chair’s position relative to the desk with a tape measure visible in frame, recording the distances you derived rather than guessed.
Add the numbers the photographs cannot hold to the same note: monitor distances and heights, the desk’s preset values if it adjusts, the chair’s settings from its own record. Photographs preserve arrangement; numbers preserve geometry, and a rebuild needs both — the photo tells you where the speakers stood, the note tells you the screen sat twenty-six inches from your eyes and two inches above the desk’s surface at its centre.
Store the set where the setup’s other paperwork lives, and refresh it after every significant change rather than letting it become a historical document of a setup that no longer exists. The players who rebuild a disturbed setup in twenty minutes, identical to the millimetre, are not more talented than everyone else. They are the ones who spent ten minutes, once, writing down what ‘right’ consisted of — which is the same lesson every guide in this batch teaches about chairs, desks and cables alike.
The Seasonal Setup: Light and Heat Across the Year
A setup arranged in one season is auditioned by the others, and two of its properties are seasonal whether you planned them or not. Light moves first: the window that was safely behind the monitor in winter swings its afternoon sun across the screen in summer, and a setup that was glare-free at the solstice can be unplayable at the equinox. The fix is rarely moving the desk — it is a blind, a screen reposition within the arm’s range, or a lamp arrangement that balances the new brightness — but it must be re-derived each time the sun’s schedule changes, which is why the ergonomics guide in this batch tells you to re-audit lighting seasonally rather than treating it as solved.
Heat is the second seasonal property, and it belongs to the tower and the room together. A tower that ventilated happily in a cool room in January adds its exhaust to a July room already at the edge of comfort, and its favourite place — enclosed under the desk, beside your legs — becomes the warmest seat in the house. Summer may argue for moving the tower to the desk’s far end or onto a stand in the room’s air, and for checking that its intakes are drawing the room’s coolest air rather than its own exhaust recycled in a corner.
Build the seasonal pass into the setup’s calendar the way the cable guide builds in its monthly one: twice a year, an hour, checking light at the hours you play and heat at the loads you run. Setups fail seasonally in slow motion, and the players who notice are the ones who scheduled the noticing.
Headphone-First Setups: Docks, DACs and the Cable Drop
Players who live in headphones have a setup geometry of their own, and it is usually improvised badly around a desk arranged for speakers. The headphone chain needs an address: a hook or stand within the golden triangle’s edge — reachable without leaning, clear of the mouse zone — and its cable needs a route that respects how headphones are actually used. The classic failure is the cable dropping from the desk’s front edge to a tower on the floor, crossing the player’s lap and the chair’s caster path, where it is run over weekly and yanked monthly. Route it along the desk’s underside to a fixed point above and behind the chair’s usual position, with a service loop sized for your furthest lean, and the cable disappears from the setup’s incident reports.
A desktop DAC or amplifier, where the chain includes one, belongs in the reach zone’s second row: close enough for its volume knob to be a reflex, far enough that its cable to the PC and its power lead route in the rear bundle with everything else. Its heat is trivial; its cable count is not, and headphone gear added casually is how a tidy desk grows a second, smaller nest at its front edge.
Wireless headphones abolish the drop and replace it with a charging discipline: the dock becomes the address, placed where the headphones are set down by habit — which is where the hook was — and the whole arrangement succeeds or fails on whether returning the headphones to their home is the easiest motion available at the end of a session. Headphone-first players should judge their setup by that motion. When the dock is where the hand wants to go anyway, the system maintains itself; when it is not, the headphones will live on the desk, the chair and the floor in rotation, and no purchase will fix what placement broke.
Gear for This Guide
You do not need to buy anything to follow most of this guide, but the items below are the ones that genuinely come up again and again in this topic. Each one is a current, widely sold model rather than a placeholder pick.

Ergotron LX Monitor Arm
Ergotron’s LX arm is the classic setup upgrade: it floats a monitor up to 34 inches at exactly your eye level and distance, and returns the desk surface underneath to you. For dual or ultrawide stations it is the single biggest quality-of-life purchase. Check on Amazon

VIVO Dual Monitor Desk Mount
VIVO’s dual mount does the same job for two screens up to 30 inches, with clamp or grommet fitting — symmetrical angles and a clear desk, without two bulky stands dictating your layout. Check on Amazon

EUREKA ERGONOMIC 47 Inch Gaming Desk
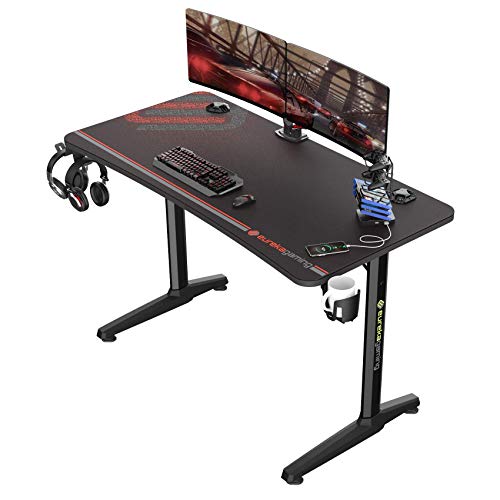
If you are setting up from scratch, Eureka’s desk bundles the setup-friendly features — headphone hook, cup holder and a charging rack — into a compact footprint that suits single-monitor stations. Check on Amazon
Frequently Asked Questions
How far should my monitor be from my eyes?
Roughly an arm’s length — around 20 to 30 inches for typical 24–27 inch screens, a little further for ultrawides. You should read text comfortably without leaning in or turning your head for the corners.
Should the monitor be directly in front of the keyboard?
Yes for your primary screen: monitor centre, keyboard centre and your body’s centre on one line. Secondary screens angle in from the side.
Is it bad to put a PC tower on carpet?
Yes — carpet blocks bottom intake fans and feeds the case dust and fibres. Lift it on a stand or board at minimum; on the desk is better if space allows.
How do I hide cables without a cable tray?
A power strip mounted under the desk plus adhesive clips along the rear edge achieves most of the effect. The full method, tray or not, is in How To Organize Cables On A Gaming Desk.
What is the most common gaming desk setup mistake?
Centring everything on the desk instead of on the player. The chair and your body are the reference point; the desk and screens arrange around them.
How do I set up one desk for both a PC and a console?
Treat the console as a first-class tenant rather than a visitor: a permanent home with ventilation — not inside a closed cabinet while it runs — one HDMI lead to the monitor or a small switcher so the display changes sources without cable surgery, and a controller dock in the reach zone. Set your chair and screen for the console’s typical posture, which is usually a few inches further back than your PC posture; if you play both in an evening, a monitor arm that slides the screen between the two distances earns its cost quickly.
My desk faces a wall and the setup feels cramped. What actually helps?
Depth is what you are short of, so buy it back: a monitor arm removes the stand’s footprint and lets the screen sit closer to the wall than any stand allows, and a keyboard pulled to the desk’s front edge with the mouse zone kept ruthlessly clear returns the working inches. Light helps the feeling more than the fact — a bias light behind the monitor softens the wall’s presence — and a desk mat that defines your territory makes a small surface feel organised rather than merely small.
Where should I put my PC’s power button and front ports if the tower is under the desk?
Within reach of your seated position without standing or crawling — which usually means the tower on a stand at the desk’s side rather than centred under it, oriented so its front panel faces your chair’s approach. If the tower must sit deep under the desk, a desktop USB hub and the discipline of waking the machine from the keyboard cover most daily needs, and the power button becomes a weekly rather than daily journey. Placement should follow the frequency of the reach, as with everything else on the desk.
How often should I redo my desk setup from scratch?
Rarely, and only when the audit says the arrangement — not a component — is the problem: a new desk, a new room, or a setup that has drifted through a year of additions into something nobody designed. Most setups need only the iteration this guide describes: one change at a time, tested across real sessions, documented when it proves itself. The full reset is a powerful tool precisely because it is expensive in time; spend it when the setup’s problems are structural, and let the weekly nudge handle everything else.
The Short Version
Set up around your seated body: screens at arm’s length and eye level, keyboard centred on you, tower breathing freely, power mounted under the desk and cables bundled with slack. Add light and sound last. Fifteen minutes of play will reveal the one remaining nag — fix that, and the station is yours.