Understanding how to position a Wi-Fi extender matters more than which model you bought. The rule that decides most installations is the halfway rule: place the extender roughly midway between the router and the dead zone, at a spot where the router’s own signal is still strong, because an extender can only repeat what it receives. Put it inside the dead zone itself — the instinctive move — and it will faithfully rebroadcast a weak, error-filled signal, giving you full bars and miserable speeds.
This guide turns that rule into a method: how to read your home’s signal map, how height and obstacles change the answer, how to use the extender’s own indicators and a phone to test candidate outlets, and how the advice shifts for two-storey homes, long apartments and outdoor coverage. Position is also the first thing to revisit when an installation degrades, which is why it appears at the top of the checklist in How to Fix a Wi-Fi Extender that Keeps Disconnecting. Get placement right and even a modest extender performs respectably; get it wrong and no upgrade will save you.
Disclosure: As an Amazon Associate, ilcastellomenu.com earns from qualifying purchases. If you buy through a link on this page, we may earn a commission at no extra cost to you. Product details and availability change over time, so check the current listing before you buy.
The halfway rule, stated precisely
Halfway refers to signal, not tape-measure distance. In an open-plan space the two coincide; in a house with a brick chimney breast or a tiled bathroom between router and bedroom, the signal halfway point sits much closer to the router than the geometric one. Your target is an outlet where a phone shows a strong router connection — as a working guide, a signal reading around -60 dBm or better, or a speed test delivering at least half of what you measure beside the router. From that perch, the extender’s own transmission only has to cross the remaining, easier half of the path.
Most extenders help you find this spot: a link LED that glows green for a good host connection and amber or red for a poor one, or an app meter with a simple too-far warning. Trust these indicators over your instincts. They measure the actual radio path, including the wall you forgot contains plumbing. The setup sequence that produces these readings is covered in How to Set Up a Wi-Fi Extender; this guide assumes the extender is configured and focuses purely on where it lives.
In this guide
How to position a Wi-Fi extender using a signal walk
- Stand beside the router with a phone Wi-Fi analyser app (or the extender maker’s app) and note the router’s signal strength in dBm.
- Walk slowly toward the dead zone, watching the reading fall; note where it crosses about -65 dBm — beyond this, repeating quality drops fast.
- List the outlets between the router and that crossing point, favouring ones at waist height or higher, in open air.
- Plug the extender into the best candidate, wait two minutes, and read its link indicator.
- From the dead zone, run speed tests on the extended network in the spots you actually use — desk, bed, sofa, not the doorway.
- If results disappoint, move one outlet closer to the router and repeat. One outlet is a meaningful distance in radio terms.
- When satisfied, leave the setup alone for a full day of normal use before judging — evening congestion from neighbours is part of real life.
This twenty-minute ritual outperforms any amount of spec-sheet research. Readers working on a large floor plan will find the same method scaled up in the context of Best Wi-Fi Extenders for Large Homes, where the halfway point may be a landing or hallway rather than a room at all.
Height, furniture and the obstacles that eat signal
Radio at Wi-Fi frequencies behaves a little like light from a lamp: it spreads, reflects and gets absorbed. Height helps — an extender on a shelf or counter generally outperforms one at skirting-board level, where sofas, cabinets and human bodies block the path. Keep the unit in open air: not inside a cupboard, not behind the television, not wedged between a wall and a metal filing cabinet. If the only available outlet is low, a short extension lead or a different model form factor can be a legitimate fix, provided the unit stays ventilated and safely out of foot traffic.
The worst offenders in a typical home
Brick, concrete and stone walls; tiled bathrooms and kitchens (tile plus moisture plus pipework is a triple penalty); mirrors and foil-backed insulation; fish tanks; large metal appliances; and underfloor heating mats. A path that crosses one such obstacle diagonally can lose more signal than three plain stud walls crossed squarely — which is why a slightly indirect position, bouncing coverage down a hallway, often beats the straight line on the floor plan. Antenna orientation interacts with all of this, and the fine detail lives in our guide to Best Antenna Postion for Wi-Fi Range Extenders.
Two storeys, long flats and other awkward shapes
Between floors, signal passes through the ceiling/floor structure, which usually contains joists, boards and sometimes concrete. The best extender position for an upstairs dead zone is often directly above or below a strong downstairs spot — near the stairwell, where the opening gives radio a relatively clear path. In two-storey homes the router itself ideally sits centrally and elevated; if it is exiled to a corner by the incoming line, the extender’s halfway point may need to be surprisingly close to it. More patterns for this layout are in Best Routers for 2 Story House.
Long, thin apartments present the opposite geometry: a corridor is a natural waveguide, and an extender placed mid-corridor frequently covers both ends better than one placed in a side room. For outdoor targets — a garden office, cameras, a patio — the extender belongs on the inside of the exterior wall nearest the target, not outside in the weather, unless it is a genuinely outdoor-rated unit of the kind surveyed in Best Wi-Fi Extenders for Outdoors. Every extra wall between extender and garden is range you have spent for nothing.
Positioning for gaming and streaming rooms
Latency-sensitive uses reward a slightly different trade: a position a little closer to the router than the pure halfway point, sacrificing some bars in the far room for a cleaner, faster backhaul link. Games care about delay and jitter more than raw download numbers, and a strong host link keeps both low. If the console or PC can plug into the extender’s Ethernet port, do it — the last wireless hop disappears, and only the extender-to-router link remains wireless. The models and expectations for that arrangement are covered in best wifi range extenders for gaming.
Streaming televisions are more forgiving of delay but greedy for sustained throughput, especially with 4K. For a TV room, position for the strongest stable 5 GHz link you can achieve; if the path forces you onto 2.4 GHz, expect the picture quality to step down when the household is busy, and consider whether the room’s real answer is a tri-band extender or a wired access point instead.
Common positioning mistakes
- Inside the dead zone: the classic error — the extender repeats a signal too weak to use.
- On the floor behind furniture: convenient, invisible and radio-hostile.
- Beside sources of interference: microwave ovens, baby monitors, cordless phone bases and Bluetooth-heavy desks all share or neighbour the 2.4 GHz band.
- Next to the router: pointless — the extended network duplicates coverage you already had.
- Judging by bars alone: bars show the extender’s signal to your phone, not the extender’s link to the router. Test speed and stability, not icons.
- Never re-testing after changes: a new bookcase, a moved router or a neighbour’s new network can all shift the ideal spot over time.
Notice that none of these mistakes involve buying the wrong product. They are free to fix, which is precisely why placement deserves a methodical hour before any money changes hands — and why, if you are still shopping, placement thinking should feed back into how to choose a wifi extender rather than raw speed classes.
The short version
Find where the router’s signal is still strong — around -60 dBm — on the way to the dead zone, put the extender there, elevated and in the open, then verify with real speed tests in the places you actually sit. Adjust one outlet at a time. That is the whole discipline, and it rescues more installations than any other advice in this cluster.
Worked example: a three-bedroom house, outlet by outlet
Picture the common layout: router in the front lounge where the line enters, main bedroom at the back, a tiled bathroom between them, hallway running the length of the house. The dead zone is the back bedroom. Candidate outlets: the lounge doorway (too close to the router — the extended signal would still have to cross the bathroom), a hallway socket midway (the signal walk shows the router still strong here, and the hallway gives the extender a line down the house that dodges the bathroom entirely), and the bedroom itself (inside the dead zone — disqualified by the halfway rule).
The hallway socket wins, as it usually does: corridors are the motorways of home Wi-Fi. Mounted at the hallway socket’s height, the extender repeats a clean signal and its own broadcast enters the bedroom through the doorway rather than through the tiled wall. Testing confirms the pattern — the bedroom’s speeds land in the healthy fraction of router-side numbers, and, just as important, they hold in the evening. The lesson generalises: draw the house’s obstacle map, find the corridor route, and let geometry do what power cannot.
Measuring properly: dBm, bars and honest speed tests
Three instruments are available to you and they are not equal. Signal bars are the worst: they describe only the hop your phone is currently using, in coarse steps, with no memory. A Wi-Fi analyser’s dBm reading is the professional instrument — a negative number where -50 is strong, -60 to -65 is the extender-placement sweet spot, and -75 or worse is a signal on its knees. Speed tests are the ground truth but the noisiest: they vary with the test server, the hour and the household’s other activity, so treat single runs as anecdotes and averages of three, at the same spot and hour, as evidence.
Use each tool for its job. The dBm walk finds candidate outlets. The extender’s link indicator confirms the backhaul at each candidate. Speed tests, run where you actually sit, deliver the verdict. Households that skip the middle instrument end up chasing ghosts — repositioning for the phone’s bars while the extender’s own link, the hop that governs everything, goes unmeasured in the corner.
The sweet spot moves: seasons, furniture and neighbours
A position that was perfect in spring can sag by winter without anything being ‘broken’. Doors that stood open get closed against the cold. A new bookcase lands on the critical wall. The neighbours replace their router and your channel plan collides with theirs. Even the household itself changes the radio environment — more bodies, more devices, a metal-framed sofa bed in the spare room. None of this is failure; it is the physics of a shared, unlicensed medium doing what it does.
The practical response is a twice-a-year five-minute ritual: glance at the extender’s link indicator, and if it has drifted from green to amber, run the short version of the signal walk and try one outlet either way. Treat the extender’s position as a tuning, not a fixture. Installations that get this minimal attention stay good for years; installations treated as fit-and-forget slowly become the household’s standing complaint, blamed on everything except the moved bookcase.
Antenna orientation, in depth
Radio waves leave an antenna in a pattern shaped like a doughnut around its axis: strongest perpendicular to the antenna, weakest off its ends. A vertical antenna therefore spreads its energy horizontally — ideal for covering one floor — and sends relatively little straight up or down. This single fact explains the classic multi-storey advice: to push signal between floors, angle one antenna toward horizontal, rotating its doughnut so the strong plane points up and down through the floor. Extenders with two external antennas earn their flexibility here: one vertical for the floor, one angled for the stairs.
Polarisation is the second-order effect: a receiving antenna aligned with the transmitting one couples best, which is why matching the extender’s antenna angles roughly to the router’s is a reasonable starting guess when both have visible antennas. Treat all of this as tuning, not law — reflections off walls and metal scramble polarisation indoors, and the analyser reading after each adjustment is the only verdict that counts. Adjust one antenna, re-measure at the dead zone, keep what helps. Five minutes of this can be worth a surprising amount of range, and it costs nothing but the walk between rooms.
Internal-antenna models remove the knobs but not the physics: the unit’s own orientation becomes the adjustment. Rotating a plug-style extender is rarely possible (the prongs decide), but a desktop unit can be turned, tilted on its stand or moved a shelf higher with real effects, and even a plug unit sometimes sits in a rotatable outlet adapter in some countries’ fittings — used safely and without straining the connection. The principle survives the form factor: the extender’s posture is part of its position, and the households that experiment with posture as well as place consistently find a better sweet spot than those that only move the box.
Positioning room by room: office, TV room, nursery, garage
The home office rewards the conservative position: a little closer to the router than the pure halfway point, because its currency is not peak speed but an unbroken day of calls. Put the extender where its link indicator is unambiguously strong, wire the work laptop or dock into its port if the desk layout allows, and accept a slightly less heroic signal at the room’s far corner — nobody works in the corner. The TV room inverts the priority: the television is fixed, so the extender positions itself for the television’s sake, ideally with line-of-sight down the room and the TV wired into the port, which removes the last hop from the equation entirely.
The nursery and children’s rooms ask for reliability at low bandwidth — monitors and cameras that must simply never drop — plus the physical common sense of keeping electronics and their lights out of the sleep environment where possible; an extender in the hallway outside serves the room while living elsewhere, and its LEDs can usually be dimmed or scheduled off at night. The garage and workshop are the opposite problem: distance, a fire door or the house’s original exterior wall, and devices (door openers, cameras, a radio) that are forgiving of speed and unforgiving of absence. Position for the garage at the house wall nearest it, high and in the open, and judge success by the opener’s reliability over a month, not by a speed test on day one.
The pattern across all four: position for the room’s actual job and its actual device, not for an abstract coverage map. A house is not uniformly needy — it has a room where income is earned, a room where films are watched, a room where a baby sleeps and a room where a door must open. The extender that serves the neediest room’s real requirement, at the real hour, is positioned correctly by the only definition that survives contact with family life.
Gear mentioned in this guide
These are examples from the product classes this guide discusses. Every model below was checked against the Amazon Creators API product pool for this site, and the link goes to the exact listing that was verified.

TP-Link Archer Air E5 — placement-friendly design
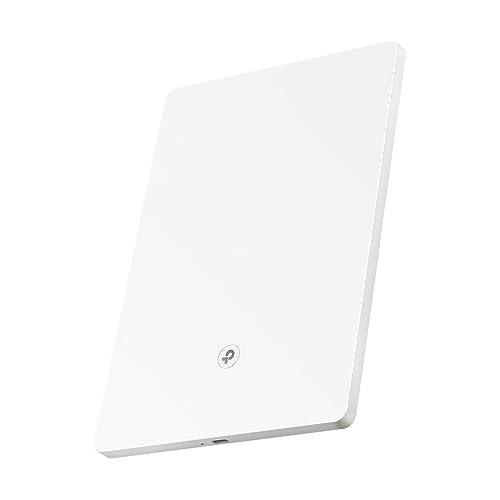
This ultra-thin wall-mounted AX3000 extender exists for the problem this guide describes: it sticks flat to a wall at proper height instead of slumping in a low outlet behind furniture, with mounting materials in the box. A reminder that form factor is a placement feature.
TP-Link RE220 — the signal-indicator classic
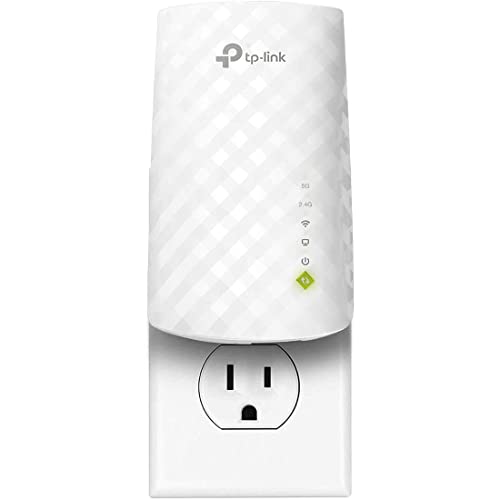
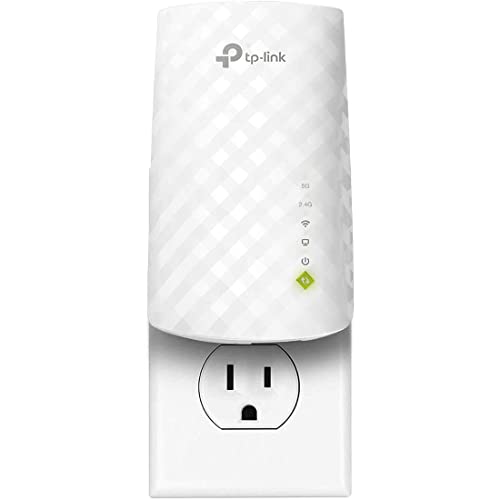
The RE220’s link light makes the signal walk in this guide quick: green means the host link is healthy, and you can iterate outlets in minutes. Its compact plug design also shows the common constraint — it lives where the outlets are, so choose the outlet deliberately.
Positioning when the router itself is badly placed
Every positioning rule in this guide assumes the router radiates from somewhere reasonable, and in many homes it does not. Provider installers put routers where the line enters the building: a front corner, a meter cupboard, behind the television in the least-used room. An extender asked to fix a whole house from that starting point is doing two jobs — escaping the router’s bad corner and crossing the home — and it will do both poorly. Before spending an afternoon micro-positioning an extender, spend ten minutes asking whether the router can move even two or three metres. A router lifted out of a cupboard, off the floor or out from behind a television often gains more coverage than any extender placement can, because every device in the home benefits, including the extender itself.
If the router truly cannot move — the fibre termination is fixed, the landlord forbids it, the only cable point is where it is — then position the extender to compensate for the router’s specific handicap rather than following the generic halfway rule blindly. A router in a front corner throws half its energy at the street; the extender belongs deeper into the home on the line toward the rooms that matter, even if that line is not the geometric middle of the property. A router low behind furniture loses its signal upward and outward through clutter; an extender placed higher, on an upstairs landing socket or a tall hallway outlet, can catch the signal that escapes over the furniture and relay it cleanly. Read the router’s prison first, then position for the gap that actually exists.
Extenders also forgive a badly placed router less as homes get smarter. A house with a few phones tolerates a marginal extender link because nothing depends on it minute by minute. A house with cameras, a video doorbell, smart heating and someone working from home punishes the same marginal link daily. If your positioning experiments keep landing on “almost good enough,” that is information: the router’s position is the bottleneck, and the durable fixes are moving the router, wiring to an access point, or stepping up to a mesh system whose first node sits by the router and whose second node you can place freely. Positioning skill matters, but it cannot repeal physics.
The doorway principle: positioning through openings, not walls
Signal prefers holes. A doorway, an open archway, a stairwell void or a hallway intersection passes far more signal than the same distance through a stud wall, and vastly more than through brick, tile or a chimney breast. Skilled positioning is therefore less about measuring metres and more about drawing lines through openings. Stand at the router and look toward the dead zone: the best extender socket is usually the one that can “see” the router through doorways and can in turn “see” the target room the same way, even if that socket is a little closer to the router or a little farther than the textbook halfway point.
Test this principle rather than trusting the floor plan. Homes surprise you: a socket that looks perfect on paper may sit behind a steel fire door that spends its life closed, while an unpromising socket near a wide archway enjoys a clean shot in both directions. Doors are part of positioning, too. A position that works with every door open and fails when the bedroom doors close at night is a position that fails when it matters most, so run your evening tests with the house in its night-time state — doors shut, heating on, everyone home and streaming. The extender does not care about your floor plan; it cares about the building as it is actually used.
Stairwells deserve special respect in two-storey homes. The open void of a staircase is a natural signal chimney between floors, and a landing socket beside it often outperforms every other upstairs position because the extender can hear the router up the stairwell and broadcast along the landing into the bedrooms. Conversely, an extender placed in an upstairs room directly above the router may struggle if the floor construction is dense, while the landing position a few metres away, fed through the stairwell opening, works effortlessly. When in doubt between two upstairs sockets, choose the one nearer the stairs and test it first.
Positioning for renters: no drilling, no rewiring, no trace
Rented homes forbid the permanent fixes, which makes positioning the whole solution — and fortunately it usually is enough. The renter’s toolkit is placement, height and furniture. If the ideal hallway socket is occupied or badly located, a short, good-quality extension lead can move an extender a metre or two along a wall or up onto a shelf edge, and that small move regularly matters more than any setting in the app. Keep the lead short and the arrangement tidy and safe, away from walkways and heat sources, and remember the goal is line of sight through doorways, not elevation for its own sake.
Furniture is the renter’s other lever. A bookcase rotated a few degrees, a metal filing cabinet moved off the router-to-extender line, a mirror-backed wardrobe no longer sitting exactly between the extender and the bedroom — these zero-cost rearrangements change signal paths as surely as new hardware does. Work the line in order: first the path from router to extender, because that link carries everything, then the path from extender to the devices. In shared houses, agree the extender’s socket with housemates and label it if necessary; an extender unplugged for a hoover and returned to a random socket is the leading cause of “it worked when you set it up” in rented homes.
Renters should also position with the next home in mind. Because you cannot know the next layout, favour the middle of the home’s traffic pattern — the hallway or landing hub — over a hyper-specific spot tuned to one room’s quirk. A hub position serves the most rooms acceptably, adapts when furniture changes, and is the position most likely to resemble the right answer in the next property too, where the same extender will need to earn its keep all over again.
Seasonal and household rhythms: why the right spot changes
A position proven in one month can decay in another without anything electronic changing. Gardens grow: a hedge or a leafy tree between the house and a garden office attenuates signal in summer that passed freely through bare branches in winter. Heating changes air and materials slightly, radiators fill and warm, and foil-backed decorations, a large Christmas tree or new insulated curtains appear exactly where signal used to pass. Neighbours change too — a new router next door on your channel, a neighbour’s own extender appearing, a house extension altering reflections — and your extender experiences all of it as a slowly shifting environment it must keep serving.
The practical response is a light-touch seasonal check rather than constant fiddling. When performance in the extended room noticeably sags and nothing in your home has obviously changed, repeat the short version of the original signal walk: check the extender’s link quality in its app, try the neighbouring socket a metre either way, and confirm the status indicator still shows a healthy router link. Ten minutes twice a year keeps a good installation good. What you should not do is chase every small fluctuation; Wi-Fi breathes with load and weather, and a position that is right on average is the correct goal.
Household rhythm matters as much as season. The extended room’s worst moment is the household’s peak: evening streaming, calls and downloads stacked together, doors closed, everyone home. A position chosen on a quiet weekday morning may be a position chosen for a house that rarely exists. Always make the final judgement at peak time, from the actual chair, desk or bed where the connection is used, with the actual device that struggled. That single discipline — testing where, when and with what the problem occurs — is worth more than any instrument you can buy.
Positioning a second extender without creating a roaming mess
Homes that outgrow one extender usually need coverage in two opposite directions: bedrooms one way, a garden office the other. Two extenders can serve this well if each is positioned as an independent spoke from the router, hearing the router directly and covering its own territory with as little overlap as possible. Position them so their coverage zones meet gently rather than stacking: heavy overlap invites devices to cling to the wrong extender and makes fault-finding miserable, because a struggling device might be attached to either unit. Distinct network names, unfashionable as they are, earn their keep in two-extender homes precisely because they let you prove which unit a device is using.
Never position a second extender inside the first extender’s coverage in order to relay onward. The daisy-chain looks tempting on a floor plan — each unit within sight of the last — but every wireless hop repeats the speed penalty and adds latency and failure modes, and the far room ends up with the worst connection in the house despite having hardware devoted to it. If a room can only be reached by relaying from another extender, that room is telling you it needs a wired feed, a powerline-fed point or a mesh node with a proper backhaul. Readers weighing those architectures will find the honest trade-offs in the comparisons with mesh systems and access points elsewhere in this cluster, and the shortlist of models suited to bigger homes in the best Wi-Fi extenders for large homes roundup.
Finally, position two extenders at different times. Install and settle the first, live with it for several days, and learn its real coverage edge by walking the home. Only then place the second to cover what genuinely remains. Homes measured this way often discover the second unit belongs somewhere entirely different from the original guess — frequently closer to the router than expected, covering a mid-home shadow the first extender revealed. Patience here is not caution for its own sake; it is how the second purchase ends up solving the real remaining problem instead of duplicating the first solution.
Micro-adjustments: the last metre often matters most
Once an extender is in the right room and the right hallway, small movements finish the job. Rotating a plug-in unit in its socket is rarely possible, but shifting it between the two sockets of a double outlet, moving it from a low socket to the higher one on the same wall, or clearing the foot of space immediately around it can each change the link quality by a visible step in the app. The reason is local clutter: a power strip full of chargers, a radiator pipe, the metal frame of a nearby appliance or even a stack of books can sit exactly in the signal’s path at one socket and miss it entirely at the next. Treat the final positioning as a search over a one-metre neighbourhood, testing each candidate for a few minutes under real use rather than judging by the instant the status light settles.
Height adjustments belong to this same fine-tuning stage. Raising an extender by half a metre — from a floor-level socket to a shelf-edge position on a short extension lead — lifts it above the furniture layer where sofas, cabinets and stored clutter absorb signal, and it frequently improves both the router link and the coverage of the target room at once. Lowering occasionally helps too, in homes where a metal-reinforced ceiling or a dense upstairs floor makes the cleaner path run underneath obstacles rather than over them. The only way to know is to test both, briefly and honestly, with the device and task that motivated the purchase.
Antenna micro-adjustment, on models that have external antennas, follows one principle: antennas radiate most strongly sideways, perpendicular to their length, so orientation should be chosen for the shape of the path. For a mostly horizontal path along a hallway, upright antennas serve well. For a path that must climb or drop between floors, tilting one antenna toward the horizontal helps throw more energy up or down the stairwell. Adjust one antenna at a time and re-test, because changing everything at once teaches you nothing about which change helped — and keep a note of the winning arrangement, since antennas get knocked whenever the unit is unplugged for decorating or cleaning.
Record the finished position properly and the work stays done. Note the socket, the height and the antenna arrangement, and take a photograph. Extenders get moved by cleaners, decorators, housemates and curious children, and a position that took an afternoon to find should not depend on anyone’s memory to restore. If performance collapses suddenly months later, that record is the first diagnostic: nine times out of ten, the extender is simply no longer where you left it, and restoring the documented position restores the network with it.
There is one positioning test that settles arguments no app reading can: the overnight test. Cameras stay connected or they do not, backups complete or they stall, and the household wakes to a network that either quietly worked or quietly failed at 3 a.m. when a cloud service retried and gave up. After any significant repositioning, let a full night and a full busy evening pass before declaring success. Extenders reveal their real quality over days, under the home’s true rhythm of doors, heating, neighbours and load, and a position that survives that rhythm has earned its socket in a way no five-minute speed test can prove.
If the overnight test fails in a position that measured well by day, suspect the variables that change after dark before moving anything: heating systems cycling, a neighbour’s network becoming busy with evening streaming, doors closing along the signal path, or a smart device that wakes at night and clings to the extender from a distant room. Adjust for the night-time house — a socket one doorway closer, a door habit changed, a band choice revisited — because the night-time house is the one the network must actually serve.
When every socket has been tried and the honest best is still not good enough, accept the verdict the house is giving you. Positioning has limits set by construction and layout, and recognising them early saves weeks of tinkering: the remaining answers are a wired access point, a mesh system with a node in the problem area, or a router relocation, each covered elsewhere in this guide cluster.
Frequently asked questions
How far from the router should an extender be?
As far as it can go while keeping a strong host link — typically where the router’s signal still measures around -60 to -65 dBm. In many homes that is one or two rooms away, not at the far wall. Use the extender’s link indicator rather than guessing distances.
Is it better to place the extender higher or lower?
Higher, within reason. Waist-to-shelf height clears most furniture and bodies. Outlets are usually low, which is why wall-mounted models and short extension leads are popular workarounds — just keep the unit ventilated and in open air.
Can an extender be too close to the router?
Yes. Very close placement wastes the purchase and can confuse roaming, with devices clinging to whichever signal they found first. If the extender is in the same room as the router, it is furniture, not infrastructure.
My only halfway outlet is in a bathroom. What then?
Avoid it — moisture and steam are bad for electronics and bathrooms are radio-hostile anyway. Move one room closer to the router or one room further along a different path; a slightly imperfect position on a dry wall beats the theoretical optimum in a tiled, steamy room.
Should the extender be in line of sight of the router?
Line of sight helps but is rarely achievable or necessary. A path down a hallway with one ordinary wall usually beats a shorter path through a tiled bathroom or chimney breast. Think in obstacles, not metres.
Does moving the router ever beat repositioning the extender?
Often. A router moved from a floor corner to a central shelf can shrink the dead zone enough that the extender’s job becomes easy — or unnecessary. Try router placement first if the router currently lives somewhere radio-hostile.
Should an extender go inside the weak room itself if there is a spare socket there?
Almost never as the first attempt. Inside the weak room, the extender receives the same feeble signal your devices struggled with, and repeating a feeble signal produces strong bars and disappointing speed. Try the hallway or doorway position first, where the router link is healthier. The exception is a room that is weak only in one corner — a large room where the far desk sits in shadow — where an in-room position near the door can work well.
How do I position an extender in a home with underfloor heating or foil insulation?
Expect floors and foil-backed materials to block far more signal than ordinary construction, and position accordingly: favour same-floor paths through doorways and stairwells over short vertical paths through the floor, and keep the extender on the same storey as the devices it serves whenever the layout allows. Test more candidate sockets than usual, because signal behaviour in these homes is spikier — one socket can be dramatically better than its neighbour a metre away.
Is a windowsill ever a good position?
Occasionally, for serving a garden or an outbuilding, because glass passes signal better than the wall around it and the extender gains a clear outward path. Weigh the downsides: direct sun overheats electronics, condensation gathers on cold glass, and the inward coverage may suffer if the window is at the home’s edge. Treat a sill as a targeted experiment for outdoor coverage — the dedicated options are compared in the best Wi-Fi extenders for outdoors roundup — not as a general-purpose position.
My extender works best in a socket I need for something else. What are my options?
Use an extender model with a pass-through socket if the device displaced is low-power and the arrangement stays tidy, or rearrange what plugs in where along that wall — the extender’s exact socket matters more than most other appliances’ does. Avoid stacking the extender on multi-way adapters or long chains of extensions, which add heat, looseness and one more thing to be knocked out of place. A short, sound extension lead to a nearby shelf is usually the cleanest compromise.
Does the extender need repositioning after I change or upgrade my router?
Often, yes, at least a quick recheck. A new router radiates differently — different antennas, different placement temptations, sometimes a different room entirely — so the old halfway point may no longer be halfway in signal terms. Repeat the short signal walk, confirm the link quality in the app, and be willing to move the extender a room closer or farther. Ten minutes of rechecking protects the whole investment in the new router.
Related Guides
Keep going with these guides and roundups from the same networking cluster: