Disclosure: As an Amazon Associate, ilcastellomenu.com earns from qualifying purchases. Product examples below link to Amazon, where you can check current availability and specifications; this guide itself lists no fixed prices because printer pricing and bundles change frequently.
Knowing how to set up a printer correctly means working in this order: unbox and remove every piece of transit tape and packing, install the ink or toner, load paper, power on and run the printer’s own initial setup, then connect it to Wi-Fi or your computer and install the manufacturer’s software before printing a test page. That sequence takes most people twenty to forty minutes, and following it in order prevents the three classic first-day problems — a printer that cannot find the network, cartridges the machine refuses to recognise, and test prints ruined by packing material left inside. This guide covers wireless, USB and Ethernet setups for home and small-office machines.
Still deciding which machine to buy? Start with How to Choose a Printer. Already connected but want the network side bulletproof? Our How to Connect to Wi-Fi a Printer guide goes deeper on Wi-Fi specifically.
Unboxing and First Power-On: How to Set Up a Printer From the Box
Manufacturers pack printers assuming rough shipping, so the machine in front of you is wearing more tape, foam and cardboard than you might expect. Finding all of it is the real first step — a missed orange tab is the single most common reason a brand-new printer errors immediately.
Remove every piece of packing
Work through the quick-start sheet’s unboxing diagram and check inside the scanner lid, the paper tray, the rear access door and the cartridge bay. Transit locks often sit under the scanner glass area on all-in-ones. Keep the box for the return window, but remove all tape before powering on.
Install ink or toner correctly
For inkjets, insert the starter cartridges until they click, matching colours to the labelled slots. For laser printers, remove the toner cartridge, rock it gently side to side to distribute toner, pull the sealing strip fully out, and reinstall. Many new inkjets then run an automatic priming and alignment routine — let it finish without interruption.
Load paper and power on
Fan the paper stack, load it print-side as marked on the tray, and slide the guides snugly against the edges — loose guides cause crooked prints and jams from day one. Connect the power cable directly to a wall outlet rather than a crowded power strip if the manual asks, then power on and complete the language, region and date prompts.
In this guide
Connecting to Wi-Fi During Setup
Most home printers join the network during initial setup, either from the printer’s screen or through the manufacturer’s phone app. Getting this right once saves every device in the house from ever needing a cable.
Use the printer's setup wizard
On screen-equipped models, open the network or wireless setup menu, choose your network name and enter the password carefully — passwords are case-sensitive and the on-screen keyboard is unforgiving. Print the network configuration page the printer offers and keep it; it records the printer’s IP address, which is gold during later troubleshooting.
App-guided and WPS setup
Screenless printers usually set up through the brand’s mobile app over Bluetooth, which hands the Wi-Fi credentials to the printer for you. WPS push-button setup also works where the router supports it: press the router’s WPS button, then the printer’s, within the time window. If setup fails repeatedly, move the printer into the same room as the router for setup, then relocate it.
2.4 GHz versus 5 GHz networks
Many printers only support the 2.4 GHz band. If your router merges both bands under one network name, setup usually still works, but if the printer cannot see the network at all, temporarily separating the bands in the router settings is the standard fix. Our roundup Best Wi-Fi Printers for Home Use favours models with painless dual-band behaviour.
Connection options compared
| Connection | Best for | Reliability | Setup effort | Sharing |
|---|---|---|---|---|
| Wi-Fi | Most homes, phones and laptops | Good — depends on signal | Moderate | Everyone on the network |
| Ethernet | Offices, printer near router | Excellent | Low once cabled | Everyone on the network |
| USB | One computer, desk-side printer | Excellent | Low | That computer only |
| Wi-Fi Direct / app | Guests, no router available | Fair | Low | One device at a time |
Installing Software and Drivers on Your Computers
A printer connected to the network is only half set up. Each computer needs the right driver or app to unlock scanning, duplexing and ink monitoring — the basic driver your operating system installs automatically rarely exposes everything.
Windows and macOS basics
Download the full software package from the manufacturer’s support page for your exact model rather than using the disc in the box, which is often outdated. During installation, choose the network connection option and let the installer find the printer. On macOS, many printers also work instantly through AirPrint for basic printing, with the vendor app adding scanning.
Adding phones and tablets
Install the manufacturer’s print app on phones and tablets, sign the printer and phone into the same network, and print a photo as a test. Apple devices can usually print immediately through AirPrint; Android devices may need the brand’s print service plugin enabled in settings.
Chromebooks and shared computers
Chromebooks print to most modern Wi-Fi printers natively once both share a network — add the printer in Chromebook settings if it does not appear automatically. For a household, finish by printing one test page from every device that will use the printer, while setup details are fresh in your mind.
USB and Ethernet Setup Alternatives
Wireless is convenient, but wired connections still win in specific situations, and knowing when to choose them prevents weeks of intermittent frustration.
When USB makes sense
A single computer beside the printer is the classic USB case: no network, no passwords, no dropouts. Connect the cable only when the installer asks — plugging in early can make Windows install a generic driver that lacks scanning. USB is also the reliable fallback when Wi-Fi setup repeatedly fails.
When Ethernet makes sense
For a printer that lives near the router or a network switch, Ethernet is the most dependable option of all: it never drops, needs no password, and every device on the network can print to it. Small offices should default to Ethernet, as the models in Best Office Printers for Small Business assume.
Switching connection types later
You can change your mind. Moving from USB to Wi-Fi usually means running the manufacturer’s connection utility or repeating the wireless setup from the printer’s menu, then removing the old USB printer entry from your computer to avoid printing to a ghost queue.
Test Prints, Alignment and First Checks
Setup is not finished when the printer appears on screen — it is finished when it produces a clean test page, a straight scan and a correct double-sided print. Spend five minutes verifying all three now.
Print and inspect the test page
Check the test page for missing colours, streaks and crooked text. New inkjets should run the automatic alignment; if yours offers a manual alignment page, complete it — misaligned heads are the main cause of blurry-looking text on new machines, and the fix is built in.
Test scan and copy
Make one copy directly from the printer’s panel. This single test verifies the scanner, the feeder (if fitted) and the print engine together without involving any computer — a trick support teams use to isolate problems, and one we reuse in How to Fix a Printer that Won T Print.
Set your defaults
While you are in the settings, choose sensible defaults: your usual paper size, duplex on for documents if supported, and draft mode off. Set the printer as the default device on each computer so family members stop printing to the old machine by accident.
Setup Problems and How to Avoid Them
Nearly every setup failure falls into a handful of categories, and all of them are easier to prevent than to diagnose later.
Printer not found during installation
Confirm the printer and computer share the same network, restart both, and temporarily disable VPN software on the computer, which commonly hides local devices. Entering the printer’s IP address manually in the installer resolves most stubborn cases.
Cartridge not recognised errors
Remove and reseat the cartridge, wipe the copper contacts gently with a dry lint-free cloth, and confirm you removed all protective tape from the contacts — but never touch the ink nozzles themselves. Starter cartridges must usually be installed for first setup even if you plan to use larger ones later.
Register, update and note the details
Run the firmware update the setup app offers, register the warranty, and photograph the model and serial label. Store the network configuration page with the manual. These five minutes are the difference between a ten-minute and a two-hour support call later, and they feed directly into the habits in How to Maintain a Printer.
Setting Up for a Household: Accounts, Sharing and Defaults
A printer serving several people needs a few deliberate choices during setup that a single-user printer does not. Making them now prevents the slow accumulation of household printing friction.
Decide who administers the printer
One person should own firmware updates, supply orders and setting changes, even if everyone prints. Shared administration is how economy modes get switched on mysteriously and paper defaults change mid-week. Note the admin app login somewhere the household can find it — a printer nobody can administer becomes e-waste early.
Set defaults per computer, thoughtfully
Each computer keeps its own defaults, so set them individually: duplex on for the document machines, photo paper presets on the family computer that prints pictures. Show each user where the quality and paper settings live; most ‘the printer is broken’ reports from family members are actually a stray draft-mode setting on one machine.
Guest printing without the password lecture
If guests print occasionally, Wi-Fi Direct or the printer’s guest/cloud print address avoids handing out your network password. Set it up once, test it with your own phone off the home network, and you will never again read a boarding pass aloud digit by digit at midnight.
Supplies from day one
Order the first replacement supply during setup week, while you know the exact model numbers, and store it near the printer. New owners consistently overestimate how long starter cartridges last — starter supplies are partially filled — and the first empty-cartridge moment always arrives mid-document.
Setup for Specific Situations
Three common situations bend the standard setup sequence in useful ways. If one of them is yours, fold its adjustments into the main routine rather than improvising afterwards.
Setting up in a dorm or shared flat
Many campus networks block device-to-device communication, which defeats normal Wi-Fi printing. The standard workarounds are USB to your own laptop, Wi-Fi Direct, or the university’s own print service. Check the campus IT guidance before assuming the printer is faulty — the printer is usually fine and the network is doing exactly what it was designed to do.
Setting up a printer for an elderly relative
Prioritise simplicity over features: complete the setup for them, set generous defaults, tape a one-line instruction (‘press Copy, then the green button’) to the lid, and enable whatever remote-status features the app offers so you can see ink levels and errors from your own phone. A printer that a relative is afraid to touch is not set up, however correctly it is configured.
Setting up a second printer
Give the new printer a clear, distinct name in every app and printer list — ‘Office Laser’ beats a second model number nobody remembers. Set defaults so each machine attracts its natural jobs: documents to the laser, colour and photos to the inkjet. Two printers fighting over the default slot is the main failure mode of multi-printer homes, and naming plus defaults prevents it.
After Setup: The First Week Checklist
Setup day gets the printer working; the first week is when its place in the household is really decided. These small follow-ups, spread across the first seven days, catch the issues that otherwise surface at the worst moments.
Day one to two: print from everything
Send one real job from every device that will ever use the printer — each computer, each phone, the tablet in the kitchen. Devices that fail now get fixed while the setup is fresh in your mind and the app passwords are still in your messages. A device discovered not to work during a deadline three months later is a self-inflicted wound.
Mid-week: the boring documents test
Print the household’s most common real documents: a multi-page document for duplexing, an envelope, a form that must align. These expose paper-guide habits, default settings and tray assignments that a photo test page never touches. Adjust defaults now, while ‘the new printer’ is still a novelty everyone is patient with.
End of week: supplies and settings audit
Check the ink or toner level after a week of enthusiastic printing — new households print heavily at first, and starter supplies shrink fast. Confirm the first replacement is on order, verify firmware is current, and photograph the printer’s network page for your records. The setup is now genuinely finished, and the printer can begin its proper career of being ignored.
Setup Verification: Proving Everything Works
Manufacturers consider setup finished when the printer joins the network. Owners should consider it finished when a short battery of proofs has passed — because each proof corresponds to a feature that will otherwise be debugged later, separately, under pressure.
The five proofs
Print a colour document from a computer; print a photo from a phone; make a copy from the panel; scan a document to a computer or phone; and print a two-sided document if the printer supports it. Five tasks, ten minutes. Together they exercise the print engine in both colour and duplex modes, the scanner in both directions, and the network from two kinds of device.
Record the baseline
Keep the colour document proof and note the date, the supply levels and the firmware version. This baseline is the comparison point for every future ‘it doesn’t print like it used to’ conversation, and it costs nothing but a folder. Owners who keep baselines troubleshoot in minutes; owners who rely on memory troubleshoot in adjectives.
Teach the household while it is new
Walk every user through the three things they will actually do — print, copy, and what to do when paper runs out — while the printer is still a novelty. Questions asked in setup week are free; the same questions during a homework deadline are not. Leave the quick-start sheet with the printer for the questions nobody asks out loud.
Gear for This Guide
The examples below come from our verified product pool and illustrate the printer classes discussed in this guide. They are examples, not a ranked list — use the criteria in this article to judge any model, including newer revisions of these machines.
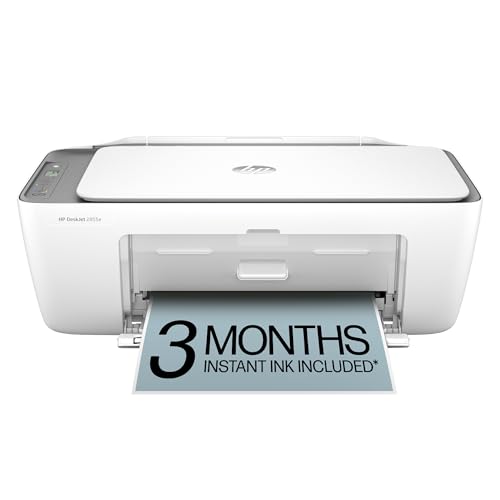
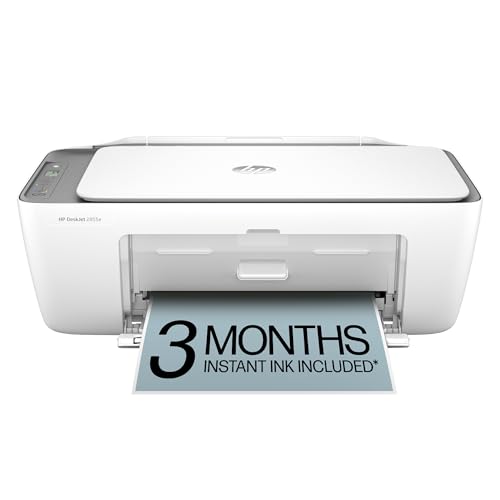
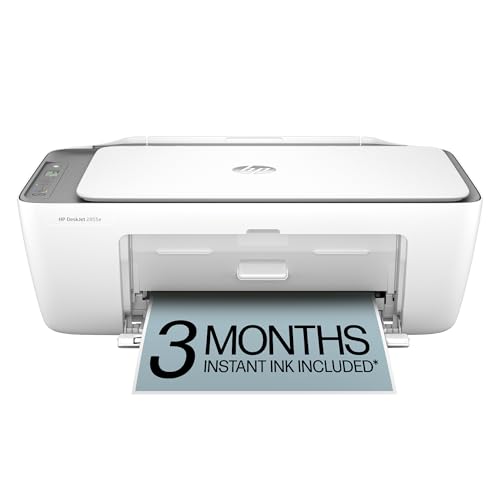
HP DeskJet 2855e
A representative compact home all-in-one whose app-guided wireless setup mirrors the phone-led process described above — typical of current entry inkjets. HP DeskJet 2855e — Check on Amazon

Brother MFC-J1010DW
A representative wireless all-in-one with a colour display, useful for comparing screen-led Wi-Fi setup against app-led setup when you shop. Brother MFC-J1010DW — Check on Amazon
Placement Decisions to Make During Setup, Not After
Setup guides treat placement as a preliminary, but the decisions you make in the first hour tend to become permanent, so make them deliberately. Put the printer on a surface that does not wobble: a shaking desk telegraphs vibration into the mechanism, blurs nothing in normal printing but loosens covers and rattles trays, and makes scanning from a feeder measurably less straight. Leave the manufacturer’s recommended clearance behind and above the machine for heat and for the scanner lid, and check the full travel of every moving part — tray extensions, rear feed flaps, the lid with a thick book under it — before you push the machine back against the wall and declare it installed.
Think about the paper’s home at the same time. A printer set up beside its paper supply, stored flat in the wrapper or a drawer, gets fed fresh dry sheets; a printer whose paper lives across the room or in a damp cupboard gets fed whatever someone grabbed last month. Decide where printed output will land, too, especially for a shared machine: a clear landing zone beside the printer prevents the slow drift of other people’s documents into a mixed pile, which is how confidential pages walk away and urgent ones get recycled unseen. Finally, route the power cable so it cannot be kicked out mid-print, plug into a surge-protected outlet if the machine will stay permanently connected, and avoid smart plugs that cut power abruptly, because inkjets in particular want to shut down through their own routine so the printhead parks and seals correctly.
Setting the Defaults Properly: The Twenty Minutes That Save Years
Factory defaults are chosen to make a first test page look impressive, not to match your life. During setup, while you are already in the menus, set the defaults you will actually live with. Confirm the paper size matches your region and the stock you loaded — a mismatch between the driver’s assumed size and the tray’s real contents is the single most common cause of scaled, clipped or oddly margined prints in a new installation. Set the tray’s paper type honestly as well: the machine adjusts ink coverage, drying pauses and fusing temperature based on that setting, and telling it plain paper when you have loaded something heavier invites smearing that looks like a hardware fault.
Quality, duplex and quiet defaults
Choose a sensible everyday quality level as the default — standard rather than maximum — and reserve the highest settings for final copies and photographs, because maximum quality on every draft wastes ink and time without visible benefit on text. If the machine has automatic two-sided printing and most of your work is documents, consider making duplex the default and single-sided the deliberate exception; you can always override per job, and the paper saving compounds quietly. Set sleep and auto-off behaviour to suit the household: a printer that sleeps deeply saves power but takes longer to produce the first page, while one that never sleeps is ready instantly and, for inkjets, keeps its head maintenance routines running. Enable quiet mode on a schedule if the machine offers scheduled quiet hours and it lives near bedrooms. Every one of these settings can be changed later, but in practice almost nobody does — which is exactly why setup day is the day to set them.
Setting Up Scanning Properly: Destinations, Formats and File Names
Most people finish setup having tested printing and copying, then discover scanning weeks later when a deadline demands it. Set scanning up now, while the software is fresh in your mind. Create the destinations you will actually use: a folder on your main computer, an email address for quick sends, and a cloud folder if your household shares documents that way. Test each destination with a real document, because scan-to-email in particular fails silently in many installations until outgoing mail settings are confirmed, and discovering that during a house purchase is miserable.
Formats, resolution and naming conventions
Choose defaults with intent. Scan documents as PDF at a moderate resolution — high enough that small text stays crisp, low enough that files stay emailable — and photographs as JPEG or TIFF at a higher resolution, because re-scanning a photo later is often impossible once the original is returned or filed away. Turn on text recognition (OCR) for document destinations if your software offers it, so the resulting PDFs are searchable; the difference between a folder of searchable scans and a folder of picture-only scans is the difference between an archive and a pile. Finally, set a file-naming pattern that includes the date automatically, and agree a simple household convention for the rest of the name. Future-you, searching for a warranty scan at midnight, will be grateful. If scanning is a major part of why you bought the machine, compare your model’s feeder and software against the expectations set in our roundup of the best printers for scanning while exchanges are still easy.
Setting Up for a Mixed Household: Different Computers, Phones and Guests
A setup is not finished when one computer prints; it is finished when every regular device prints and the occasional guest can be accommodated without an IT project. Work through the household systematically: each laptop and desktop gets the full driver package if its owner scans or needs advanced options, or the lightweight built-in driver if they only print. Phones and tablets usually need nothing more than being on the same network, but test each one anyway, because a phone connected to a guest network or a 5 GHz band the printer handles poorly will fail in ways that look mysterious later.
Guest printing without sharing your passwords
Decide in advance how visitors will print. Options include printing from the guest’s phone via the printer’s own direct wireless mode, receiving the file by email or message and printing it for them, or enabling the manufacturer’s cloud-print address so a guest can send a document to the printer’s unique email. Each has a privacy balance: direct modes keep everything local, cloud addresses are convenient but route documents through a service. What you should not do is hand out your main Wi-Fi password to every visitor purely for printing, or leave the printer’s direct mode permanently discoverable with no PIN where the model lets you set one. Write the chosen guest method on the same card as the network details and keep it near the printer.
Security Setup: Do These Steps While the Manual Is Still Open
A new printer joins your network with factory settings that favour easy installation over safety, and setup day is when that balance should be corrected. Change the administrator password on the printer’s embedded web page from its default — often the device serial number or a blank — to something stored in your password manager. That admin interface controls network settings, scan destinations and address books, and on a shared or small-office network it should not be open to anyone who connects.
Update the firmware once during setup, using the manufacturer’s tool or the printer’s own update function, and let it finish without interruption. Then review the services the machine offers and switch off the ones you will not use: unused network protocols, unused cloud connectors, and remote access features all shrink the surface you have to think about. Confirm the printer is on your main network rather than exposed through any router feature that forwards it to the internet — home printers should essentially never be directly internet-facing. If your router supports a separate network for smart-home gadgets and your printing still works reliably from your computers across that arrangement, it is a reasonable home for a printer; if cross-network printing proves flaky, keep the printer on the main network and rely on the password and firmware hygiene instead. Security that breaks printing gets disabled by frustrated households, so choose the arrangement you will actually keep.
Setting Up Supplies Monitoring So You Never Run Dry Mid-Job
The moment a printer is new, its supplies are full and the question of replacements feels distant — which is precisely why setup day is the right time to build the system. Note the exact supply part numbers for your model, including the high-yield versions, and keep that note with the printer’s paperwork or in its web interface if it allows custom labels. Enable low-supply warnings in the driver and the manufacturer’s app, and set the warning threshold generously if you can: a warning at a quarter remaining gives you time to order calmly; a warning at nearly empty gives you a deadline.
Decide where the spare lives. One spare set, stored sealed, upright and in the same room conditions as the paper, turns a supply emergency into a two-minute swap. Avoid stockpiling far beyond one spare set, especially inkjet cartridges and tank ink beyond the next refill, because supplies age, warranties on them expire, and a printer replaced early leaves you with expensive orphans. If your model participates in a subscription or auto-delivery programme and your volume is steady, setup is the moment to evaluate it with real numbers rather than at the panicked moment of an empty cartridge. Readers still deciding between supply systems will find the ownership maths in our ink tank versus cartridge comparison directly relevant to this choice. Finally, photograph or file the receipt and warranty details now, and register the product if registration extends support or simplifies future claims in your region.
Setting Up Special Media: Envelopes, Labels, Card and Photo Paper
The main setup proves plain paper; real life adds everything else. Before the first time it matters, configure the special media you know you will use. Load a single envelope using the guides in the tray or rear feed, set the paper type to envelope in both the printer menu and the driver, and print a test addressed to yourself. Envelopes fail more often from a skipped paper-type setting than from any mechanical cause, and a calm test today prevents a crumpled invitation the night before a wedding. Repeat the pattern for labels — always through the path your manual recommends, usually the straightest one, and never a sheet with labels already missing — and for the heaviest card you expect to run, confirming the machine feeds it without strain and the print adheres properly.
For photo paper, create and save a preset: the correct paper type, the highest sensible quality, and borderless enabled only if you actually print borderless, since borderless modes crop a small margin of the image by design. Save each of these as named presets in the driver where the software allows it — “Envelope,” “Labels,” “Photo glossy” — because a preset chosen in one click gets used correctly, while a half-dozen settings remembered imperfectly get skipped under time pressure. Note the maximum paper weight your manual specifies and write it on the printer’s paperwork; exceeding it is a common cause of feed failures that owners misdiagnose as breakdowns. Fifteen unhurried minutes of media setup converts the printer from a plain-paper appliance into the machine you actually bought.
Replacing an Old Printer: Migrating Without Losing Your Settings or Your Mind
Many setups are replacements, and replacements carry baggage the first-time setup never faces. Before the old machine leaves, harvest what it knows: photograph its control-panel settings if it held anything customised, note the presets and paper profiles you relied on, and export or write down scan destinations and address-book entries, because none of that transfers automatically to a different model and some of it will not transfer even within the same brand. Print a final configuration page from the old printer if it offers one; it records network details and totals that answer questions you will otherwise be asking a machine that is already in a recycling centre.
Install the new printer alongside the old one rather than swapping in place. Give it a distinct name, connect it, and run both in parallel for a few days of real work. That overlap lets you compare output on your own documents, fall back instantly if the new machine has an early fault, and discover workflow differences — a scanner that files to a different folder, a driver that buries the duplex option — while the familiar machine still covers deadlines. Only when the new printer has handled a representative week should you remove the old one’s queues from your computers; stale queues for departed printers are a leading cause of “sent to the wrong printer” and phantom offline errors months later.
Supplies deserve a decision at the same moment. Unopened supplies for the old model can often be returned if you are inside the retailer’s window, or passed on with the machine if you give it away; opened cartridges and part-used toner have little value and should travel with the printer to its next home or into the manufacturer’s recycling scheme. If the old printer still works, the kindest and most useful destination is a person or group who will actually print with it regularly — a student, a community office, a family member setting up a first home office — because an inkjet stored “just in case” quietly dries into scrap, while a working machine in weekly use stays alive. Wipe the old printer’s stored data with a factory reset before it leaves, as the security section above advises, and include its power cable and a note of its supply part numbers: the small courtesies that make a second-hand setup easy rather than an archaeological dig.
What to keep from the old installation
Keep the paperwork habit, not the paperwork pile: retain the new machine’s receipt, warranty terms and supply numbers in the same folder or note where the old printer’s lived, so the household’s printer knowledge survives the swap. Keep also any genuinely universal accessories — a good USB cable, a ream of the paper the household standardised on — and let model-specific extras go with the old machine. The goal at the end of a replacement setup is a single, clearly named, fully tested printer that every device in the house can reach, with the old installation’s queues, confusion and half-remembered settings retired along with its hardware.
Frequently Asked Questions
My new printer is asking to update firmware during setup. Should I let it?
Yes, once, during setup, provided the printer is plugged into a reliable power outlet and you let the process finish completely without switching the machine off or printing. Firmware updates during the first setup fix early bugs, add support for newer operating systems and phones, and occasionally improve supply recognition. The cautions are simple: never interrupt an update, never start one during a power cut or storm, and after it completes, print a test page and check your settings survived — occasionally an update resets defaults such as paper size, which is far easier to spot on setup day than a month later.
The printer set up in the wrong language or region. Can I change it?
Almost always, yes. Language is a display setting found in the setup or preferences menu on the printer’s screen, and changing it does not affect printing. Region matters more because it governs default paper sizes and, on some brands, which supply cartridges the machine will accept — cartridges are sometimes region-coded. If you bought the printer in your own country, the region will already be correct. If you imported it, set the region before buying spare supplies, and be aware that changing region on some models requires a manufacturer support procedure, which is one more reason to buy printers through channels in your own market.
Can I set up a printer without an internet connection?
Yes. A USB connection to one computer needs no internet at all beyond downloading the driver in advance, and Wi-Fi setup on a home router works on the local network even if the broadband behind it is down. What you lose without internet is the cloud layer: manufacturer apps that rely on accounts, cloud print addresses, remote printing from outside the home, and automatic firmware updates. Download the full driver package somewhere with a connection first if the installation computer has none, and skip any setup step that demands account creation — most manufacturers allow local setup without an account, even when the app presents it as the default path.
I have two printers on the same network. How do I stop confusion?
Rename both machines with clear, distinct names in their settings and in each computer’s printer list — room-based names such as “Hall laser” and “Study inkjet” prevent the classic error of sending a document to the wrong floor. Set the household’s everyday machine as the default on each computer, and remove stale entries for printers you no longer own, because old queues are where “the printer won’t print” mysteries breed. If both machines are the same model, the rename matters even more, since identical model names in a list are an invitation to pick the wrong one every time.
How long does it take to set up a new printer?
Typically twenty to forty minutes including software on the first computer. Adding each extra computer or phone takes a few minutes once the printer is on the network.
Should I use the disc that came with the printer?
No — download the current full software package from the manufacturer’s support site for your exact model. Discs are frequently several versions old.
Why can't the setup find my printer on Wi-Fi?
Usually a band or network mismatch: confirm both devices use the same network, check whether the printer needs the 2.4 GHz band, restart the router, and try entering the printer’s IP address manually.
Do I need to install software on every computer?
For full features like scanning, yes — install the manufacturer’s package on each machine. Basic printing may work through built-in AirPrint or Windows drivers without it.
My new printer says the cartridge is not recognised. What now?
Power off, reseat the cartridge until it clicks, check for leftover protective tape on the contacts, and wipe the contacts with a dry lint-free cloth. Use the starter cartridges for first setup if the manual requires them.
Can I move a USB printer to Wi-Fi later?
Yes. Run the wireless setup from the printer menu or the manufacturer’s connection utility, then delete the old USB printer entry from your computer’s printer list to avoid confusion.
Do I need an internet connection to set up a printer?
You need internet to download full drivers and firmware updates, and some apps ask you to create an account. The printer itself can print over your local network or USB without internet once set up, though cloud features will not work.
Should I update the firmware during setup or later?
During setup is ideal — you are already in the app, the printer is on stable power, and early firmware often contains the setup and connectivity fixes that make the first weeks smooth. Never interrupt a firmware update once it has started.
My printer came with a CD but my computer has no drive. What do I do?
Ignore the CD entirely. Download the current full software package from the manufacturer’s support page for your exact model; it is newer than the disc and contains everything the disc had.
How long should a full printer setup take, start to finish?
For a straightforward home installation — unboxing, supplies, Wi-Fi, one computer, one phone, test print, copy and scan — plan on thirty to sixty unhurried minutes, most of it waiting for software to install and the machine to run its first alignment. Add time for each extra computer, for special-media presets, and for any network complication such as a mesh system that needs the printer steered to the right band. Rushing rarely saves time overall: the skipped test scan or the unrecorded network report has a way of demanding its minutes back, with interest, on the evening something urgent needs printing.
The Bottom Line
Unpack fully, install supplies, load paper, connect, install the full software, then prove the setup with a test print, a copy and a print from your phone. Do those steps in order and a new printer goes from box to boring reliability in under an hour — which is exactly what a printer should be.
Related Guides
Keep exploring with these guides and roundups from the same printers collection: