Disclosure: As an Amazon Associate, ilcastellomenu.com earns from qualifying purchases. Product examples below link to Amazon, where you can check current availability and specifications; this guide itself lists no fixed prices because printer pricing and bundles change frequently.
Knowing how to fix faded printer prints starts with identifying the pattern: uniformly light pages usually mean low ink or toner, an economy/draft setting, or a supply near its end; faded patches and streaks point to clogged nozzles, a dirty laser window or uneven toner distribution; and one faded colour signals that colour’s supply or nozzles specifically. The fixes follow the pattern — check levels and settings, gently rock a laser toner cartridge to redistribute toner, run one inkjet cleaning cycle, and verify the paper setting matches the paper. This guide diagnoses by pattern so you apply the right fix instead of replacing parts at random.
If pages are also streaky or missing lines entirely, pair this with How to Unclog a Printer; if the printer will not print at all, start at How to Fix a Printer that Won T Print.
Read the Pattern First: How to Fix Faded Printer Prints by Symptom
Fading is a symptom with several distinct diseases. Spending sixty seconds classifying your faded page saves you from the classic error — buying new cartridges for a settings problem.
Uniformly light across the whole page
The page is readable but pale everywhere. Suspects, in order: economy or draft mode switched on, ink or toner genuinely low, a paper-type mismatch, or (on lasers) a dirty scanner window or a toner-saving setting buried in the driver. This pattern is the most fixable of all.
Fading in bands, streaks or one side
Light bands across the page, one edge paler than the other, or streaks that repeat at regular intervals point to physical causes: partially clogged nozzles on inkjets, uneven toner distribution or a worn drum on lasers, or a dirty printhead area. Regular repeating intervals are a fingerprint — the spacing corresponds to a roller or drum circumference.
One colour faded, others fine
On colour machines, a single washed-out colour isolates the problem to that colour’s cartridge, tank or nozzle row. Black text staying dark while colour photos look anaemic is the classic presentation, and the fix targets that one supply, not the whole set.
Faded only on certain paper
If plain-paper prints look fine but photo or specialty paper looks pale (or the reverse), the paper setting is wrong for the media. The printer lays down ink or toner amounts based on the selected paper type; a mismatch starves or floods the page. This pattern costs nothing to fix.
In this guide
Check Settings Before Supplies
Software causes more fading than hardware, and every settings fix is free. Run this checklist before spending anything.
Draft, economy and toner-save modes
Draft mode (inkjet) and EcoMode/Toner Save (laser) deliberately use less ink or toner to make supplies last. They are excellent for internal drafts and terrible for anything you hand to another person. Check both the printer driver and the printer’s own menu — either can hold the setting.
Paper type and quality settings
Set the paper type to match what is loaded and the quality to at least standard for final documents. A ‘plain paper’ setting driving glossy photo paper under-inks dramatically; the reverse mismatch wastes ink and smears. These two dropdowns explain a large share of all faded-print reports.
Grayscale and 'black only' traps
Documents designed in colour but printed in grayscale can look washed out because light colours convert to light greys. If a specific document fades while others print well, print a system test page: a good test page convicts the document or its application settings, not the printer — a distinction How to Choose a Printer also stresses when judging demo prints in stores.
Faded prints diagnosed by pattern
| Fading pattern | Likely cause | First fix |
|---|---|---|
| Whole page uniformly light | Draft/eco mode, low supply, paper mismatch | Check settings, then levels |
| One side lighter | Uneven toner distribution | Rock toner cartridge gently |
| Bands or repeating streaks | Clogged nozzles or drum issue | Nozzle check / inspect drum (no touching) |
| One colour washed out | That colour’s supply or nozzles | Check that supply, clean that colour |
| Only on photo paper | Paper-type setting wrong | Match setting to loaded media |
| Only one document | Light colours in the file itself | Print a test page to confirm |
Inkjet Fixes for Faded Output
On inkjets, fading means ink is not reaching the paper in full quantity: supplies are low, nozzles are partially blocked, or the head needs alignment. Work through them in this order.
Levels first, then a nozzle check
Confirm the faded colour’s level is not at the bottom — estimates can lag reality, especially with refilled or third-party cartridges. Then print a nozzle check: gaps in the pattern confirm partial clogging as the cause and give you a baseline to measure the fix against.
One cleaning cycle, then alignment
Run a single head-cleaning cycle and re-check the nozzle pattern, following the restraint described in How to Unclog a Printer — repeated cycles waste the ink you are trying to save. If the pattern is complete but prints still look soft or pale, run the printhead alignment utility; misaligned heads scatter droplets and read as fading.
Cartridge-specific causes
A cartridge that has sat nearly empty can deliver pale prints before it admits defeat, and a newly installed cartridge with its vent tape still sealed will starve the head. Check the vent, reseat the cartridge, and if a third-party cartridge is involved, test with a known-good one before blaming the printer — the supply-quality point made in How to Maintain a Printer.
Laser Fixes for Faded Output
Laser fading has its own classic trio: toner distribution, toner level and optical dirt. All three are user-fixable without tools.
Rock the toner cartridge
Remove the cartridge and rock it gently side to side several times to redistribute the toner powder evenly, then reinstall. This is the famous temporary cure for one-sided fading and it genuinely works — but treat it as a diagnostic and a short reprieve: if rocking restores darkness, the cartridge is near its end and a replacement should be on order.
Check the drum and transfer areas
On models with a separate drum, a worn or light-damaged drum fades prints in repeating patterns. Never touch the drum’s surface and keep it shielded from bright light while it is out. If your cartridge integrates the drum, replacing the cartridge replaces the drum with it — one reason integrated designs are easier to troubleshoot.
Clean the laser window (where the manual allows)
A dust-filmed laser scanner window dims the beam uniformly, fading the entire page evenly — the laser twin of a settings problem. Some models provide a cleaning tool or describe wiping the window with a dry lint-free cloth; follow How to Clean a Printer and your manual, with the printer unplugged and cooled, and only where the manufacturer provides access.
Paper, Environment and Document Causes
Sometimes the printer is innocent. Paper condition, room environment and the document itself all modulate how dark a print looks.
Damp paper prints pale
Paper that has absorbed moisture accepts ink unevenly and interferes with toner transfer and fusing, producing light, sometimes blotchy output. Try a fresh stack from a sealed ream before any other fix — this five-second test is the most skipped step in fading diagnosis, and it connects to the storage rules in How to Fix Printer Paper Jams.
Extreme environments
Very cold supplies, a printer in a chilly room, or high humidity all nudge output lighter. Let a cold cartridge reach room temperature before judging it, and store supplies as the maintenance guide describes.
The document itself
Light-grey text in the source prints light-grey — obvious, yet routinely investigated as a printer fault. Print a test page and a different document; if both are bold, your printer is fine and the original file’s colours or transparency effects are the cause.
When Fading Means Replacement
Persistent fading after settings, supplies and cleaning have all been addressed is the printer communicating wear. Read it correctly and you will spend money once, in the right place.
The substitution test
The decisive experiment is a fresh, genuine cartridge or toner in the suspect colour. If output returns to full density, the old supply was the fault — case closed. If fading persists identically, the machine (printhead or drum path) is at fault and further supply purchases are waste.
Inkjet printhead wear
On inkjets with permanent heads, a head that stays faded after cleaning, alignment and fresh ink is failing. For inexpensive printers that means replacement of the machine; for higher-end photo models, a service assessment may be worthwhile — the same economics discussed in best inkjet printers for photos upgrade paths.
Choosing the replacement well
If fading ends your printer’s career, let the autopsy inform the purchase: chronic clog-fading argues for a laser next time; supply-cost fading argues for a tank inkjet. The criteria framework in printer buying guide turns that lesson into a checklist.
Fading in Photos vs Documents: Different Standards
A print can be technically fine and still look faded to its owner, because documents and photographs are judged by different eyes. Separating the two prevents unnecessary repairs and unnecessary tolerance alike.
Documents: density is the standard
For text, fading means measurable lightness — grey instead of black. The causes in this guide apply directly, and the test page is the judge. If the test page is bold, a ‘faded’ document is a file problem: light font colours, transparency effects and draft settings in the application are the usual authors.
Photos: contrast and colour balance
Photos that look washed out often suffer from paper and profile mismatches rather than low ink: plain-paper settings on photo paper, the wrong side of the paper loaded (photo paper prints on one side only), or a colour that is partially clogged and quietly shifting the balance. Print the nozzle check, confirm the paper’s print side, and match the paper setting before concluding anything about supplies.
The reference-print habit
Keep one good print — a photo or a rich document page — from when the printer was healthy, stored away from light. When output ‘seems’ faded months later, printing the same file and comparing removes all doubt about whether anything changed, and the comparison’s pattern tells you which colour or density moved.
Long-Term Print Fading: When the Page Itself Ages
Not all fading happens at print time. Some prints leave the printer perfect and fade on the wall, in the album or in the filing cabinet — a different problem with different cures.
Light is the main enemy
Dye-based inkjet prints fade fastest in sunlight and bright display conditions; pigment inks and laser toner are far more stable. For prints that will hang or display, pigment-based printing on quality paper is the durable combination, and framing behind UV-filtering glass extends life further.
Paper quality decides decades
Acidic, cheap paper yellows and weakens, taking the image with it. For documents and photos that must last — certificates, family archives, business records — decent paper is not a luxury; it is the medium the print lives in. The printer gets the credit, but the paper does the lasting.
Thermal prints are temporary by design
Receipts and direct-thermal labels fade with heat, light and time, as their technology dictates. Scan or photograph anything thermal that you need to keep — a warranty receipt, a shipping record — at the moment you receive it, because no storage method fully stops the chemistry.
Setting Up a Simple Print-Quality Routine
Fading is easiest to fix when it is caught at the ‘slightly light’ stage rather than the ‘illegible’ stage. A tiny routine, folded into normal printer care, keeps you permanently in the easy stage.
A monthly quality glance
Once a month — when you wipe the glass and check levels — print the test or nozzle-check page and actually look at it. Thirty seconds. Bands, gaps or overall lightness at this stage respond to the gentlest fixes in this guide: a setting, a cartridge rock, a single cleaning cycle.
Keep the reference set
File that monthly test page, dated, with your printer records, alongside the healthy reference print described earlier. A sequence of dated test pages turns ‘it has been getting worse’ from a feeling into a visible trend, and trends point at causes: gradual and even suggests supplies or drum; sudden suggests a change you made.
Respond in proportion
Slight fading gets settings checks. Persistent fading gets the substitution test. Only fading that survives a fresh genuine supply earns a repair conversation. This proportionality is the whole skill — most owners either ignore fading until it is severe or replace supplies at the first pale page, and both responses waste money in opposite directions.
Colour-Specific Fading: A Short Field Guide
When one colour fades, owners often replace the whole supply set — the most expensive possible response to the most localised fault. This field guide keeps the response proportional, colour by colour.
Read the nozzle check by colour
The nozzle-check pattern is printed in separated colour blocks for exactly this purpose. A complete black block with a broken magenta block is a signed confession: your problem is magenta’s supply or nozzles, and cyan and yellow are innocent bystanders whose replacement buys nothing. Diagnose per colour, spend per colour.
The least-used colour fades first
In most households one colour — often the one absent from the family logo, the school colours and the usual photos — sits idle longest and clogs or settles first. If your fading always involves the same colour, that pattern is your printing’s fingerprint, and the prevention is a periodic all-colour test print that exercises every channel equally.
When a colour prints the wrong hue instead of fading
A colour that prints but shifts — greens going muddy, skin tones going magenta — usually means one channel is partially blocked rather than empty, distorting the mix. The same nozzle check identifies it. Treat hue shifts as fading’s sibling: same diagnosis path, same fixes, same substitution test if cleaning does not restore the pattern.
Gear for This Guide
The examples below come from our verified product pool and illustrate the printer classes discussed in this guide. They are examples, not a ranked list — use the criteria in this article to judge any model, including newer revisions of these machines.
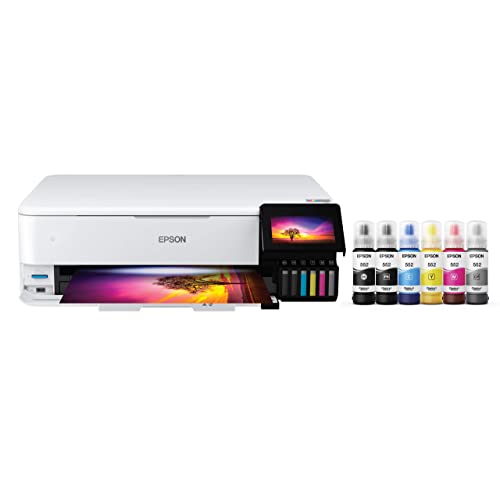
Epson EcoTank Photo ET-8550
A representative six-colour photo tank printer: when a colour fades here, the tank window and per-colour nozzle check make the pattern diagnosis in this guide straightforward. Epson EcoTank Photo ET-8550 — Check on Amazon

Canon imageCLASS MF656Cdw
A representative colour laser: its integrated cartridge-and-drum design means the substitution test replaces both suspects at once. Canon imageCLASS MF656Cdw — Check on Amazon
The Test Matrix: Four Prints That Isolate Any Fading Fault
Fading invites random part-swapping because everything in the chain can cause it, so replace guessing with a matrix of four controlled prints, each changing exactly one variable. Print one: the printer’s own built-in test or demo page, on the paper already loaded. This is the machine’s confession about itself, made without your computer, driver or document anywhere in the chain. Print two: the same built-in page, or your own test document, on fresh paper from a newly opened ream. Comparing one and two isolates the paper — if the fresh sheet prints boldly, your loaded stack was the culprit and no supply needs buying. Print three: your own document from your usual application, on the fresh paper. If the built-in pages are strong and this one is pale, the fault lives in the document or application’s settings — a draft mode, a light font, a washed-out source file — and the printer stands acquitted. Print four: a different document, ideally a freshly typed page of ordinary text, from a different application. If three is pale and four is bold, the original file itself is faded at the source, as scans of old documents and screenshots so often are.
Read the matrix as a technician would. Fading present in all four prints, including the machine’s own page on fresh paper, is a genuine printer-side fault, and the technology-specific sections of this guide — supplies, nozzles, drum, transfer — become the territory. Fading that appears only when your computer is involved is a settings fault, and no cartridge will cure it. Fading confined to one document is not a fault at all but a property of the file, curable only by improving the source. Ten minutes and four sheets purchase that certainty, and they protect you from the classic fading tragedy: a new cartridge fitted, the old one binned, and the prints exactly as pale as before because the fault was a checkbox in a print dialogue all along.
The Hidden Economy Settings: Every Place a Printer Learns to Print Pale
Modern printing stacks contain at least four separate places where an economy or draft setting can live, and a fading complaint often requires auditing all of them, because switching one off leaves the others quietly rationing your ink or toner. The printer’s own panel or web settings may hold a toner-save or eco mode that persists across every job from every device — the first suspect when all devices print pale. The driver on each computer holds its own quality and economy choices, and they can differ per computer, which is why one laptop prints boldly and another palely to the same machine. The application’s print dialogue adds a third layer, with its own draft and ink-saving options in some programmes, and a fourth hides in presets: a saved preset named innocently — “Everyday,” “Fast” — may carry a draft quality setting inside it, reapplied faithfully each time the preset is chosen by habit.
Audit them in that order — machine, driver, application, preset — changing nothing else between test prints, and print the machine’s own page after the first step to see whether the machine-level setting was the whole story. Add two modern complications to the audit. Operating systems increasingly offer their own simplified print interfaces, which may not expose the manufacturer’s quality settings at all and can default to economical behaviour the full driver would not choose; if fading arrived when you started printing through a new simplified dialogue, install and use the manufacturer’s driver for the test. And check for a mismatch between the paper type the driver believes and the paper loaded: a driver set to a heavy or glossy stock drives a laser’s fusing and an inkjet’s ink limits differently, and plain paper printed under a wrong, restrictive profile can emerge convincingly faded. Settings faults are unglamorous, which is precisely why they outlast supply changes — nobody suspects the checkbox after buying a cartridge.
Calibration Routines That Restore Density
Beyond the one-off fixes sit calibration routines that many owners never run, because they live in maintenance menus with uninviting names, yet two of them speak directly to fading. Laser printers periodically calibrate themselves — adjusting toner density and colour registration against internal references — and a machine whose calibration has been interrupted, disabled or simply drifted can print uniformly pale while every supply is healthy. Find the calibration or density adjustment in your model’s maintenance menu or driver utilities, run it on plain paper with the machine warmed up, and print the test matrix’s first page again; a visible deepening after calibration reclassifies the whole episode from dying supplies to drifted settings. Some business models also expose a manual density control; if yours does, change it in small steps with a test print between, and return it to the middle once the underlying cause is fixed, because a density control cranked to maximum to compensate for a dying cartridge will print grotesquely dark through its healthy replacement.
Inkjets answer with alignment and paper-feed calibration, which affect fading more than owners expect. A misaligned head lays its droplets slightly off their intended positions, and at text sizes the eye reads that scatter as greyness — the ink is all there, merely distributed where it blurs rather than where it would darken. Run the alignment utility whenever text looks woolly-pale rather than cleanly light, and after any cartridge change, move or jam that involved force. The deepest calibration, on photo-capable models, is the paper-specific profile work from the colour sections: the right profile for the actual stock restores the density that a wrong profile was rationing. Calibration rarely tops the list of fading suspects, which is exactly why it resolves the stubborn minority of cases that survive new supplies and clean nozzles.
When the Source Is Faded: Documents, Scans and Screenshots
A meaningful share of fading complaints are the printer faithfully reproducing a pale original, and recognising them saves real money. Scanned documents carry the sins of their capture: a page scanned at low contrast, or a scan of a photocopy of a photocopy, arrives at the printer with its blacks already grey, and no printer setting can invent the darkness the file never contained — the honest fixes are at the source, rescanning the original with better settings or adjusting the file’s levels so its darkest tones become true black. Screenshots print pale by design more often than users realise: interface greys, light text on tinted backgrounds and anti-aliased small fonts are composed for glowing screens, and on paper, without the screen’s light behind them, they wash out. Documents authored in deliberately light fonts — the elegant thin typefaces that design tools favour — print exactly as designed, which is to say faintly at reading sizes.
Test for source fading with the matrix’s fourth print: a freshly typed page in an ordinary font. If it prints boldly, stop maintaining the printer and start improving the file. For scans you must live with, most scanning and PDF software offers a contrast or threshold adjustment that deepens greys toward black; apply it to a copy, never the only original file. For documents you author, choose body fonts with genuine weight for anything destined for paper, and be suspicious of any text whose colour is specified as a grey percentage — what looks like sophisticated charcoal on screen prints as apology on paper. The printer’s job is fidelity, and sometimes the most useful troubleshooting verdict is that it has been doing its job all along, reproducing a pale file with perfect accuracy.
Measuring Fading Objectively: The Reference Print Method
“Faded” is a comparison pretending to be a property, and comparisons need anchors. Create one: on a day when the printer is healthy and supplies are fresh, print a test page that combines solid black text, a block of mid-grey, a colour patch set if relevant, and a small photograph, on your standard paper. Date it and file it away from light. That sheet becomes the household standard against which every future suspicion is measured, under the same lighting, side by side. Gradual decline — the kind owners sense for months before acting — becomes visible instantly in comparison and invisible without it, which is why so many fading stories are discovered late: human memory for density is as unreliable as memory for colour.
The method extends to supplies discipline. Print the same standard page when a new cartridge or toner has settled in, and file it with the supply’s installation date; a supply that prints measurably paler from its first week is a dud to return within its window, not a mystery to endure for its whole life. Keep the sequence of reference sheets together and the printer acquires a visible health record, the same record the maintenance guide builds from nozzle checks and test pages. When a technician or a support line asks “how long has it been fading,” the folder answers with dates and evidence instead of impressions — and support conversations, like troubleshooting itself, run several times faster on evidence.
Environment at the Printer: Light, Heat and the Slow Fade Before Printing
The final territory is the room itself, acting on supplies before they ever print. Toner cartridges and ink stored in the printer or beside it age faster in heat and direct sun: a machine that lives on a sunny windowsill or against a radiator is keeping its supplies in the two conditions their packaging warns against, and gradual, unexplained paleness is one of the milder symptoms — clumping toner and thickening ink are the others. Audit the printer’s microclimate as part of any stubborn fading case: move supplies’ storage to a cool, shaded cupboard, and if the printer itself cannot move, at least shade it and give its vents room, because a machine that runs hot also dries inkjet nozzles between jobs at a rate its designers did not assume.
Paper completes the environmental picture from the other direction. Paper stored in the printer’s tray in a bright, warm room ages where it sits, and the top sheets — the ones printed first — can carry weeks of light and humidity exposure into the test that is supposed to acquit the machine. This is why the test matrix insists on fresh paper from a sealed ream for its decisive prints: it removes the room from the equation. Households that print infrequently should treat the loaded stack as perishable, returning it to its wrapper or a sealed box between busy periods. Environment is the least mechanical cause in this guide and the most commonly missed, precisely because nothing is broken — the printer, the supplies and the paper are each merely living in conditions that quietly tax them, and the fix is a change of address rather than a change of parts. If, after the full matrix, a replacement machine is genuinely the answer, the models in our best printers for home business roundup are built for the kind of consistent, high-duty output that resists drift longest.
Fading That Comes and Goes: Intermittent Density and Its Timetable
The hardest fading to catch is the kind that is present on Tuesday’s print run and absent on Friday’s, because every test you run has a fair chance of acquitting a guilty machine. Intermittency is itself the clue, and it has a short list of usual authors. Temperature and warm-up state lead it: a laser printing its first pages of the day from cold can lay toner differently from the same machine an hour into work, and an inkjet after a warm afternoon in a sunny room is a different instrument from the same printer on a cool morning. Supply state follows: a toner cartridge near its end can print acceptably after being rocked or after the machine’s calibration, then relapse as the remaining toner settles again, producing a fading that seems to heal and return on a rhythm of days. Humidity writes the third pattern, with pale, uneven output arriving in damp weeks and vanishing in dry ones as the paper’s condition changes.
The method for intermittent faults is the log, kept with the reference sheets this guide already has you filing. Each time output disappoints, file the actual faded page — not a description of it — with the date, the time of day, whether the machine had been working or idle, and which supply levels the machine reported. Three or four exhibits usually reveal the timetable, and the timetable names the author: mornings only, damp weeks only, the week before a cartridge died. Without exhibits, intermittent fading generates the worst purchasing decisions in this subject, because owners test on a good day, conclude the new cartridge fixed nothing or everything, and learn nothing either way. Evidence first, parts second — the order matters most exactly when the fault refuses to sit still.
Keep the reference sheet habit after this episode closes, not just during it. One dated test page per supply change turns every future fading question into a comparison you can settle in a minute, and it is the single practice that most separates owners who diagnose fading calmly from owners who buy cartridges on suspicion.
And when the matrix acquits the printer entirely — as it often does — accept the verdict gracefully. A pale file, a damp ream or a buried economy setting is a cheaper fault than any part, and finding it is a success, not an anticlimax.
Frequently Asked Questions
My prints faded right after I installed a new cartridge. Is the cartridge faulty?
Possibly, but eliminate the installation causes first, because they are more common and free to fix. On a toner cartridge, confirm the sealing strip was fully pulled and the cartridge was gently rocked to distribute toner before fitting, as the supply sections describe; a cartridge installed in a hurry can feed unevenly for its first hundred pages. On an inkjet cartridge, check that the vent tape is fully removed and run one alignment, since a new cartridge changes the head’s geometry slightly on cartridge-head designs. Then print the reference test: if output is still measurably paler than the previous supply’s filed reference sheet, and settings are proven unchanged, you have the evidence a retailer needs to exchange a dud — which does happen, particularly with third-party supplies of variable quality.
Text prints faded but photographs look fine — or the reverse. Why?
Because text and photographs travel different paths through the printing stack, and each path has its own settings and supplies. Text paleness with healthy photos often means the black supply or the text-specific settings are at fault: on many inkjets, documents print from a pigment black cartridge while photos use the dye colours, so an exhausted or clogged pigment black fades every letter while pictures stay rich — the nozzle check’s black pattern is the witness. The reverse pattern, strong text and pale photos, points at the colour supplies, the photo paper profile, or a driver quietly applying an economy setting to image printing. Diagnose by component, using the nozzle check or a colour test page, rather than treating “the printer” as one undifferentiated suspect.
Fading appeared after a software or driver update. Can an update do that?
Yes, through settings rather than sabotage. Updates can replace the manufacturer’s driver with a generic one whose default quality and colour handling differ, reset a previously adjusted density or quality preference to a new default, or introduce a simplified print interface that hides the settings you used to rely on. The remedy is to reinstall the manufacturer’s current driver package for your exact model, then re-run the settings audit in this guide — machine, driver, application, preset — before concluding anything about supplies. If the machine’s own built-in test page prints boldly throughout, the hardware and supplies are innocent by definition, and the entire fault lives in the software chain the update rearranged.
Only the left or right side of the page is faded. What does that localise?
A clean vertical division of fading is one of the most informative patterns in this guide. On a laser, one-sided fading often means toner is distributed unevenly in the cartridge — the gentle rocking remedy exists precisely for this — or, if rocking changes nothing, that the transfer or scanning optics are serving one side poorly, which leans toward service. On an inkjet, a side-specific fade can follow a head that is partially clogged in the nozzles serving that pass direction, or a paper path issue letting the sheet sit at a slight angle or distance on one side. Print the test page twice, rotated if your printer allows a different feed orientation, and note whether the fade follows the page or stays with the machine’s side; that single observation tells a technician more than a page of description.
Why are my prints faded even with a new cartridge?
Check draft/eco settings and paper type first — both survive cartridge changes. Then run a nozzle check (inkjet) or confirm the cartridge vent tape is removed and the cartridge is fully seated.
Does rocking a toner cartridge really help?
Yes, temporarily. It redistributes the remaining toner evenly. Treat restored darkness as a warning to order a replacement, not as a permanent repair.
Why is only one side of the page faded?
On lasers, uneven toner distribution or a drum issue; on inkjets, partial nozzle blockage on that side’s passes. The cartridge-rock test (laser) or nozzle check (inkjet) separates the causes.
Can paper cause faded prints?
Absolutely. Damp paper and paper-type mismatches are among the most common causes. Test with fresh paper from a sealed ream and matched settings before buying supplies.
How do I know if it's the printhead or the cartridge?
Substitute a fresh, genuine cartridge. If fading persists identically with a complete nozzle pattern, the printhead or drum path is at fault; if it clears, the old supply was.
Why do prints fade over time after printing?
Dye inks on poor paper, direct thermal prints, and pages stored in sunlight all fade after printing. For documents that must last, pigment inks or laser toner on decent paper are the durable choices.
Why are prints faded on one side of the page only?
On a laser, toner has settled unevenly — rock the cartridge gently and plan its replacement. On an inkjet, the nozzles serving that side’s passes may be partially blocked, or the paper is not lying flat. The nozzle check and a fresh, flat stack of paper separate the causes quickly.
Can humidity really make prints lighter?
Yes. Damp paper interferes with ink absorption and with toner transfer and fusing, producing pale and sometimes blotchy output. It is one of the most common and most overlooked causes, which is why a fresh stack from a sealed ream is an early test in this guide.
My prints start dark and fade as the job goes on. What does that mean?
On an inkjet, the supply may be nearly empty and starving during long runs, or the head is overheating protection kicking in on very long photo jobs. On a laser, a cartridge at its true end behaves this way. Either way, the pattern points at supply exhaustion rather than settings.
Why are my prints faded after the printer sat unused for months?
On inkjets, partially dried nozzles — work through the nozzle check and a cleaning cycle. On lasers, toner settles; rock the cartridge. In both cases the fix is in this guide’s early sections, and the prevention is the regular-use and storage routine from the maintenance guide.
Can old paper cause fading even in a healthy printer?
Yes. Paper that has absorbed moisture or simply aged in poor storage prints pale and unevenly from any machine. It is why this guide’s fresh-ream test comes before supply purchases: paper is the cheapest suspect and a surprisingly frequent culprit.
Is some fading normal as a cartridge or toner runs low?
Yes — gradual lightening across a supply’s final stretch is normal behaviour, not a defect, and it is one of the ways a printer announces an approaching replacement before the formal warning arrives. The pattern to expect is a slow, even decline over many pages, responsive for a while to the remedies in this guide: rocking a toner cartridge redistributes what remains, and an inkjet may print acceptably until its level estimate finally agrees with reality. What is not normal is sudden fading from a supply with most of its life remaining, or fading that a fresh, correctly installed supply does not cure — those patterns point back into the matrix: settings, calibration, paper or the machine itself, in the order this guide tests them.
The Bottom Line
Classify the fading pattern, check the free settings, then test the matching supply — rock the toner, check the nozzles, swap in fresh paper. Faded prints are one of printing’s most diagnosable faults, and the pattern on the page almost always names its own cure.
Related Guides
Keep exploring with these guides and roundups from the same printers collection: