Learning how to set up airflow in a pc case means arranging a deliberate path for air: cool air in through filtered intakes, across the components that make heat, and out through exhausts, with no fan fighting another. Most cooling problems in home builds are not caused by too few fans but by fans pointing in conflicting directions, intakes strangled by panels or carpet, or exhausts recycling their own hot air. The fix is a plan, drawn before a single fan is screwed in.
This guide gives you that plan: how to map a case’s airflow path, where intake and exhaust fans belong and why, how to balance pressure so dust stays manageable, and how to tune fan speeds so the result is quiet as well as cool.
Disclosure: As an Amazon Associate, ilcastellomenu.com earns from qualifying purchases. Product examples below link to Amazon, where you can check current availability and specifications; this guide itself lists no fixed prices because pricing and bundles change frequently.
How to Set Up Airflow in a PC Case: Draw the Path First
Stand in front of the open case and trace the intended journey of a parcel of air. In the standard layout it enters at the front (and sometimes the bottom), travels over the storage and motherboard toward the graphics card and CPU, and leaves at the rear and top. Every fan you install should push air along that journey; a fan that pushes against it is worse than no fan at all.
This front-to-back, bottom-to-top direction is not arbitrary: it works with the graphics card’s position low in the case and the CPU high, and it agrees with hot air’s natural rise rather than fighting it. The full physics — pressure, turbulence, and why the path matters more than raw fan count — is developed in PC Case Airflow Explained; this guide is the practical application of those principles.
Inventory what the case gives you
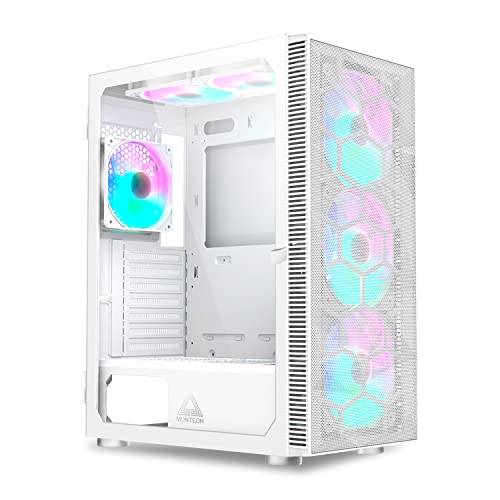
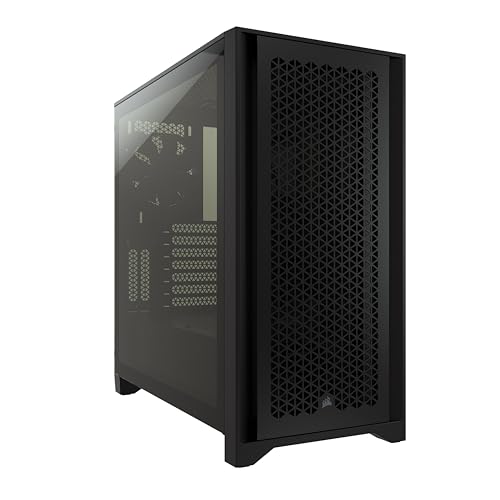
List the case’s fan mounts by position and size, note which fans are included and where they sit from the factory, and identify the filtered intakes. Factory layouts are sometimes sensible and sometimes arranged for the product photograph. You are free to move included fans to better positions; the mounts, not the factory arrangement, are your real starting point. Cases designed with generous mounts and mesh are surveyed in Best Gaming PC Cases for Airflow if you are still choosing the canvas.
Identify the heat sources in order
The graphics card is usually the largest heat source in a gaming PC, followed by the CPU, then voltage regulators and storage. Your airflow path must serve the graphics card first in gaming builds and share with the CPU; in a workstation build the order may reverse. Either way, both sit in the main front-to-back stream in a standard case, which is why that stream is the design’s spine.
In this guide
Step 1: Set the Intakes
Mount intake fans at the front, behind the filter and the front panel, blowing into the case. Two or three front intakes are the typical complement for a mid tower. Their job is to supply the whole system with cool, filtered air, so their path must be unobstructed: a mesh front feeds them freely, while a solid front feeds them only through its side vents — a restriction to be aware of rather than a disqualification.
A bottom intake, where the case offers one, feeds the graphics card and the power supply area usefully, provided the case stands on feet with clearance and not sunk into carpet. Check fan orientation twice before screwing anything down: fans blow toward their frame’s cross-brace side (the side with the struts and usually the label hub), and an intake installed backwards is an exhaust fighting your whole design. Arrow markings on the fan frame show rotation and airflow direction — believe them, not your memory.
Step 2: Set the Exhausts
Place a rear exhaust directly behind the CPU area at the back panel — the single most valuable exhaust position, since it removes CPU and graphics-card heat at the end of the main stream. Top exhausts, where fitted, help hot air leave from the case’s high point; one or two top-rear positions are typical. A top exhaust mounted too far forward can steal cool air that just entered from the top-front intakes before it reaches any component, so favour the rear-most top positions.
Do not over-exhaust. A case with far more exhaust than intake runs at strong negative pressure and pulls unfiltered air — and dust — through every gap and slot. The balance question is the next step’s whole subject.
Step 3: Balance the Pressure
Aim for neutral to slightly positive pressure: intake capacity (accounting for the resistance of filters and panels) roughly equal to or a little greater than exhaust capacity. Slightly positive pressure means the air entering through gaps is minimal, so nearly all incoming air arrives through your filters — which is how a case stays clean inside for months instead of weeks.
In practice, balance is set less by fan count than by fan speed: three intakes at moderate speed against two exhausts at moderate speed is a common, sensible configuration, and you will fine-tune with fan curves in step 5. Remember that a radiator mounted as an exhaust or intake changes the resistance on that side substantially; radiators are dense, and a fan behind one moves less air than its free-air specification suggests. If dust build-up is your recurring enemy, the deeper treatment is in How to Improve PC Case Airflow.
Step 4: Clear the Path — Cables, Drives, and Obstructions
Airflow obeys the path of least resistance, and a nest of cables in front of the intakes is resistance. Route power and data cables behind the motherboard tray wherever the case allows, keep the intake-to-graphics-card corridor as open as possible, and position drive cages (where removable) out of the front airstream. Cases with good routing provision make this easy; the selection criteria are in Best PC Cases for Air Cooling and in our case-buying guide.
Check the world outside the case too. A PC pushed against a wall exhausts into its own intake’s neighbourhood; a case in a closed cabinet recycles hot air regardless of its internal design. Give the rear and top exhausts room to disperse their air, and give front and bottom intakes access to the room’s cool air rather than the exhaust’s leavings.
Step 5: Tune the Fan Curves
With the hardware arranged, set fan speeds in the BIOS or your motherboard’s software. The goal is a curve, not a fixed speed: quiet at idle and desktop loads, rising smoothly as temperatures climb under real work. Tie case fans to a temperature source that reflects their job — motherboard or GPU-influenced sensors where available — rather than letting them surge with every brief CPU spike; short spikes should be absorbed, not announced.
Then verify with real loads. Run your heaviest typical workload — a demanding game or render — for twenty minutes and watch component temperatures settle. Compare against a run with the side panel removed: if removing the panel improves temperatures dramatically, the case’s airflow path is still restricted and steps 1–4 deserve another look; if temperatures barely change, your arrangement is extracting what the case can give. Silence-focused builders will also want the trade-off analysis in Airflow Case vs Silent Case, since curve tuning is where airflow and noise budgets are truly negotiated.
Common Airflow Mistakes
The greatest hits: an intake fan installed backwards (check the arrows); all fans exhausting, so the case inhales dust through its seams; a top-front exhaust ejecting fresh intake air unused; front intakes smothered by a solid panel plus a clogged filter (filters are consumables of attention — How to Clean a PC Case covers their care); and a radiator mounted as front intake without accounting for the warmed air it hands to the graphics card. Each is a five-minute fix once seen, which is the argument for drawing the path first and verifying with the panel test afterwards.
Radiators: Where They Fit in the Path
Liquid cooling rearranges the path rather than abolishing it, and the radiator’s position is the decision everything else follows. A front-mounted radiator cools the CPU with the case’s coolest air but hands its warmed air to the graphics card. A top-mounted radiator exhausts CPU heat directly out of the case, leaving front intakes to feed the graphics card with cool air, at the cost of the CPU breathing some of the card’s warmth. Neither is universally correct: graphics-heavy workloads usually favour the top mount, CPU-heavy workloads the front — and case compatibility (which positions accept which radiator sizes) often decides before preference does.
Whichever you choose, treat the radiator’s fans as that position’s fans for pressure purposes, remembering the radiator’s resistance cuts their delivered flow substantially. Push or pull fan orientation through the radiator matters less than the fact that the air goes the planned direction at all.
Worked Example: A Mid Tower, Five Fans
A concrete layout ties the steps together. The case is a mesh-front mid tower with mounts for three front fans, two top, and one rear; the build is a gaming PC with a tower air cooler. Fit two front intakes in the upper and middle positions feeding the CPU cooler’s line and the graphics card, and a third intake low if the card is long and hot — or leave the low position empty if the build is modest. Fit the rear exhaust behind the cooler. Fit one top exhaust in the rear-most position only.
Set curves so the intakes run a touch faster than the exhausts at matched temperatures, for slight positive pressure. Verify with a twenty-minute gaming load, then the panel test. That is the whole method in one paragraph: five fans at most, every one of them placed by the path, none by habit or symmetry.
Airflow in Small and Unusual Cases
Compact cases compress the same principles into fewer, more consequential choices. With room for two or three fans total, each fan’s direction is a major decision, and many small cases rely on the graphics card and power supply as de facto exhausts. The path still exists — find it in the maker’s diagrams, feed its intake, and do not add a fan that fights the designed stream just because a mount exists.
Inverted and vertical cases rotate the standard path rather than replacing it: identify where cool air enters (often the bottom or a side) and where it must leave, and audit your fans against that map. The method survives every geometry: draw the path, feed it filtered air, exhaust at its end, balance the pressure.
Fan Sizes, Counts, and What the Numbers Mean
Fan sizes shape an arrangement more than fan brands do. Larger fans — 140 mm where mounts allow — move a given volume of air at lower speed and lower noise than 120 mm fans, which is why cases offering 140 mm front mounts deserve a preference mark in a quiet build. Two larger fans commonly match three smaller ones in delivered air while sounding calmer doing it. Where a mount accepts either size, choose the larger unless a radiator plan dictates otherwise.
Counts deserve the same realism: beyond a complete path — typically two or three intakes and one or two exhausts in a mid tower — each additional fan buys less cooling and more noise than the one before. Spend the arrangement effort first, the fan budget second, and let the verification step in the main guide tell you whether any gap remains for another fan to fill.
Static pressure versus airflow fans, placed correctly
The two fan families earn their names in specific seats. Pressure-optimised fans — with broader, more angled blades — belong where air must be pushed through resistance: behind dense filters, against radiators, into restrictive front panels. Airflow-optimised fans — with narrower blades and higher free-air volume — belong in open exhaust seats where nothing resists them. Swapping the families does not break anything, but it leaves performance on the table in both seats.
In a simple air-cooled build the distinction is a refinement; in a filtered, radiator-equipped build it is a real variable. Check what the case includes before buying replacements — many included fans are already sensibly chosen for their factory positions.
Troubleshooting the Setup You Just Built
A new arrangement that disappoints usually fails in one of four places, and each has a tell. Temperatures unchanged despite more fans: the path was already adequate, or the new fans are fighting it — audit directions again. Graphics card hotter after adding a front radiator: the predicted trade arrived; consider moving the radiator to the top or accept the exchange knowingly. A new whistle or hum at certain speeds: a fan is now resonating with a panel or blowing across a sharp edge — shift its curve past that speed or reseat it on its mounts. Dust appearing inside within weeks: the pressure balance went negative — revisit step 3 with the filter resistance honestly counted.
Treat the first week with a new layout as a tuning period, not a verdict. Log temperatures under your usual loads, adjust one variable at a time, and let the system settle into its final curves. Airflow done well is invisible afterwards — which is the point, and the proof.
Helping a friend's build: the audit as a gift
Everything in this guide doubles as a fifteen-minute audit you can perform on any existing PC, and it is worth learning as a party trick of genuine value: filters, directions, path, pressure, curves. Most home PCs have never had any of the five checked since assembly day, and most harbour at least one free improvement. The method travels because it is a method — case shapes change, fan fashions change, and the air, obligingly, keeps obeying the same rules.
Airflow for AIO Liquid Coolers and Tower Coolers Together
Many builds mix the two cooling religions — a liquid AIO on the CPU inside a case full of air-cooled everything else — and the arrangement rules reconcile them simply. The AIO’s radiator takes one of the path’s seats (front intake or top exhaust, with the trade-offs already covered) and its fans are counted as that seat’s fans in every calculation. The tower-cooler logic does not apply, but the graphics card’s logic is unchanged: it still needs the front-to-card corridor fed with air that has not been pre-warmed beyond what you accepted when you placed the radiator.
The mistake to avoid in mixed builds is double-counting: treating the radiator’s fans as both intake and extra, or adding case fans to ‘help’ a radiator whose own fans already define its airflow. Count each fan once, in the seat it occupies, and the plan stays honest.
The smell test and other low-tech verification
Verification does not require instruments. A tissue held at the rear exhaust should stream outward steadily; at the intakes it should draw gently inward; at the seams of a positive-pressure case it should flutter faintly outward. An incense stick or a vape pen’s vapour (used carefully, away from the intakes) traces the stream around the graphics card better than any diagram. These are workshop tricks older than the PC itself, and they catch reversed fans and dead zones that temperature logs only hint at. Use them; the air is invisible, but it is not undetectable.
Prove It Afterwards: Testing the Airflow You Think You Built
A fan arrangement is a hypothesis until the machine testifies. The simplest testimony is thermal: before changing anything, record component temperatures at a fixed, repeatable load — the same game scene or stress test, the same duration — together with the room’s temperature, because the honest figure is always the component’s rise over the room, not the absolute number. After the setup, repeat the identical test. A change that does not move the rise has not changed the cooling, whatever it did to the noise or the aesthetics, and the discipline of the before-and-after pair is what separates airflow tuning from airflow theatre.
For the path itself, the tissue test remains undefeated: a strip of tissue or a ribbon held at each vent and gap shows, in real time, which way air is moving and how honestly. Hold it at the case’s seams and unused openings as well as the fans — a setup whose front intake is strong but whose side gaps leak the pressure sideways will show you the leak in fluttering tissue, and the fix is a blanking plate or a fan repositioning that no temperature log would have localised so quickly. Incense or a smoke pencil, used sparingly and away from the intakes, draws the internal path visibly for those who want to see the river rather than infer it.
Log the results with the configuration that produced them — fan positions, directions, curve settings — because airflow work is iterative and memory is not. The builder who records three tested configurations owns knowledge; the builder who tries six and remembers the last owns a rumour. This testing discipline underlies every claim in our airflow explainer, and it is what makes the difference between a setup and a superstition.
Fan Control as a System: Headers, Hubs, and Which Temperature Drives Which Fan
The fans you arranged so carefully are only as intelligent as their control, and the control question that matters most is rarely asked: which temperature should each fan obey? Case fans wired to follow the processor’s temperature will sprint during a compile while the graphics card idles, and sit idle during a game while the card cooks — because the sensor they obey is not the component they serve. Modern boards and control software increasingly allow case fans to follow the graphics card’s temperature, a mixed average, or a dedicated sensor placed in the case’s airstream, and assigning the front intakes to the graphics card’s signal is the single most valuable control decision in a gaming machine.
Hardware limits shape the plan. A motherboard offers a handful of headers; splitters share one header’s signal among fans that should genuinely behave identically — the front intake bank is the natural group — while powered hubs let many fans share one control signal without overloading the header’s electrical budget. Group by job, not by convenience: intakes together, exhausts together, radiator fans with their own curve because their job includes a pump’s schedule and a liquid’s slower temperature rhythm. A fan asked to obey two masters through a splitter obeys neither well, so the grouping decisions are the control system’s real design.
Set the curves only after the groups are right, and set them against the temperatures that matter: find, by testing, the speed at which each group’s cooling stops improving meaningfully, and let that speed be the curve’s ceiling for ordinary loads. Everything above it is noise buying nothing — the knee of the curve is where a well-set-up machine lives, and finding it per group, rather than accepting a default ramp to maximum, is the difference between a tuned system and a loud one.
Dual-Chamber and Panoramic Cases: Airflow Where the River Bends
The dual-chamber design — components in a glass-fronted main room, power supply and cables in a hidden second chamber — has rearranged the standard path, and builders importing the classic front-to-back instincts can misread it. In most dual-chamber cases the intake arrives from the side and the bottom rather than the front, the graphics card is fed by bottom intakes directly beneath it, and the rear and top exhausts carry the combined load out. The path is a rising diagonal rather than a horizontal river, and it works beautifully when the bottom intake is given air to breathe — which returns the setup to an old truth in new clothes: a dual-chamber case parked on thick carpet has had its main intake furnished with a rug.
The side intake’s direction deserves a deliberate decision, because many of these cases allow the side bank to be fitted either way and the internet argues both. As intake, the side bank feeds the motherboard zone and the card’s length with fresh air, and the top and rear exhausts complete the rise. As exhaust, it can scavenge the card’s heat early but risks starving the very components it passes. Default to intake unless your testing — the before-and-after method, not opinion — shows your specific card and cooler prefer otherwise. These cases are instruments with options, and the options are settled by measurement.
The panoramic variants, glass on two or three sides, add a thermal footnote: glass is an insulator compared to a vented panel, so a panoramic case’s cooling is entirely its fans’ work, with no passive leakage helping or hurting. That makes fan placement more decisive and the tissue test more valuable, and it makes the bottom intake’s clearance — on a stand, on a desk, never on carpet — a specification of the setup rather than a detail of the furniture.
Feeding the Graphics Card: The Hungriest Component Gets Its Own Plan
In a modern gaming build the graphics card is not one heat source among several; it is the furnace the case exists to serve, and its feeding deserves a dedicated pass after the general setup. The card’s own fans draw from the space directly beneath them, which is why the bottom intake — or the front intake’s lower fan, aimed along the card’s length — matters out of proportion to its size. A card whose intake zone is a dead pocket of its own recirculated exhaust will run hot in a case whose processor temperatures look exemplary, and the diagnostic signature is exactly that split: cool processor, suffering card, in a setup that passes every general test.
Mind the obstructions in the card’s personal airstream. A support bracket, a capture card in the slot below, a thick cable run dressed neatly across the card’s fans — each taxes the card’s breathing in a way the case’s overall airflow figures forgive and the card does not. Leave the slots below the card empty where you can; where you cannot, test the card’s temperatures with the neighbour present and absent, and let the result arbitrate. Vertically mounted cards rewrite the problem entirely, moving the intake face toward the side panel — where the gap between card and glass becomes the critical dimension, measured in fingers: a card suffocating against a panel needs the mount’s alternative position or a return to horizontal, whatever the showcase preferred.
Finally, give the card’s exhaust somewhere to go. Cards that dump their heat into the case — most of them — rely on the rear and top exhausts to clear it before the processor’s cooler drinks it. If the processor’s temperatures rise in games more than in processor-only tests, that hand-me-down heat is the likely story, and the cure is exhaust capacity and path, not a bigger processor cooler. The setup is a system of hand-offs; the card’s heat must be handed out of the case, not merely handed around it.
Seasonal Tuning: The Setup Is Not Finished When the Weather Changes
An airflow setup tuned in a cool spring room is a hypothesis about summer it has not tested. Warm weather attacks from two directions: the room’s baseline rises, carrying every component’s temperature with it degree for degree, and dust accumulates through the high-use months, taxing the intakes a little more each week. The seasonal discipline is light but real. At summer’s start, clean the filters — the cleaning guide’s maintenance pass — and re-run your standard temperature test; if the rise over room has grown since spring at the same load, the machine is telling you its cooling margin has been spent, and the fan curves earn a summer revision: the same knee points found earlier, with the curve’s middle raised to meet the season.
Winter invites the opposite error — curves left at summer settings, howling against a cold room’s modest loads — and the same test, run once, rights it. Some builders keep two saved profiles and swap them with the clocks; others simply re-tune twice a year by the test’s evidence. Either way, the principle is the one this whole guide is built on: the setup serves the machine in its actual room and season, and a configuration that cannot be revisited is not a setup but a guess that got lucky once.
Seasonal attention has one more target: the room itself. A PC that spent winter against an external wall may spend summer in a sun patch’s afternoon reach; a case whose intake drew cool air from a hallway now draws from a closed, warm room. When temperatures change their story, audit the room before the fans — the cheapest degrees in PC cooling are the ones the room gives you for moving a case out of a sunbeam.
Airflow for the Quiet Hours: Night Loads, Downloads, and Idle Behaviour
Most airflow advice is written for the machine at full cry, but a PC spends its life at the other end — idling, browsing, downloading overnight, serving files to the household — and its setup should behave there too. The idle questions are different: not whether the cooling suffices, but whether the fans ever truly rest, whether a curve’s floor keeps a fan audibly hunting around its start threshold, and whether the machine’s night voice suits the room it sleeps in. A fan curve with a clean zero — fans stopped below a temperature the idle machine never reaches — is the single kindest setting for a bedroom PC, provided the stop is real and the restart, when a load arrives, is prompt and undramatic.
Hunting is the idle fault to hunt: a fan whose control point sits exactly at the idle temperature will cycle endlessly — spin, cool, stop, warm, spin — and the cycling is more audible than a constant low speed would be. The cure is hysteresis, a deliberate gap between the switch-on and switch-off temperatures, or simply moving the curve’s first point safely above the idle temperature so the boundary is crossed only by genuine loads. Test at night, in the quiet, with the patience the problem deserves; idle behaviour cannot be judged in a daytime room over the sound of a kettle.
Overnight loads — the long download, the backup, the render queue — deserve one deliberate check: run the machine’s typical night task and confirm the temperatures and the noise at the pillow’s distance, not the chair’s. A setup that is perfect at the desk and present at the bed is a setup that will be switched off at night, and the downloads will not happen, and the backups will quietly stop existing. Airflow, like every part of this craft, is finally about the life around the machine.
A Second Worked Example: The Dual-Chamber Showcase Build
Take a panoramic dual-chamber case, a hot graphics card mounted horizontally, a liquid cooler for the processor, and an owner whose temperatures are fine for the processor and disappointing for the card. The layout as delivered: side bank as intake, radiator at the top exhausting, rear exhaust fitted, bottom bank — the one beneath the card — left empty because the case shipped without fans there and the build looked complete. The tissue test tells the story in a minute: strong flow across the motherboard, a lazy drift under the card, and the card’s own fans recycling their pocket. The processor, fed by the side intake and cooled by the top radiator, is innocent; the card is breathing its own exhaust in a glass room.
The correction follows the diagnosis, not the catalogue. The bottom bank is populated as intake — three modest fans at modest speed — giving the card a personal supply of room air. The side bank stays intake but is grouped to follow the graphics card’s temperature signal, so the whole intake system now works for the furnace. The top radiator’s fans get their own curve on the liquid’s slower rhythm, and the rear exhaust is raised slightly to clear the card’s hand-me-down heat before the radiator drinks it. Nothing exotic was bought: the empty bank was the case’s own design waiting to be used, and the control regrouping was free.
The retest, same scene, same duration, same room: the card’s rise over ambient falls by a margin that changes its fan speed, its noise, and its sustained clocks, while the processor’s numbers barely move — the signature of a fix aimed at the right component. The example’s lesson is the guide’s lesson in miniature: the case had the airflow all along, arranged for a build that was not quite this one, and the setup work was simply introducing the hardware to the machine it actually contained.
Gear for This Guide
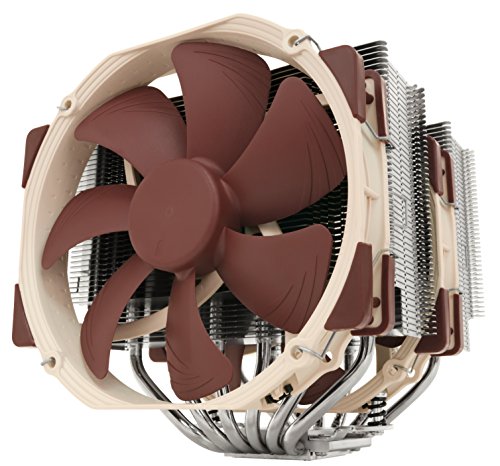
Two verified CPU coolers whose own airflow direction must agree with the case path you have just built — a dual-tower flagship and a single-tower staple, both exhausting toward the rear.
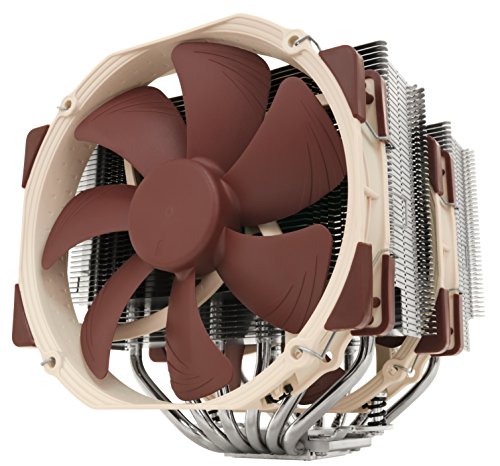
Noctua NH-D15 CPU Cooler
A dual-tower cooler whose fans push air front-to-back through two fin stacks — mount it so its exhaust feeds the case’s rear exhaust, never against it. Noctua NH-D15 CPU Cooler — Check on Amazon

Cooler Master Hyper 212 Black II CPU Air Cooler
A single-tower four-heatpipe cooler with a PWM fan, the classic partner to a rear-exhaust layout in a mid tower build. Cooler Master Hyper 212 Black II CPU Air Cooler — Check on Amazon
Frequently Asked Questions
How many case fans do I actually need?
For most mid tower builds, two or three intakes and one or two exhausts complete the path well. Beyond that, returns diminish quickly — arrangement and panel design matter more than count. A single rear exhaust plus two front intakes already outperforms five fans installed without a plan.
Should my case be positive or negative pressure?
Slightly positive is the usual recommendation for home builds: intakes (after filter resistance) marginally exceed exhausts, so air leaks out of gaps instead of dust leaking in. Strong negative pressure cools similarly but fills the case with unfiltered dust; strong positive pressure can trap hot pockets. Balance, verified by dust behaviour over a month, is the goal.
Do top fans help or hurt?
Top-rear exhausts help by removing hot air at its high point. A top-front fan often hurts — as an exhaust it ejects fresh intake air before it does any work, and as an intake it can disrupt the front-to-back stream. If you fit one top fan, put it in the rear-most position as an exhaust.
Does a front radiator ruin airflow for the graphics card?
It warms the intake air somewhat, since the CPU’s heat is dumped into the airstream entering the case. Graphics card temperatures typically rise a little; CPU temperatures improve. Whether that trade suits you depends on which component runs hotter in your workloads — it is a trade, not a ruin.
How do I know my airflow setup is finished?
When temperatures under your heaviest real workload are stable and acceptable, when removing the side panel changes them only slightly, and when a month of use leaves dust mainly on the filters rather than inside the case. At that point, further fan purchases are decoration, not cooling.
Can top fans ever be right as intake?
In the standard path, no — top intake fights the heat’s natural rise and recycles the case’s own exhaust zone. The exceptions are specific and provable: some compact and inverted layouts are designed around a downward path, and a top-mounted radiator in a very particular configuration can be fed as intake when the rest of the system is arranged to exhaust low. The burden of proof is the temperature test, run both ways. If you cannot articulate why your layout is the exception, it is not, and the top fans should exhaust.
How do I tell which way a fan blows without powering it on?
By its structure rather than its branding. Air moves from the fan’s open face — the side you see the blades and the maker’s sticker from — toward the side with the support struts and the cable exit; the struts are downstream. Most frames also mould small arrows into the edge showing rotation and airflow direction, worth a torch and ten seconds on a second-hand fan. When a bank must match, check every fan individually: one reversed fan in a bank of three is a common build error and a quiet saboteur of an otherwise correct setup.
Is push-pull on a radiator worth the extra fans?
Rarely for temperatures, occasionally for noise. A second bank of fans on a radiator adds a small improvement in flow through the fins, largest at low speeds — which is exactly where its value hides: a push-pull radiator can move the same air with each bank turning slower, and slower is quieter. If the radiator’s cooling is already sufficient at a comfortable noise level, push-pull buys nothing you will feel. If you are choosing between faster fans and doubled fans at the same cooling, the doubled fans are usually the pleasanter sound.
My case has a side fan mount over the graphics card. Intake or exhaust?
Intake, in almost every build that has the choice. A side fan sits directly beside the card’s own intakes, and feeding that spot with room air is the most targeted cooling a case offers — the historical reason side mounts existed. As exhaust it competes with the card’s fans for the same air and can starve them. The exceptions are passively cooled or unusually arranged cards, and as ever the temperature test, run both ways on the same load, is the court that decides your specific build.
Do fan filters on intakes hurt cooling enough to matter?
Slightly, measurably, and worth it. A clean filter costs a small fraction of an intake’s flow; a clogged one costs a great deal, which is why the honest comparison is not filter versus no filter but maintained filter versus the dust mat that an unfiltered intake grows inside the case instead — on the heatsinks, where it taxes cooling far more and is far harder to remove. Run the filters, clean them on the schedule the cleaning guide sets, and the tax stays at its small, honest rate.
Does cable management really change temperatures, or is it cosmetic?
Both effects are real but unequal. A genuinely obstructed intake path — a cable bundle parked in front of a fan or across the graphics card’s intakes — costs measurable degrees, and clearing it is cooling work. The difference between tidy cables and beautiful cables, routed in the same open paths, is cosmetic, and no temperature sensor will ever know. Spend the first hour on obstruction, where the degrees live, and let beauty be the hobby it honestly is rather than a cooling claim it cannot support.
How many case fans is enough for a typical gaming build?
Enough is defined by the path, not by a count: one clear intake route feeding the graphics card and processor zone, one clear exhaust route clearing their heat, and no component left breathing a dead pocket. In a typical mid tower that resolves to two or three intakes and one or two exhausts; the fifth and sixth fans usually buy noise options — the same air at lower speeds — rather than cooling. Add fans to fix a diagnosed pocket or to slow the existing ones down, not to raise the count.
The Bottom Line
Draw the path, feed it with filtered front intakes, exhaust at the rear and top-rear, balance toward slightly positive pressure, clear the corridor of cables, and tune curves to real workloads. Airflow is an arrangement, not an accumulation — five minutes of planning beats five extra fans.
Related Guides
Choose the right canvas, weigh panel materials, and troubleshoot fan noise: