Knowing how to improve pc case airflow starts with a diagnosis, because high temperatures have several causes and only some of them are airflow. A clogged filter, a reversed fan, a case inhaling its own exhaust, and a cooler that is simply outmatched all present as ‘my PC runs hot’ — and the first three are free to fix while the fourth is not an airflow problem at all. Spending money before separating them is how builders end up with extra fans stirring the same hot box.
This guide runs the diagnostic first (the side-panel test), then the improvements in order of cost: cleaning and placement, fan direction and layout, pressure balance, cable and obstruction clearing, and only at the end, hardware changes.
Disclosure: As an Amazon Associate, ilcastellomenu.com earns from qualifying purchases. Product examples below link to Amazon, where you can check current availability and specifications; this guide itself lists no fixed prices because pricing and bundles change frequently.
How to Improve PC Case Airflow: Diagnose Before You Spend
Run your heaviest typical workload for twenty minutes and note the CPU and graphics card temperatures once they stabilise. Then remove the side panel and repeat. Interpret honestly: if temperatures drop substantially with the panel off, the case’s airflow is the bottleneck and everything in this guide applies. If they barely move, the component coolers themselves are the limit — a mounting problem, dried thermal paste on an older build, or a cooler undersized for its processor — and no case change will fix what the panel test just acquitted.
Note the pattern too, not just the numbers. A hot graphics card with a cool CPU points at the card’s air supply or recirculation. Both hot together points at whole-case exchange — intake, exhaust, or the room air the case breathes. A CPU hot only under rendering loads with a front radiator fitted may be breathing the graphics card’s exhaust through a layout that needs rethinking. The theory behind these patterns is in PC Case Airflow Explained.
In this guide
Fix 1: Clean the Path You Already Own
The cheapest airflow improvement is restoring the one the case shipped with. Filters clog gradually enough that nobody notices the month the cooling went bad: remove and clean every intake filter, blow the dust mats out of the CPU cooler’s and graphics card’s fin stacks (fans held still, short bursts), and wipe fan blades — the complete safe routine is How to Clean a PC Case. A neglected case can recover a startling amount of cooling from this step alone.
While cleaning, verify the case’s surroundings with the same suspicion. A case backed against a wall, sealed in a cabinet, or standing on deep carpet is a case whose vents are decorative. Give exhausts room to disperse and intakes access to room air, and lift a floor case onto its feet or a hard surface so the bottom intake and power-supply filter can breathe.
Fix 2: Audit Every Fan's Direction
A single reversed fan can defeat an otherwise good layout — an intake installed as an exhaust starves the front of the case and fights its neighbours. With the power off, check each fan against its frame arrows (rotation and airflow direction are moulded into the frame) and against the plan: front and bottom in, rear and top out. Correct any fan that disagrees, and confirm the CPU cooler’s fans blow toward the rear exhaust rather than into the intake stream.
Then audit positions, not just directions. An exhaust in the top-front position ejects fresh intake air before it works; move it to the rear-most top slot or retire it. A front intake whose lower position feeds the power-supply shroud instead of the graphics card may serve better one slot up. The full layout method is in How to Set Up Airflow in a PC Case; this fix is that method applied as an audit to an existing build.
Fix 3: Rebalance the Pressure
Check the dust evidence. If the interior coats with dust despite clean filters, the case is running negative — exhausts out-pulling intakes, with makeup air leaking in unfiltered through every seam. Correct it by speeding intakes relative to exhausts (fan curves), adding an intake, or slowing an exhaust, until the balance is neutral to slightly positive. If instead a specific corner runs hot while dust stays low, suspect a dead zone rather than global pressure, and treat it with Fix 4.
Remember that filters and radiators tax the fans behind them: an intake behind a dense filter delivers less than its free-air rating, so ‘three intakes, two exhausts’ can still be negative in delivered air. Balance by delivered flow and by observed dust behaviour over a few weeks, not by fan-count arithmetic.
Fix 4: Clear the Corridor and Feed the Graphics Card
Open the case and look along the path from the front intakes to the graphics card: every cable bundle, drive cage, and reservoir in that corridor is taxing the card’s air supply. Reroute cables behind the motherboard tray, remove or relocate an empty drive cage if the case allows, and dress the remaining runs flat against surfaces rather than balled in the stream. Graphics cards respond disproportionately to a clear corridor and, where the case offers one, to a bottom intake feeding them directly.
Address recirculation too: an open-air graphics card dumps heat upward and sideways, and some of it re-enters its own fans. A rear exhaust pulling strongly at the end of the path, plus slot covers replaced in the empty positions below the card (open slots can short-circuit the pressure you built), keeps the card’s exhaust moving out instead of around. Panel material plays a role at the extremes — the comparison in Tempered Glass vs Mesh Case explains when the front panel itself is the restriction.
Fix 5: Hardware Changes, In the Right Order
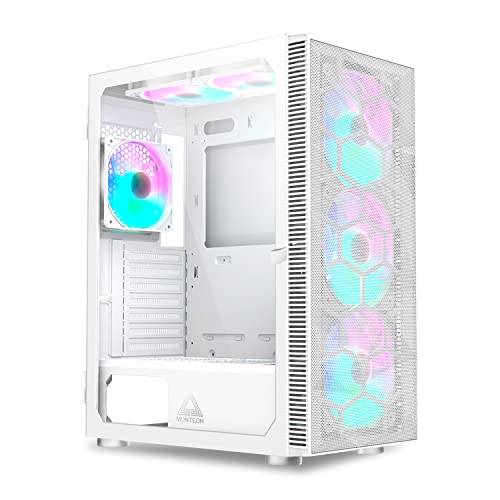
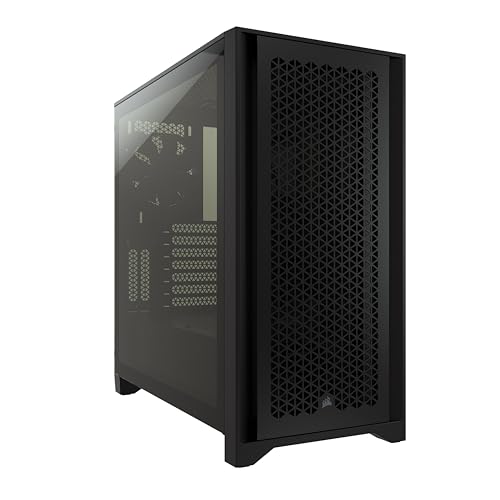
Only now spend money, and spend it where the diagnosis pointed. If delivered intake is the limit, add or upgrade intake fans — pressure-optimised models where filters or radiators resist them. If the front panel is the restriction and temperatures justify it, some cases accept a mesh front conversion; otherwise the case itself is the ceiling and replacement is the honest fix, chosen with the criteria in How to Choose a PC Case. If one component overheats while case air is demonstrably cool (panel test), upgrade that component’s cooler rather than the case’s fans.
Set expectations by the panel test you ran at the start: it told you the maximum improvement available from case airflow. Hardware bought beyond that ceiling buys noise, not degrees.
Verify the Improvement
Repeat the original workload and compare stabilised temperatures against your baseline, then repeat the panel test: the gap between panel-on and panel-off should have narrowed to a few degrees. Live with the result for a few weeks and read the dust: filters collecting the dust (instead of the interior) confirms your pressure correction worked. If noise rose while temperatures fell, revisit fan curves — the goal was never maximum airflow, but sufficient airflow at civilised speeds, the balance explored in the fan-noise companion guide linked below.
Seasonal and Load Changes: Airflow Is Not Set-and-Forget
A layout tuned in winter can disappoint in summer, because the room’s air — the case’s raw material — has warmed by several degrees, and every component’s equilibrium rises with it. Expect to revisit fan curves seasonally if you live somewhere with real summers: a slightly more assertive curve for the hot months is normal maintenance, not an admission of failure. New hardware resets the question too: a more powerful graphics card redraws the case’s heat map, and the layout that served the old card deserves a fresh panel test rather than inherited confidence.
This is the deeper reason this guide teaches diagnosis before fixes. Products change, rooms change, dust accumulates — but the panel test, the direction audit, and the pressure check work on every build you will ever own. Learn the method once and every future ‘my PC runs hot’ starts with knowledge instead of a shopping cart.
A Note on Expectations: What Good Looks Like
A well-arranged mainstream case shows a recognisable signature: component temperatures that stabilise and stay stable, a panel test gap of only a few degrees, fans that are audible under full load as a soft whoosh rather than a roar, and dust that collects on filters rather than components. If your system shows that signature, its airflow is done — further spending chases decimals. If it does not, exactly one of the fixes in this guide corresponds to the missing signature, and the diagnosis section exists to tell you which.
Resist the perfectionist trap at the end of the process: the last two degrees are the most expensive in all of cooling, and they buy nothing the components can feel. Sufficient, quiet, and clean beats maximal, loud, and dusty — every day the PC is actually used.
The Graphics Card Deserves Its Own Paragraph of Diagnosis
Because it is usually the hottest and loudest component, the graphics card rewards dedicated attention before any general fix. Check its immediate environment as a system: intake air reaches it from the front and below; its own fans need unobstructed space beneath them; its exhaust — for open-air designs, in every direction — needs the case’s stream to carry it away rather than letting it pool and re-enter. A card sandwiched close above a power-supply shroud, fed by a front intake blocked by a drive cage, exhausting into a dead corner, will run hot in a case whose CPU is perfectly cool — and every symptom will misleadingly suggest a case-wide problem.
Fix the card’s neighbourhood first in any GPU-hot diagnosis: clear its corridor, open its underside, strengthen the rear exhaust that serves it. Only when the card’s local environment is demonstrably clean should the investigation widen to the whole case.
Knowing when to stop: the good-enough plateau
Every airflow project reaches a plateau where the remaining improvements cost more — in money, noise, or effort — than they return in degrees. The plateau’s markers are the ones from the verification section: a narrow panel-test gap, stable temperatures, dust on filters. Reaching it is success, and the correct action is to stop, close the case, and use the computer. Builders who cannot stop here end up maintaining a wind tunnel as a hobby in itself — a legitimate hobby, but a different one from the machine they set out to cool.
Case Studies: Three Hot PCs, Three Different Answers
The method earns its keep in stories. The first PC ran hot after a graphics card upgrade: the panel test showed a wide gap, and the corridor audit found the new, longer card sealed against the drive cage its predecessor had cleared — the cage came out, the gap closed, no money spent. The second PC ran hot from new in a sealed-front case: every internal fix was attempted honestly, the panel test gap never narrowed, and the verdict was the case itself — a mesh-front replacement ended a year of fan purchases in one step. The third PC ran hot with a narrow panel-test gap from the start: the case was innocent, the CPU cooler’s mounting was not, and a repaste and remount — a component job, not an airflow job — was the whole cure.
Three identical complaints, three unrelated causes, one method that separated them in an afternoon each. That separation — not any single fix — is what this guide exists to teach.
Writing your baseline down
End the project the way technicians end theirs: with the numbers recorded. Note the stabilised CPU and GPU temperatures under your standard load, the fan curve settings, and the date of the last filter clean, in a file that lives with the PC’s other records. Baselines convert future mysteries into comparisons — ‘the GPU is eight degrees above its March baseline’ is a diagnosis half-made — and they protect you from chasing temperature ghosts that turn out to be a warmer room or a heavier game. The best airflow improvement of all is the one you can prove happened.
Airflow and Noise: Spending the Same Budget Twice
Every airflow improvement in this guide was purchased with one of two currencies — money or noise — and the verification step should audit both accounts. A layout that dropped temperatures by leaning on fan speed has spent noise; whether the trade was wise depends on the room and the listener, and the fan-noise companion guide exists to renegotiate it. The elegant improvements — cleaning, direction, corridor, pressure — spend neither currency, which is precisely why this guide insists on exhausting them before any purchase is authorised.
Hold your finished system to the double standard: temperatures at their plateau and noise at its floor, simultaneously. A system that achieves only one has a fix still outstanding, and by now you own the complete diagnostic kit for finding it.
The improvement that is not in the case
One last entry in the ledger, carried over from the theory: the room. A PC moved out of a sunlit alcove, a cabinet door left open during long sessions, a case relocated from beside a radiator to across the room — these unglamorous relocations have rescued more ‘hopeless’ temperatures than any fan ever sold. When the case has passed every audit in this guide and temperatures still disappoint, interrogate the room with the same honesty. The air your case breathes is the room’s air, and sometimes the room is the component that needs upgrading.
One Change at a Time: The Discipline That Makes Improvements Real
The fixes in this guide are ordered by cost and likelihood, but the method that makes any of them trustworthy deserves its own statement: change one variable, retest, record. The temptation to do everything at once — clean, re-fan, re-curve, re-cable in one heroic afternoon — is understandable and ruinous, because a machine improved by five changes teaches you nothing about which of them mattered, and a machine made worse by five changes gives you no way back. The record is the other half of the discipline: the configuration, the test, the temperatures, the noise, in a log kept with the machine. Three entries in such a log are worth more than a forum’s hundred opinions, because they describe your case, your components, and your room — the only system you actually own.
The test itself must be boringly identical each time: the same load, the same duration — long enough for the soak our explainer describes — the same room conditions as nearly as life allows, and the temperatures recorded as rises over the room’s temperature, which is the only form in which they can be honestly compared across days. Builders who adopt this protocol discover something quietly wonderful: their arguments with the internet end, because they no longer need the internet’s verdicts. They have their own, measured, and the machine improves in steps they can prove.
The Panel-Off Experiment and Other Honest Diagnostics
Before spending anything, quantify what better airflow could even buy you, using the experiments that cost nothing. The panel-off test is the headline: record temperatures at your standard load with the case closed, then with the side panel removed, then — if your case has a restrictive front — with the front panel lifted away as well. Each removal prices a restriction. A large gain from the side panel says the whole system is starved; a large gain only from the front says the front’s design is the tax; a small gain from both says your airflow is already near what this case can give, and the remaining heat belongs to the components’ coolers, the room, or physics — a verdict that saves you from buying fans to fix a case that is not the problem.
The temporary-fan test is its partner: a spare fan, held or loosely fitted at a candidate position — the bottom intake is the usual candidate — while the standard load runs and the graphics card’s temperature is watched. Ten minutes tells you what that position is worth in your build, before a mounting screw is turned or a fan is bought. Builders are often surprised in both directions: the bottom intake that transforms the card’s behaviour, and the extra exhaust that changes nothing but the noise. Both surprises are bargains at the price of a test.
Record these experiments in the log with the same care as the fixes. A diagnostic result is an asset — it will arbitrate future purchases, future builds, and the day a hotter card arrives and you need to know, in advance, what your case has left to give.
When the Case Is Innocent: Cooler Contact and the Misdiagnosed Machine
A share of machines sent to this guide for airflow crimes are innocent of them, and their real fault is at a cooler’s mounting. The signature is asymmetry: one component hot while its neighbours are comfortable — a processor cooking in a case whose graphics card is cool and whose exhaust air is barely warm. Case airflow is a shared resource; when it fails, everything downstream warms together. When one component suffers alone, suspect its private arrangements: the cooler’s mounting pressure, its thermal paste’s age and spread, a fan fitted backwards on a tower cooler, a protective film — it happens to the careful — left on a cold plate.
The test that separates the two worlds is the panel-off experiment read carefully. A component whose temperature barely improves with the panel off, in a case suddenly full of room air, is not waiting for airflow; it is waiting for its own cooler to be reseated. Save the fan purchases, order the paste, and do the unglamorous mechanical work. Conversely, a whole machine that cools dramatically with the panel off has confessed to the case, and this guide’s sequence — clean, direct, balance, feed, and only then hardware — is its sentence, to be served in order.
Reviving an Older Case: Cages Out, Paths Open, Dignity Intact
Older cases were designed for a cooler era’s components, and many are one honest afternoon from serving a modern build well. The revival moves, in order: remove the drive cages you no longer use, because the classic cage stack sits exactly where the front intakes need to breathe, and its departure is the single largest airflow gift an old case can receive. Replace tired fans with modern ones of the largest diameter the mounts accept — the mounts have not changed in decades, which is the old case’s secret advantage. Fit filters if the intakes lack them, accepting the small flow tax as the price of the interior staying clean enough to keep the gains. And dress the cables along the case’s edges with the discipline the corridor fix describes, because an old case’s cable management is a suggestion you must complete yourself.
What the revival should not become is surgery. Cutting new vents into panels is a permanent answer to a question the fan positions usually answer temporarily, it voids whatever the case’s structure intended, and its results are uninsurable against the day you want the panel whole again. The honourable exception is the case whose front is a sealed wall with no alternative intake — and even there, a maker’s mesh variant panel or a reputable mod kit, where they exist, beats the jigsaw. An old case revived by arrangement keeps its dignity and its resale; a cut case has one owner’s experiment written on it forever.
Judge the revival by the log, as always. Some old cases, revived, run a modern build within a few degrees of a new case’s performance, and their owners have bought those degrees with an afternoon instead of a purchase. Others reveal, in the panel-off test, a starvation no arrangement cures — the intakes are simply where the heat cannot use them — and those cases should be retired to the light duties they were born for, with thanks. The test decides; sentiment merely attends.
The Room’s Contribution, Priced Honestly
Every case in this guide’s case studies improved more from its room than from at least one of its hardware changes, and the pattern deserves to be stated as a ranking. Moving a case out of an enclosed desk bay into open air is worth more than most fan purchases. Giving a bottom-intake case a stand — lifting it off carpet into breathable space — is worth more than a fan curve’s evening. Turning a case so its exhaust leaves the room’s occupied corner, instead of pooling where its intake can recover it, is worth a measurable margin at the cost of rotating a box. And the room’s temperature itself outranks everything: a build’s components live at the room’s temperature plus their rises, and the cheapest degrees in the entire subject are the ones a window, a door left open, or a relocated desk provides.
This is not an argument against the case work — it is an argument for doing the free, large things before the priced, small ones, which is the same order this guide applies inside the case. Audit the room with the same tissue-and-thermometer honesty as the case: where does the exhaust go, where does the intake drink, what does the sun do to the corner at four in the afternoon? The machine’s environment is part of the machine, and the improver who treats it that way routinely finds degrees their neighbours are trying to buy.
A Fourth Case Study: The Small Case That Cooked Its Card
A compact build arrived with a familiar complaint: a mid-range graphics card running hot and loud in a small case whose processor stayed cool, in a room that was not warm. The panel-off test gave the first clue — the card improved dramatically, the processor barely — which is the signature of a local starvation rather than a system failure: the card, mounted low in the compact layout, was drinking from a pocket beneath itself that the case’s single front intake never reached, its own exhaust recirculating in the space between the card and the power supply’s shroud.
The fixes were arrangement, not artillery. The case’s one optional fan position — a bottom mount its owner had never populated — received a slim fan as intake, aimed into the card’s pocket. The front intake’s curve was tied to the graphics card’s temperature rather than the processor’s, so the supply now answered the component that needed it. A nest of spare cables stored, in the universal habit, in exactly that under-card space was relocated to the case’s rear. The card’s temperature at the standard load fell by a margin that changed its fan speed, its noise, and its owner’s opinion of the case — and the total spend was one slim fan, because the diagnosis had been precise about which cubic ten centimetres of the machine were actually broken.
Set this study beside the three earlier in this guide and the pattern completes itself: a dusty path, a backwards fan, a starved card, a pocket of recirculation — four different diseases wearing one symptom. The improver’s craft is not the fixes, which are mostly simple. It is the refusal to prescribe before diagnosing, which is the whole of this guide in one sentence.
Fan Curves as an Airflow Tool, Not Just a Noise Tool
Curves appear in the fan-noise guide as acoustic instruments, but they are airflow instruments first, and an improver who ignores them leaves the cheapest capacity in the system unclaimed. A curve decides when the case’s full delivery arrives: a lazy curve that reaches useful intake speed only at high temperatures lets the graphics card spend the first minutes of every session drinking its own warming exhaust, while a curve tied to the card’s temperature — with the intakes answering the component they feed — establishes the path before the heat does. The improvement is measurable in the log as a lower stabilised temperature at the same maximum fan speed, which is to say it is cooling bought with timing rather than with air.
The exhaust side has its own timing fault: an exhaust curve that lags the intakes lets the case pressurise with warm air at load changes, pooling heat around the card before the rear of the case begins its work. Synchronise the system’s response — intakes and exhausts rising together, on the signal of the component that matters — and the path exists at every moment of the load rather than assembling itself after the fact. This costs nothing, appears in no product’s feature list, and is worth more than several of the purchases this guide defers to its final fix.
Radiators as Airflow Citizens: When the Loop Blocks the River
A radiator is a wall that air must be pushed through, and its placement rewrites the case’s map more than any fan. A front radiator taxes the intakes twice — once through its fins, once by delivering its warmed air to everything behind it — which is why the front-radiator build’s processor stays cool while its graphics card, drinking radiator-warmed air, files the complaint that brings the owner to this guide. The improvements are placement and honesty: the radiator at the top, exhausting, where its heat leaves immediately and the front intakes run free; or the front position kept, with the card’s supply reinforced from the bottom and the expectation set that the card will live a few degrees warmer by design.
Thickness and fan stack belong in the same audit. A thick radiator with one bank of fans can deliver less air than a slim one with two, and the push-pull question from the setup guide is settled by the log, not by loyalty. What the improver should not do is blame the loop’s existence: a well-placed radiator is a fine exhaust citizen, moving its heat out of the case in an organised stream. The sin is never the radiator. It is the radiator placed where the river used to be, with nobody redrawing the map.
The Maintenance Treadmill: Keeping the Improvement You Bought
Every improvement in this guide decays, and the decay has a schedule the improver should know in advance. Filters reload with dust at the room’s rate, silently taxing the intakes a little more each month until the machine is, in effect, running last season’s worse configuration. Fan bearings age into friction and noise. Cables migrate as components are swapped, and the corridor so carefully cleared re-fills one upgrade at a time. The improvement project is therefore not finished at verification; it is converted into a maintenance rhythm — the filter check monthly in a dusty home, the direction and corridor audit at every component change, the baseline test each season — whose whole cost is minutes and whose benefit is that the machine never again needs rescuing.
Keep the log at the centre of the rhythm, because decay is invisible without a baseline. The owner who can say ‘the card is six degrees above its spring figure, and the filters are due’ owns a machine that will be diagnosed in minutes for the rest of its life. That, more than any single fix, is the improved state this guide’s title promises: not a case that was once optimised, but a system whose airflow is known, measured, and kept.
Teaching the Next Build: Notes Your Future Self Will Thank You For
An improved case is a store of knowledge about your components, your room, and your habits, and most of it evaporates unless it is written where the next build will find it. Record the three lessons that cost you the most to learn: which position in this case is worth the most to your graphics card, which restriction the panel-off test priced highest, and which fix turned out to be theatre. When the next case is chosen — with the criteria in our case-choosing guide — those three lines will steer the shortlist better than a dozen reviews, because they describe the machine and the room the new case must actually serve.
This is also the moment to note the system’s honest ceiling: the stabilised temperatures, the noise at the plateau, the configuration that achieved them. A future upgrade — a hotter card, a warmer room, a new desk — will be judged against that record in an afternoon instead of a month. The improver’s final product was never the cooler machine. It is the documented one, whose owner can prove what its airflow is and reproduce it on demand.
Gear for This Guide
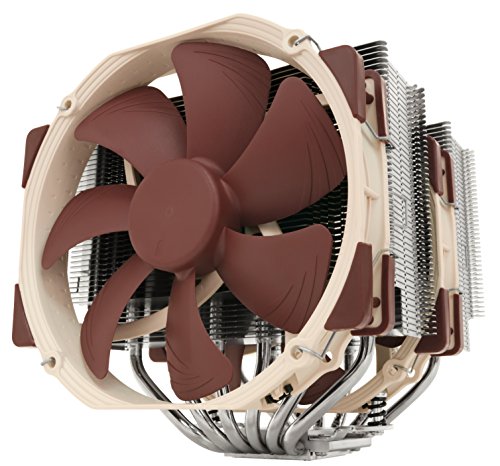
Two verified coolers for the one hardware conclusion this guide sometimes reaches — that the component cooler, not the case, was the limit the panel test identified.
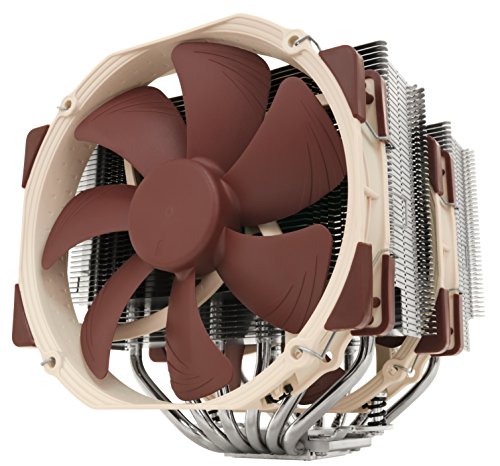
Noctua NH-D15 CPU Cooler
A dual-tower cooler that removes CPU cooling from the list of suspects in all but the hottest builds — the upgrade to make when the panel test acquits the case. Noctua NH-D15 CPU Cooler — Check on Amazon

Cooler Master Hyper 212 Black II CPU Air Cooler
A single-tower staple that has cooled generations of mid-range processors; a sensible step up when a stock cooler is the diagnosed bottleneck. Cooler Master Hyper 212 Black II CPU Air Cooler — Check on Amazon
Frequently Asked Questions
How much can airflow fixes actually improve temperatures?
It depends on how restricted the starting point was — which is what the side-panel test measures. A neglected, clogged, or mis-fanned case can improve dramatically; a case that was already breathing well has little to gain, and the panel test will have told you so before you spent anything.
Will adding more fans always help?
No. Beyond a complete path — intakes feeding components, exhausts removing warmed air — additional fans add noise faster than cooling, and a badly placed one can actively hurt by ejecting fresh air or creating turbulence. Add fans to fill a diagnosed gap in the path, never as a general tonic.
My graphics card is hot but my CPU is fine. What is the likely cause?
The card’s own air supply: a blocked corridor from the front intakes, a shroud or surface tight beneath its fans, or its exhaust recirculating into its intake. Clear the corridor, consider a bottom intake if the case offers one, and make sure the rear exhaust is pulling the card’s heat out of the case.
Does removing slot covers or panels help cooling?
Removing the side panel helps diagnostically, not as a lifestyle: it destroys the designed path, invites dust onto everything, and removes the case’s electrical shielding. Slot covers below the graphics card should generally stay fitted to preserve the pressure path. Fix the path; do not amputate it.
When is the case itself the problem?
When the panel test shows a large gap, you have cleaned, corrected, and rebalanced everything, and the remaining restriction is the case’s design — a sealed front with token vents feeding hot hardware is the classic case. At that point a mesh-front replacement is a rational purchase rather than another fan.
Do vented slot covers help or hurt?
They make the case’s pressure balance leak at the rear, which helps a build that needs another exhaust path and hurts one whose carefully kept positive pressure is its dust defence. In a typical build the effect either way is small, and the honest answer is that slot covers are a fine-tuning instrument, not a strategy: test them in your log if your rear zone runs hot, and otherwise leave the covers the case shipped with, because the maker arranged the leaks they intended and your pressure plan was built on them.
Is removing the intake filters a legitimate airflow improvement?
It is a legitimate experiment and a poor permanent arrangement. As an experiment, it prices the filters’ restriction exactly, and the figure belongs in your log. As an arrangement, it converts a washable filter’s tax into an unwashable heatsink tax, collected slowly and repaid at the cleaning bench with interest. The exceptions are machines in genuinely clean rooms — filtered air, hard floors, no pets — where the filters guard against a dust that barely exists. Know your room’s dust honestly; the filters’ fate follows from it, as our airflow setup guide sets out.
Can undervolting count as an airflow fix?
It counts as a heat fix, which is better: it reduces the load the airflow must carry rather than improving the carrying. A graphics card undervolted with care commonly sheds a meaningful share of its heat at indistinguishable performance, and every degree it does not make is a degree the case does not have to move. Purists may note it is not airflow; the thermometer does not care, and neither should the improver whose goal is a cooler, quieter machine rather than a doctrinally pure one.
How much improvement should I expect before I conclude the case itself is the limit?
Work the sequence and watch the log. Cleaning, direction, balance, and the corridor typically recover most of what a neglected setup was losing; the hardware steps add their margins; and what remains after all of them — measured by the panel-off test, which prices the case’s total restriction — is the case’s honest limit. If the panel-off prize is still large after every fix, the case is the limit and a transplant is the remaining move. If the prize has shrunk to a couple of degrees, you have arrived: the machine is as cool as this case, these components, and this room intend it to be, and further effort belongs to other hobbies.
My case has fan mounts I cannot use because of my radiator. Did I choose wrong?
Not necessarily — you chose a trade, and most radiator installations are exactly that: fan positions exchanged for radiator area, in a bargain that usually favours the liquid. The question is whether the remaining path still feeds the graphics card and clears the case, which the standard test answers. If it does, the unused mounts are not a mistake but a receipt. If it does not, the radiator’s position — top rather than front is the usual negotiation — is the variable to revisit before the case is blamed.
How often should I re-run the panel test?
Whenever the system changes in a way that could redraw its heat map: a new graphics card or cooler, a moved case, a new room or desk, or the arrival of a summer noticeably hotter than the one the curves were tuned in. It takes twenty minutes and a workload you already own, and it is the cheapest insurance in this guide — the test that tells you whether the machine you have is still the machine your settings believe it is. Owners who re-run it on those occasions rarely meet a temperature surprise unprepared.
Should I improve airflow before or after upgrading a component?
Before, whenever the case is staying. An improved path benefits the old build immediately and the new component from its first minute, and it removes airflow from the list of suspects if the upgrade runs hotter than expected. Diagnose the house before furnishing it.
Is a hotter room an excuse for a hotter PC?
It is an explanation, not an excuse: your components will sit at the room’s temperature plus their rises, so judge them by the rise. If the rise has grown, the case has work to do; if only the room has changed, the case is innocent and the summer curve is the honest response.
The Bottom Line
Diagnose with the panel test, then spend effort before money: clean the path, audit fan directions, rebalance pressure by delivered air, clear the graphics card’s corridor, and let hardware purchases follow the diagnosis. Airflow problems are usually arrangement problems wearing a shopping list as a disguise.
Related Guides
Finish the job with fan-noise fixes and, if the case itself is the ceiling, cooling-first replacements: